background image

3

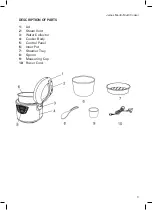
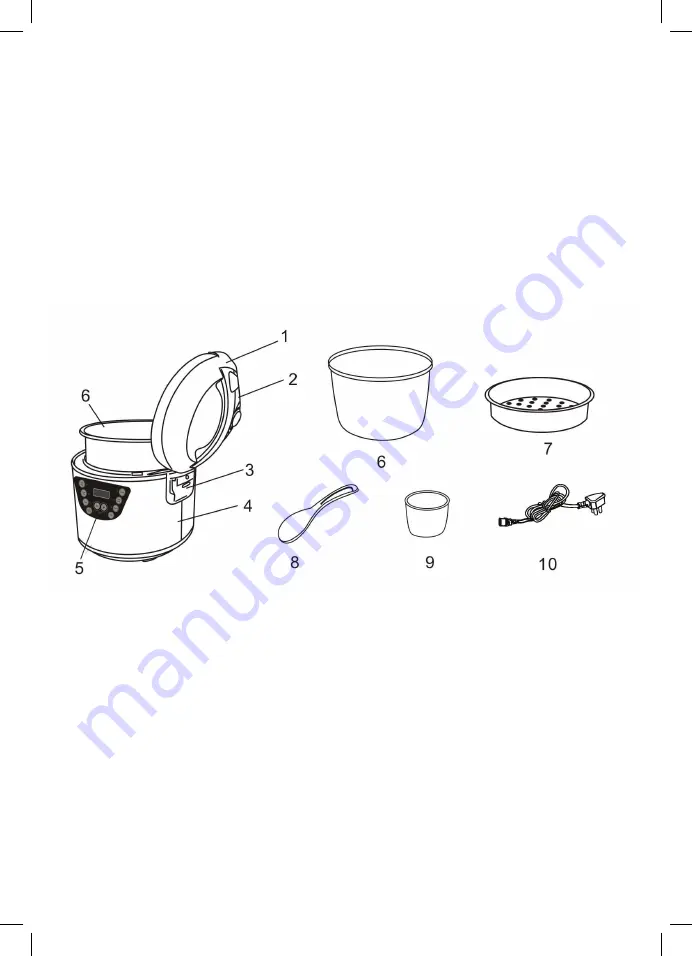
James Martin Multi Cooker

1

: Lid

2

:  Steam Vent

3

:  Water Collector

4

:  Cooker Body

5

:  Control Panel

6: 

Inner Pot

7

:  Steamer Tray

8

: Spoon

9

:  Measuring Cup

10

:  Power Cord

DESCRIPTION OF PARTS

Summary of Contents for James Martin ZX916

Page 1: ...1 James Martin Multi Cooker Multi Cooker ZX916 Safety first During use parts of this appliance will become hot please take care Read all instructions before using for the first time ...

Page 2: ... E customer services wahl co uk CONTENTS DESCRIPTION OF PARTS Page 3 IMPORTANT SAFEGUARDS Page 4 USING YOUR APPLIANCE Page 6 HOW TO USE THE RICE FUNCTION Page 6 HOW TO USE THE SAUTÉ FUNCTION Page 8 HOW TO USE THE DESSERT FUNCTION Page 9 HOW TO USE THE STEW FUNCTION Page 10 HOW TO USE THE STEAM FUNCTION Page 12 STEAMING FOOD AND COOKING RICE Page 14 HOW TO USE THE DELAY FUNCTION Page 15 CLEANING AN...

Page 3: ...3 James Martin Multi Cooker 1 Lid 2 Steam Vent 3 Water Collector 4 Cooker Body 5 Control Panel 6 Inner Pot 7 Steamer Tray 8 Spoon 9 Measuring Cup 10 Power Cord DESCRIPTION OF PARTS ...

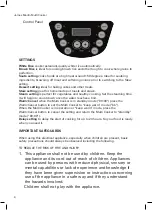
Page 4: ...ooker to keep warm mode bb When the Multi Cooker is in operation or keep warm mode press the Warm Cancel button to cancel the setting and return the Multi Cooker to standby mode 00 00 Delay setting to delay the start of cooking for up to 24 hours So your food is ready when you need it IMPORTANT SAFEGUARDS When using this electrical appliance especially when children are present basic safety precau...

Page 5: ... against risk of electrical shock never immerse the unit or let it come into contact with water or any other liquids Do not use the unit with wet hands If the appliance should become wet damp or fall in water remove plug from mains socket immediately Do not put your hands in the water 10 Never carry the unit by its power cord 11 Use this appliance only for its intended purpose as misuse could resu...

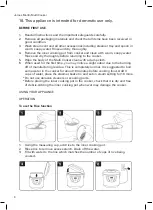
Page 6: ...th 6 When used for the first time you may notice a slight odour due to the burning off of manufacturing residue This is completely normal It is suggested to boil some water in the cooker for about 10 minutes before cooking food Add 3 cups of water place the steamer basket in and set on steam setting for 10 mins Do not use abrasive cleaners or scouring pads Before placing the inner cooking pot in t...

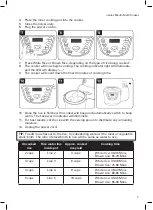
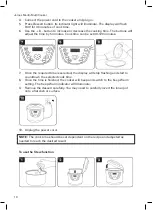
Page 7: ...rm indicator will illuminate 11 For best results stir the rice with the serving spoon to distribute any remaining moisture 12 Unplug the power cord TIP To add more flavour to the rice try substituting water with a meat or vegetable stock broth The ratio of stock broth to rice will be same as water to rice Uncooked rice Rice water line inside pot Approx cooked rice yield Cooking time 2 cups Line 2 ...

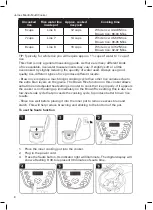
Page 8: ...e produce different results Brown rice requires a much longer cooking cycle than other rice varieties due to the extra bran layers on the grains The Brown Rice function on this cooker allows extra time and adjusted heat settings in order to cook the rice properly If it appears the cooker is not heating up immediately on the Brown Rice setting this is due to a low heat soak cycle that proceeds the ...

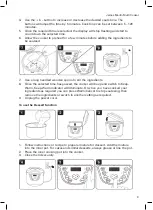
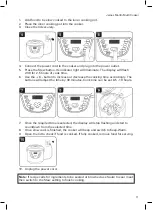
Page 9: ...den spoon to stir the ingredients 8 Once the selected time has passed the cooker will beep and switch to Keep Warm Keep Warm indicator will illuminate Or when you have cooked your ingredients as required you can press Warm Cancel to stop sautéeing then remove the ingredients or switch to another setting as required 9 Unplug the power cord To use the Dessert function 1 Follow instructions or recipe...

Page 10: ...120 minutes 7 Once the required time is selected the display will stop flashing and start to countdown the selected cook time 8 Once the time is finished the cooker will beep and switch to the Keep Warm setting The Keep Warm indicator will illuminate 9 Remove the dessert carefully You may need to carefully invert the inner pot onto a flat dish or surface 10 Unplug the power cord NOTE The cook time...

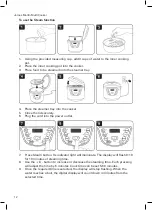
Page 11: ...or decrease the cooking time accordingly The buttons will adjust the time by 30 minutes Cook time can be set 0 5 10 hours 7 Once the required time is selected the display will stop flashing and start to countdown from the selected time 8 Once slow cook is finished the cooker will beep and switch to Keep Warm 9 Open the lid to check if food is cooked If fully cooked remove food for serving 10 Unplu...

Page 12: ... securely 6 Plug the cord into the power outlet 7 Press Steam button Its indicator light will illuminate The display will flash 0 10 for 10 minutes of steaming time 8 Use the button to increase or decrease the steaming time Each pressing will adjust the time by 5 minutes Cook time can be set 5 60 minutes 9 Once the required time is selected the display will stop flashing When the water reaches a b...

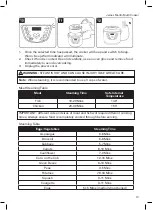
Page 13: ...to use 3 cups of water Meat Steaming Table Meat Steaming Time Safe Internal Temperature Fish 10 20 Mins 140 Chicken 20 30 Mins 165 IMPORTANT different cuts and sizes of meat and fish will require different cooking times Always ensure food is completely cooked through before serving Steaming Table Eggs Vegetables Steaming Time Asparagus 6 8 Mins Broccoli 6 8 Mins Cabbage 5 7 Mins Carrots 8 10 Mins ...

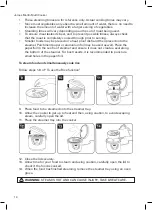
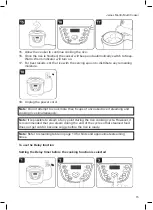
Page 14: ...be used as well Place the paper foil in the centre of steamer and ensure it does not create a seal along the bottom of the steamer For best results it is recommended to puncture small holes in the paper foil To steam food and simultaneously cook rice Follow steps 1 8 of To use the Rice function 9 Place food to be steamed onto the streamer tray 10 Allow the cooker to get up to heat and then using c...

Page 15: ...ord Note Do not attempt to cook more than 6 cups of uncooked rice if steaming and cooking rice simultaneously Note It is possible to steam at any point during the rice cooking cycle However it is recommended that you steam during the end of the cycle so that steamed food does not get cold or become soggy before the rice is ready Note Refer to steaming table on page 13 for hints and approximate ste...

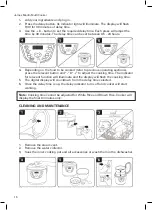
Page 16: ... press the relevant button and to adjust the cooking time The indicator for relevant function will illuminate and the display will flash the cooking time 5 The digital display will countdown from the delay time selected 6 Once the delay time is up the delay indicator turns off and cooker will start working Note Cooking time cannot be adjusted for White Rice and Brown Rice Cooker will display the f...

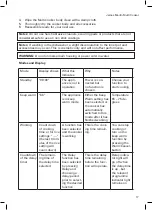
Page 17: ...o start cooking Keep warm bb The appliance is in keep warm mode Either the Keep Warm setting has been selected or the cooker has automatically switched to this mode after it has finished working Temperature 65 75 de grees Working Count down of cooking time or for rice settings the last 9 min utes of the rice setting will count down A function has been selected and the cooker is working This is the...

Page 18: ... excess moisture The display shows E1 E2 E3 or E4 E1 E2 E3 E4 ERROR Unplug your Multi Cooker and allow it to cool for 20 30 minutes if the error persists return for repair Recipe ideas and suggestions Below is a small selection of recipe ideas and suggestions to get you started One of the key features of the Wahl James Martin Multi Cooker is its versatility and the vari ety of dishes you can make ...

Page 19: ...Stew and set the time for approx 3 4 hours Cook until the beef is tender Beef stew Stewing beef cut into even sized pieces approx 3 5cm cubes Onions roughly chopped Vegetables such as carrots swede peppers leeks celery mushrooms roughly chopped or sliced Chopped garlic Beef stock approx 600ml 1pt or red wine can be used if preferred Method Set the Multi Cooker to Sauté setting add a little oil and...

Page 20: ... seasoning and stock and bring to a simmer Allow to simmer until the vegetables are soft and cooked If required close the lid to allow to simmer gently Alternatively for longer cooking times switch the setting to Stew and set the time for approx 1 hour Cook until tender Serve as a chunky soup or blend all or part of the soup for a smoother finish Add cream for a richer soup Vegetable soup Onions r...

Page 21: ... 170g butter margarine 6oz 170g self raising flour 3 eggs Zest from one lemon Lemon syrup 4oz 115g sugar Juice from two lemons Icing sugar for dusting Method Cream the butter and sugar together using a hand mixer and then gradually add in the egg while still mixing Then add in the lemon zest and fold the flour into the mixture Grease the Multi Cooker pot well with butter Place the cake mixture in ...

Page 22: ...o the following code Blue Neutral N Brown Live L Green Yellow E This appliance is fitted with a 3 pin plug which has a 13 amp fuse fitted If the plug supplied is not suitable for your socket or becomes damaged it should be cut off and disposed of and a suitable plug fitted as detailed below As the colours of the wires in the mains lead of this Multi Cooker may not correspond with the colour markin...

Page 23: ...of with general household waste Care should be taken to dispose of in a suitable manner in accordance with your Local Authority regulation GUARANTEE This product is guaranteed against defects in material and workmanship for a period of 2 years from the date of original purchase or receipt as a gift Should this product become defective during the guarantee period return it to the store of purchase ...

Page 24: ...24 James Martin Multi Cooker Wahl UK Ltd Herne Bay Trade Park Herne Bay Kent CT6 8JZ www wahl co uk Customer Service T 01227 740066 Form No ZB599 Rev1 11 17 ...

Reviews: