HC 35 E • HC 45 E • HC 55 E
45
g
Cleaning the unit (shutting down)
8.2
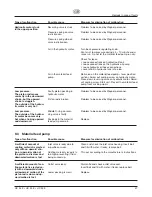
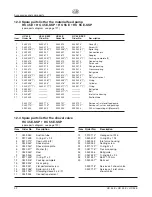
Suction filter with HC 35 E
–
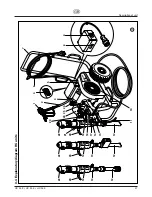
Screw off the filter (fig. 14) from suction pipe.
–
Clean or replace the filter.
Carry out cleaning with a hard brush and an appro-
priate cleaning agent.
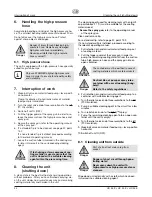
2. Insert O-ring (6) into the housing (8).
3. Insert filter cartridge (3).
4. Place thin seal (5) on threaded section of housing (8).
5. Place thick seal (4) on top of thin seal (5).
6. Slide pressure spring (2) onto housing cover pin (2).
7. Screw on housing cover (1) and tighten by hand.
1
2
3
4
5
6
7
8
8.4 Cleaning Airless spray gun
–
Rinse Airless spray gun with an appropriate clea-
ning agent.
–
Clean tip thoroughly with appropriate cleaning
agent so that no coating material residue remains.
–
Thoroughly clean the outside of the Airless spray
gun.
A clean suction filter always guarantees
maximum feed quantity, constant spraying
pressure and problem-free functioning
of the unit.
i
8.3
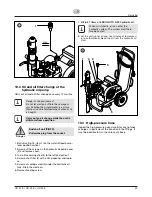
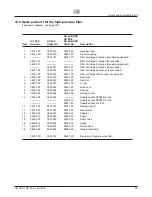
Cleaning the high-pressure filter
Clean the filter cartridge regularly.
A soiled or clogged high-pressure filter can cause a poor
spray pattern or a clogged tip.
Dismounting
1. Close ball valve on material feed pump – lever
position horizontal.
Flow of hydraulic oil to hydraulic motor of material
feed pump is interrupted.
2. Turn the relief valve knob three revolutions to the left
(
k
Circulation).
3. Switch off unit O (OFF).
4. Unscrew the housing cover (fig. 15, item 1).
5. Pull filter cartridge (3) out of housing (8).
6. Clean the pressure spring (2) and filter cartridge (3)
with an appropriate cleaning agent, clean the inside
of the housing (8) and housing cover (1).
7. Check ball in the filter cartridge (3) for wear and
replace filter cartridge, if necessary.
8. If ball in filter cartridge (3) is thoroughly worn, dismo-
unt O-ring (6) and valve seat (7). Replace worn valve
seat, if necessary.
9.
Always replace O-ring (6) after replacement.
10. Pull off pressure spring (2) from housing cover (1).
Measure length of pressure spring, and replace if
shorter than 19 mm.
Mounting
1. Insert valve seat (7) with the ball seat surface facing
up into the housing (8).

