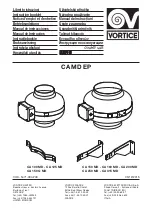
Description and operation
The appliance you have purchased is a metal
construction, centrifugal in-line extractor fan,
designed to expel air through a ventilation duct.
Safety
• Do not use this appliance for functions other than
those described in this booklet
• After removing the appliance from its packaging,
ensure that it is complete and undamaged. If in
doubt contact a professionally qualified electrician
or Vortice. Do not leave packaging within the reach
of children or infirm persons
• Certain fundamental rules must be observed when
using any electrical appliance, including:
- never touch electrical appliances with wet or
damp hands;
- never touch appliances while barefoot;
- never allow children or infirm persons to operate
appliances unattended.
• This appliance is not suitable for use by children or
by individuals with reduced physical, sensorial or
mental capacities, or by inexperienced or untrained
individuals, unless they are supervised or instructed
in its use by a person responsible for their safety
Children must always be supervised to ensure that
they do not play with the appliance.
• Store the appliance out of the reach of children and
differently able persons after deciding to disconnect
it from the power supply and use it no more.
• Do not us the appliance where flammable vapours
are present (spirit, insecticides, petrol, etc.).
• Do not make modifications of any kind to this
appliance.
• Do not expose this appliance to the weather (rain,
sun, etc.).
• Do not place objects on top of the appliance.
• Regularly inspect the appliance for visible defects. If
the appliance does not function correctly, do not
use it and contact Vortice immediately.
• If the appliance does not function correctly or
develops a fault, contact Vortice immediately and
ensure that only genuine original Vortice spares are
used for any repairs.
• Should the appliance be dropped or suffer a heavy
blow, have it checked immediately by Vortice
• The appliance must be installed by a professionally
qualified electrician
• The mains power supply to which the units are
connected must comply with current laws.
• The electrical power supply/socket to which the
appliance is to be connected must be able to
provide the maximum electrical power required by
the appliance
• Use a suitably sized multi-polar switch with
minimum contact gaps of 3 mm to install the
appliance.
• Switch off the appliance at the installation's main
switch: a) if the appliance does not function
correctly; b) before cleaning the outside of the
appliance, c) if the appliance is not to be used for
any length of time.
• Ensure that the room has an adequate source of
fresh air to ensure correct appliance operation. In
the event that other non-sealed combustion-based
appliances (such as water heater or gas stove) are
installed in the same room, check that air
replacement is sufficient for all appliances to work
effectively together.
• The appliance cannot be used to control activation
of water heaters, room heaters, etc. and it must not
exhaust into the hot air flues.
• Ensure that the appliance discharges into a single
duct (dedicated to this product) or directly to the
outside.
• Do not cover or block appliance intake or outlet
vents grilles as this may prevent optimum air flow.
• The appliance’s outlet port must always be
connected to a suitable duct.
• Models 100, 125, 150, 150 Q, 160 and 200 are fitted
with thermal fuses. Models 250 and 315 have
thermal protection and manual reset
.
If the thermal
cut-out trips, disconnect the appliance from the
mains supply for a few minutes and reconnect it
only after identifying and correcting the problem.
• The maximum ambient temperature for the proper
functioning of the appliance is 50° C.
• Specifications for the power supply must
correspond to the electrical data on data plate A
(Fig.A)
8
ENGLISH
Warning:
this symbol indicates that care must
be taken to avoid injury to the user
!
Caution:
this symbol indicates that care must
be taken to avoid damaging the appliance
!
Summary of Contents for A 100 MD
Page 42: ...42 ...
Page 44: ...44 17 14 15 16 18 21 注意 在安装阶段 本设备必须连接到一个随附的 负责控制设备本身的专用控制盒上 ...
Page 49: ...49 17 17 18 18 19 19 20 20 21 21 ...
Page 50: ...50 Note ...
Page 51: ...51 Note ...


