


Cooling System
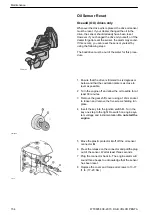
Impeller: Checking & Replacing
1 Loosen the four screws
A
and remove screws and
washers
B
. Save for later use.
2 Remove the cover plate
C
from the housing
G
.
3 Remove and inspect the impeller
D
. If there are
cracks, signs of burning or melting on the edges, or
any other visible defects, the impeller must be
replaced. Inspect the O-ring
E
for nicks, cuts, and
wear. Replace as necessary. O-rings
F
are for
retaining screws in the cover and are not critical.
4 Lubricate the pump housing with a light grease.
5 Install the impeller and O-ring. Reinstall the housing
cover plate. Reinstall the washers and screws.
Tighten screws to 19–24 in. lb. (2.2–2.8 Nm).
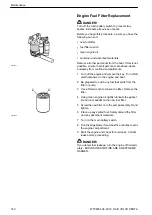
Freshwater Cooling System
Check the coolant level before each trip. If coolant is
low, add by removing the coolant filler cap
B
and add-
ing coolant via the fill spout. Do not fill above the max-
imum fill line
A
.
WARNING!
Do not open the coolant filler cap when the engine is
hot. Steam or hot fluid could spray out, causing severe
burns.
NOTICE!
The filler cap at C is for power steering fluid.
Do not add coolant to this section of the reservoir.
Engines covered by this manual are filled at our factory
with the new, more advanced “VCS” yellow coolant. If
coolant needs to be added or replaced, use the same
coolant type that came in the engine.
DO NOT
mix
coolant types.
Do not use other coolant types
such as traditional
green ethylene glycol, propylene glycol (pink), OAT, or
HOAT coolants.
Volvo Penta offers pre-mix, ready-to-use containers of
the yellow coolant. If using full strength antifreeze, use
a 50/50 mix of antifreeze and distilled water.
See
Checking Engine Coolant for Freeze
.
P0019977
P0019983
Maintenance
47706354 08-2015 © AB VOLVO PENTA
145