RD-80e
DATA FILER
7. RECORDING SONGS
7.1 FOREWORD
As well as playing back songs in Standard MIDI File 0 and 1 format (see point 2.2), the
RD-80e is also able to record the MIDI events received on the MIDI IN port, made available
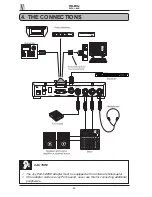
with the aid of an optional Joy-to-MIDI adapter (see section 4 for the connections).
Once recorded, these data can be saved in the form of 0 format Standard MIDI Files
(extension .MID) on the floppy disk.
Bear in mind that:
•
The instrument does not allow any overrecording (total or partial), so if you wish to
replace a recorded song, you will have to delete the song concerned and record another;
•
Recording is always with time signature 4/4;
•
The instrument records with a resolution of 192 t.p.q.n.;
•
The recording always starts at instant 1.1 and no Punch In or Punch Out operations
are possible.
7.2 RECORDING PROCEDURE
After making all the connections correctly, follow the recording procedure below:
•
Insert a disk in the floppy drive: it must be formatted and unprotected (tab closed) and
must have enough space to take the recording data.
•
Press the [REC] key and, keeping it pressed, the [PLAY] key. The LED in the [REC]
key will come on constantly, while the [PLAY] key LED will flash, indicating that the
instrument is ready to record.
The number of the song being recorded will appear on the display; this is the number
of the last file on the disk + 1.
•
Set the metronome tempo with which the recording will be made (this value will remain
constant throughout the recording). The default value is 120, but it can be changed by
pressing the [TEMPO] button and using the [INC] and [DEC] keys to set the new value.
Press [ENTER] to confirm the value and return to display of the Main Page, or [ESC] to
abort the changes.
N.B.: at each new recording the tempo value will always be set at 120, regardless of
the previous settings.
•
Press [PLAY] to start recording: the [PLAY] LED will come constantly on and the RD-
80e will start to record all the MIDI data received by the MIDI In port.
During this phase, the [PAUSE] key can be used to interrupt the recording temporarily;
press [PAUSE] or [PLAY] again to restart the acquisition of the data.
•
Press the [STOP] key to end the recording.
71

