background image

Installation Guide

Installationsanleitung, Guía de Instalacíon, Guida de Installazione, Guide d’Installation, Installatie gids
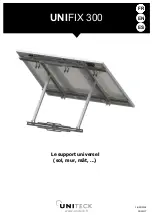
PFW 6851

www.vogels.com


Two people are recommended for this step: one person to 

level the mount and another person to mark the mounting 
locations.

Concrete Installation

5/16" Flat Washer

5/16" x 3" Lag Bolt

x4 

x4 

Insert the lag bolts and washers into the Finned anchors.Tighten all lag 

bolts using a socket wrench and 1/2″ socket.


Do not over tighten the lag bolts.

8

9

10

11

Drill four (4) pilot holes of each mark using a drill and 3/8” masonary drill 

bit. Drill 3 inches deep. 

 Only use a 3/8" masonary drill bit when drilling pilot holes.

Insert a Finned Anchor into each hole. Lightly tap each Finned Anchors 
into place with a hammer. 

Finned Anchor


x4

Page 5

Summary of Contents for PFW 6851

Page 1: ...Installation Guide Installationsanleitung Guía de Instalacíon Guida de Installazione Guide d Installation Installatie gids PFW 6851 www vogels com ...

Page 2: ... M4 x 16mm M4 x 25mm M4 x 30mm M6 x 16mm M8x 16mm M8 x 25mm M8 x 30mm M6 x 25mm M6 x 30mm x1 x1 Pair x8 x4 x4 x4 x4 x4 x8 x4 x4 x4 x6 x4 x4 x4 x4 x1 x4 x4 M6 or 1 4 Wood Drill bit 3 8 Masonry Drill bit 13mm or 1 2 Socket Finned Anchor Level You must secure the mount to two 2 wall studs with a minimum of four 4 lag bolts 2 lag bolts for each stud found X X Minimum of 2 x 4 wood stud to be used Wood...

Page 3: ...ts in the wall plate with the center of the wall studs 3 Level the mount 4 Use a pencil to mark the upper right mounting location along the center of the wall stud 2 3 4 Drill a pilot hole in the center of the upper right mark using a 1 4 drill bit and power drill Only use a 1 4 drill bit when drilling pilot holes X X 1 Place the Mount against the wall and align it with the pilot hole 2 Insert one...

Page 4: ...ep one person to level the Mount and another person to drill the pilot holes Drill a pilot hole in the center of each of the marks with a power drill and a 1 4 drill bit Only use 1 4 drill bit when drilling the pilot holes 1 Insert one 1 5 16 x 3 lag bolt and one 1 5 16 washer into each pilot holes 2 Tighten all lag bolts using a socket wrench and 1 2 socket Do not over tighten the lag bolts when ...

Page 5: ...lation 5 16 Flat Washer 5 16 x 3 Lag Bolt x4 x4 Insert the lag bolts and washers into the Finned anchors Tighten all lag bolts using a socket wrench and 1 2 socket Do not over tighten the lag bolts 8 9 10 11 Drill four 4 pilot holes of each mark using a drill and 3 8 masonary drill bit Drill 3 inches deep Only use a 3 8 masonary drill bit when drilling pilot holes Insert a Finned Anchor into each ...

Page 6: ...han the 1 8 allowance mark on the small straw or toothpick as shown in Figure 2 and Figure 3 do not use this screw The screw length must not bypass the mark 6 Test each size of the screws provided The correct screws should thread easily into the mounting point and not pull out when tension is applied 1 Flat Panel Universal Washer Universal Spacer Mounting Bracket Mount Point Mounting Screw Univers...

Page 7: ... of the mounting screw and the mounting bracket as shown 1 Place your flat panel screen side down on a soft flat surface 2 Identify the number and location of the thread inserts on the back of your flat panel 3 Aligning the holes on each mounting bracket with the thread inserts on the back of your flat panel 4 Secure each mounting bracket to your flat panel by inserting a minimum of two 2 screws p...

Page 8: ...lat panel Step 3 Using a screwdriver insert and tighten the mounting hardware and adapter plates to the back of the flat panel Do not over tighten the screws Step 4 Place the universal mounting brackets over the threaded mounting studs that are on the adapter plate Step 5 Place one 1 5 16 flat washer onto each threaded mounting stud Step 6 Thread one 1 M8 Nylon nut onto each threaded mounting stud...

Page 9: ...ed Step 1 Use a screwdriver to adjust the two 2 M6 x 30 leveling screws located on the top of the mounting brackets Step 2 Once the flat panel panel is level ues a screwdriver to tighten the two 2 M6 x 30 locking screws located on the bottom of the mounting brackets Do not over tighten these screws 17 18 Attaching the Flat Panel to the Wall Plate Securing the Leveling the Flat Panel Do not release...

Page 10: ...at panel Step 3 Using the upper hand gently pull the top of the flat panel away from the wall while the lower hand gently pushes the bottom of the flat panel towards the wall Step 1 Place one hand at the center top edge of the flat panel Step 2 Place the other hand on the center bottom edge of the flat panel Step 3 Using the upper hand gently push the top of the flat panel towards the wall while t...

Reviews: