


20
Connect to PC
The Connect to PC function allows a connected PC to function as an external storage
device. Once connected, the Qumi can function as an external storage device, which
allows you to transfer media files directly to Qumi’s internal memory, and provide you with
direct access to the projector function of the Qumi.
To use the Qumi projection function through the Connect to PC function, you will need to
install the included software package, see the following information.
1.
Power on your PC before starting the process.
2.
Unpack the Qumi and set it on your desired location.
3.
Connect one end of the power cord to the Qumi’s power socket and the other end to
a wall socket.
4.
Once both the PC and Qumi are powered on, connect one end of a type-A USB
cable to the USB socket on the PC, and the other end to the USB socket on the
Qumi.
5. Use the remote control to select
Connect to PC
and press to initiate the USB
connection to the PC.
6.
If the PC detects the Qumi, the driver is automatically installed. A prompt displays
notifying the device is ready for use.
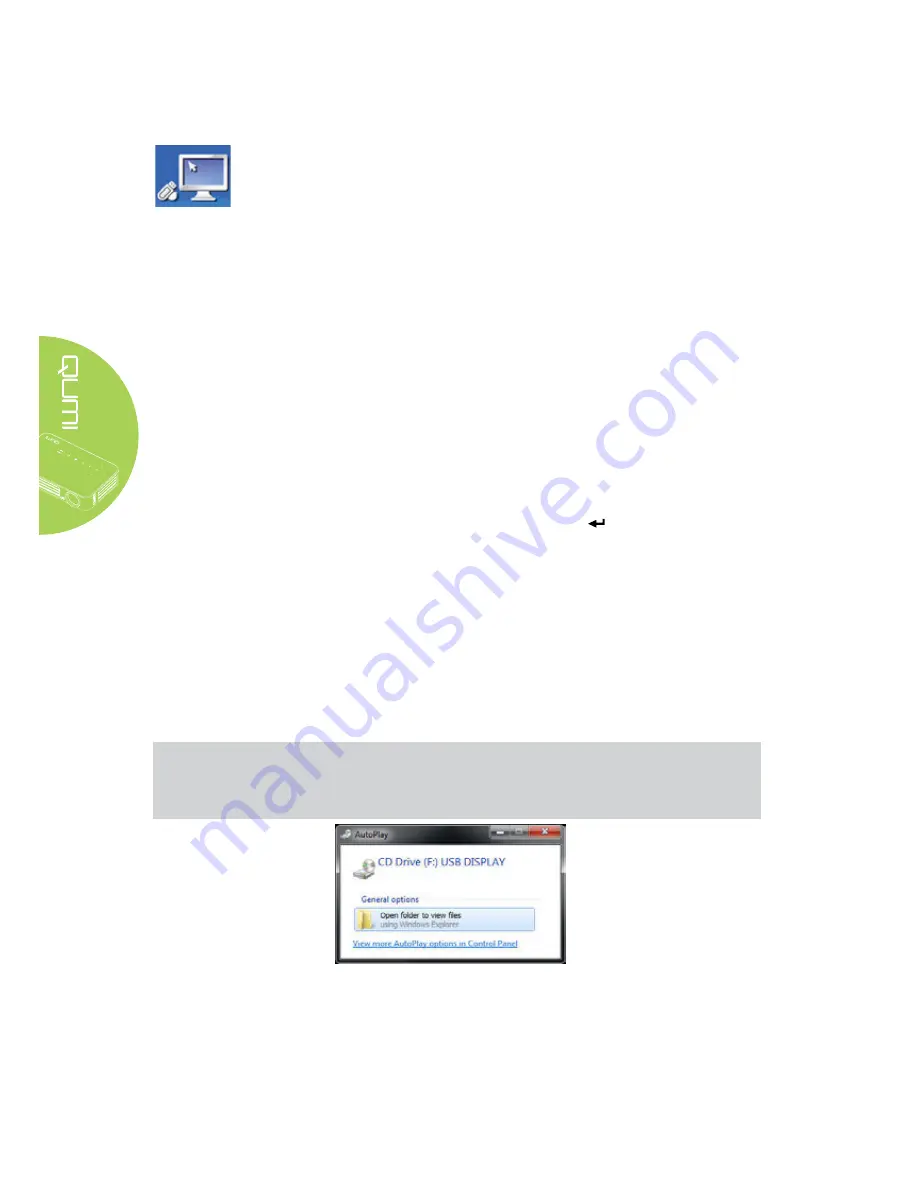
Once the Qumi drivers are installed, two Auto Play folders display. The first folder
contains the PC-based software, which provides the interface to access the Qumi
projector functions directly from your PC.
The second folder is the Qumi internal memory for use as an external drive. You can
drag and drop files into the internal memory folder as you would any other storage
drive.
Note:
1.Built-in memory for Qumi Q6 is 4GB.(User Accessible is 2GB)
2.The following screens are for reference only. The letters (F:) and (J:) are automatic
designations by the PC. The designations may differ on your PC.
Summary of Contents for QUMI Q6
Page 1: ......
Page 76: ...70 Qumi Dimensions 102mm 4 03 165mm 6 6 34mm 1 34...


