59
Connecting the Camcorder to a TV
Connect the video camcorder to the TV via the supplied cable. Power on the TV
and the video camcorder. The video camcorder
’s LCD screen turns blank, and
picture that previously appeared on the camcorder`s LCD screen now appear on
the TV screen.
1.
Connect the video camcorder to a TV via the TV-out cable (supplied). The TV
slot is situated next to the USB slot at the back of the camcorder. Lift up the
cover and insert the cable.
2.
Turn on the TV and the video camcorder, and then s
et the TV to “AV” mode.
3.
When the video camcorder is set to record, capture or playback mode, you
can preview the subjects you want to record on the TV screen.
4.
When the video camcorder is set to Playback mode, you can review all the
pictures, video and audio clips stored in the video camcorder on the TV.
Install the Vivitar Experience Image Manager Software
Warning: Do not plug your camcorder into the computer until the software
installation is complete
You must be connected to the internet to install and run the Vivitar Experience
Image Manager software.
1.
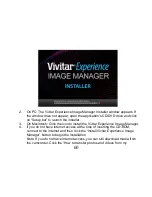
Insert the installation CD into your CD-ROM drive. The installation screen
should automatically open.


