13
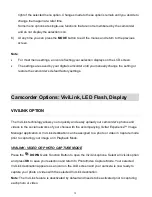
right of the selected menu option. Changes made to these options remain until you decide to
change them again at a later time.
Some menu options are single-use functions that are not remembered by the camcorder
and do not display the selection icon.
6)
At any time you can press the
MODE
button to exit the menus and return to the previous
screen.
Note
:
For most menu settings, an icon reflecting your selection displays on the LCD screen.
The settings are saved by your digital camcorder until you manually change the setting or
restore the
camcorder’s default factory settings.
Camcorder Options: ViviLink, LED Flash, Display
VIVILINK OPTION
The ViviLink technology allows you to quickly and easily upload your camcorder
’s photos and
videos to the social networks of your choice with the accompanying Vivitar Experience™ Image
Manager application. A ViviLink destination can be assigned to a photo or video in Capture mode
prior to capturing your image or in Playback Mode.
VIVILINK: VIDEO OR PHOTO CAPTURE MODE
Press the
DOWN
Quick Function Button to open the ViviLink options. Select a ViviLink option
and press
OK
to save your selection and return to Photo/Video Capture Mode. Your selected
ViviLink destination appears as an icon on the LCD screen and your camcera is now ready to
capture your photo or video with the selected ViviLink destination.
Note
: The ViviLink feature is deactivated by default and needs to be activated prior to capturing
each photo or video.


