


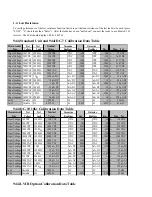


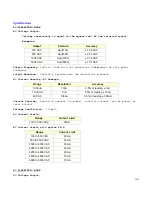


Measurement
Test
Test
Nominal
Incoming
Outgoing
Type
Voltage
Load
Values
Readings
Dev. Readings
Dev.
Max. Tol.
VIR Voltage
10 VDC 200 M
Ω
10 VDC
VDC
-10
VDC
-10 ±
3 VDC
VIR Voltage
50 VDC 200 M
Ω
50 VDC
VDC
-50
VDC
-50 ±
3 VDC
VIR Voltage
99 VDC 200 M
Ω
99 VDC
VDC
-99
VDC
-99 ±
3 VDC
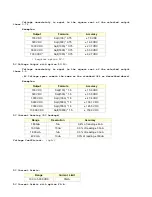
VIR Resistance
50 VDC 1 G
Ω
1 G
Ω
G
Ω
-1
G
Ω
-1 ± 100 M
Ω
VIR Resistance
50 VDC 100 M
Ω
100 M
Ω
M
L
L
L
L
L
Ω
-100
M
Ω
-100 ±
10 M
Ω
VIR Resistance
50 VDC 10 M
Ω
10 M
Ω
M
Ω
-10
M
Ω
-10 ±
1 M
Ω
VIR Resistance
50 VDC 1 M
Ω
1 M
Ω
M
L
L
Ω
-1
M
Ω
-1 ± 100 k
Ω
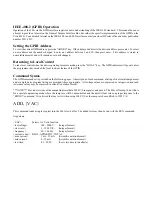
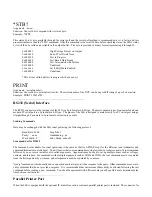
Press the calibrate-external (EXTRNL) button. The display should respond with:
PRESS CAL ENABLE
TO CONTINUE
Use a small diameter tool to press the cal button through the hole in the front panel. The display should respond with:
CALIBRATION
VOLTS CURRENT EXIT
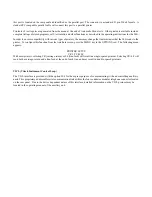
Place digital volt meter capable of reading up to 5000 volts on the output of the 944, with the common test lead going to V LO and
the voltage input going to the V HI terminal on the 944 (If you have the DC-10 option, the voltage input goes into the V HI
terminal on the DC-10, not the 944). Press enter or “1” to select the VOLTS calibration routine. The display will respond with:
HIGH VOLTAGE ENABLE
REQUIRED
Press the HV Enable push button. Three warning beeps will sound and the high voltage warning LED’s will flash. CAUTION:
after this point high voltage will be present on the output of the 944. The display will respond with:
ADJUST
500 VOLTS
After a few seconds the display will respond with a screen displaying two meters, the top one will be displaying the voltage that
the 944i is putting out.
You will notice that the 5 in the 500VDC is flashing, this shows what digit you can make your adjustment to. You can move
the flashing number to the unit column that you need to adjust using the right and left cursor keys. Using this method you can
adjust the output by ether 1, 10 or 100 volts at a time using the up and down arrows.
Adjust the voltage until the meter reads exactly 500 volts. Note: The display on the 944i will reflect the adjusted value not the
value shown on the meter.
When you are satisfied with the voltage reading on the meter press enter. The display will respond with:
ADJUST
1000 VOLTS
After a few seconds the display will respond with a screen displaying two meters, the top one will be displaying the voltage that
the 944i is putting out.
Repeat the adjustment procedure as described above, adjusting the output voltage for 1000 volts. Press enter when you are
satisfied with the meter reading. The display will respond with:


