


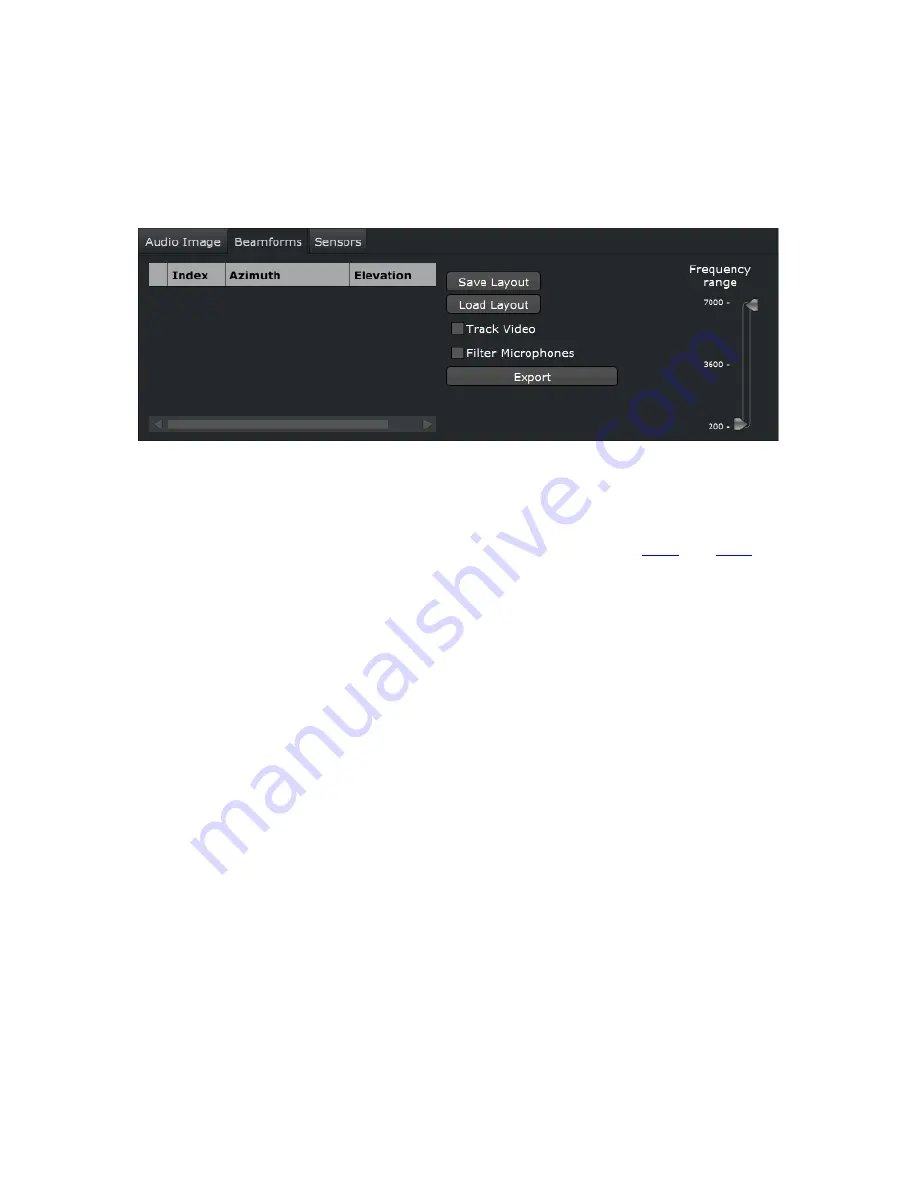
● List of current virtual microphones including position
● Controls to Save/Load the current configuration of virtual microphones
● Enable/Disable Track Video. Only usable in Realtime Mode, this feature will identify objects in the video
with virtual microphones placed on them and track those objects, moving the virtual microphones with
them.
● Export button. When a recorded session is loaded, saves a .wav file for each active virtual microphone,
containing the processed directional audio.
4.3.2.2 Adjust Image Controls
Altering the Acoustic Image controls reveals more information about the location and intensity of sound in an
environment. These controls make Realtime Mode a useful exploratory tool, and are instrumental in preparing
for a recorded session. More information on the controls can be found in section
4.3.3 Recording a Session
For detailed analysis of a sound scene, sessions can be recorded and processed according to user-defined
SPL and frequency parameters.
Preparation for Recording:
1. Select camera gain setting from drop-down menu
2. Start Audio Camera in Realtime Mode
3. Set Stitch Depth to optimal distance; this is easiest when all areas of interest are within similar
distances from the camera. Scenes with dramatic depths of field may require multiple recordings at
different stitches
4. Set maximum length of the recording; navigate in the Menu Bar to Options>Edit Record Parameters
and enter length in seconds via text box.
Recording:
1. Click on Record
2. When prompted, enter a Session Name for your recording. Notice that the prompt also contains a
calculation of remaining record-time based on the hard drive space on your destination drive
3. After giving the recording a prefix, a new session folder will be created in whatever folder is selected in
the session browser, named with the the timestamp of the recording. The prefix entered will
persist if a second recording is started, but a separate session will be created
4. After a Session Name is entered, the scene will begin to record; pressing the Stop button will cut the
session short and save what has been recorded


