© 2020 Virginia Diodes, Inc.
—All Rights Reserved
7 October 2020
The PM5B has a USB interface that can be used to control all meter functions. Be sure to review the
“ReadMe”
file contained on the flash memory drive provided by VDI with your PM5B. The Graphical User Interface (GUI) is
Windows based.
1)
The flash drive should autorun program installation;
2)
If the program does not auto-
load, run “setup.exe”;
3)
Connect the power meter to the computer to be used for all measurements and data collection using a USB (Type B)
cable at the meter and requisite connection jack for your computer;
4)
Next, turn on the power meter, so that the drivers may be automatically loaded;
5)
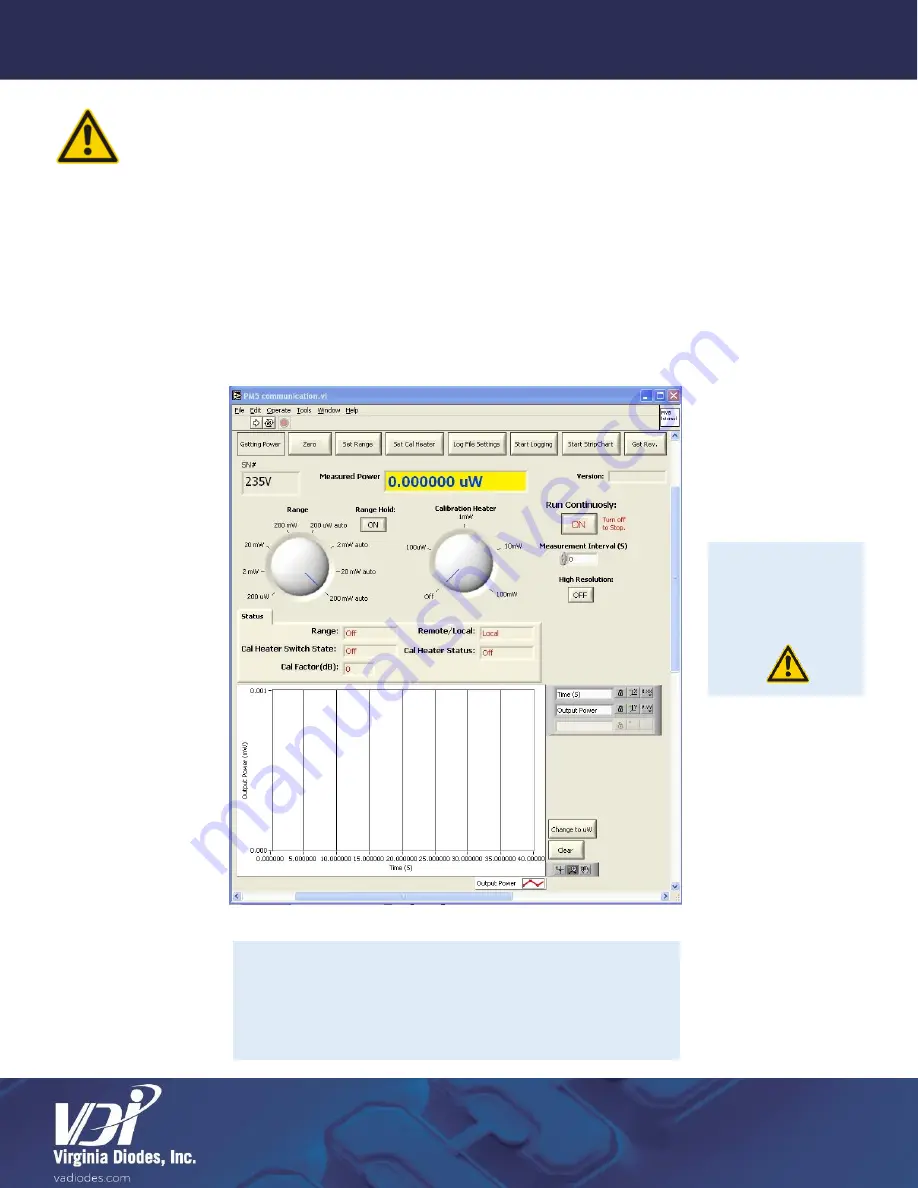
Run “PM5B.exe” installed during setup in the installation directory. Doing so will open the window shown in Figure 6;
6)
Enter the serial number found on the sensor head in the “SN#” field. Default is 235V;
7)
Run the program by clicking on the arrow in the top left corner;
8)
Clicking the Run Continuously button from
“ON” to “OFF” will stop the program.
Figure 6:
Screen shot of PM5B.exe user interface start-up screen. The graph is a generic
Labview 7 graph control with the exception of the “Clear” button, which erases
previous data points and the “Change to
µW
” button which switches the Y-axis
units between milliwatts and microwatts. The full Labview 7.0 version of this
program can be found on the flash memory drive.
Additional GUI
Control Button
Information:
Pages 12-13
Section
Seven
PM5B Software Guide, USB and GUI


