20303735
27
VWDV70 Series Gas Fireplace
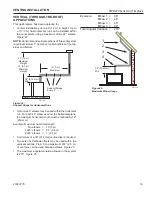
junctIon Box WIrInG
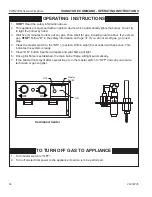
1. This should be done before framing the fireplace. Wire
the receptacle into an electrical circuit. Wire with mini-
mum 60° C wire in accordance with prevailing codes.
2. Remove the external junction box cover by removing
the screw from the side of the outside firebox wall.
Junction box was installed at the factory.
3. The junction box cover has a factory installed “romex”
style strain relief connector. After connecting the wires,
route the wire leads through this connector. Refer to
the wiring diagram in
Figure 38
.
Figure 38 -
Junction Box Wiring Diagram
FP1912
Junction box wiring
8/08
Junction Box
Factory Supplied
Not Supplied
120V AC
60Hz
eLectrIcaL InstaLLatIon
coMManD center WaLL InstaLLatIon
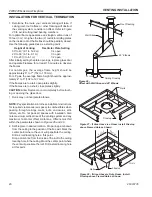
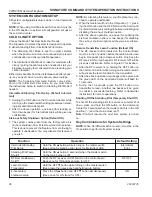
The Command Center should be mounted on the wall using
the parts supplied (15 ft. cable, junction box, wall cover).
1. Mount the junction box provided at the desired location
on the wall. Do not extend beyond the 15 ft. wire cable
provided. If a longer distance is required, the 15 ft. may
be extended to 30 ft. maximum by using two (2) cables
plugged together.
2. Attach cable to Command Center by inserting connector
into socket at rear of Command center.
3. Snap wall cover provided onto Command Center and
screw into junction box.
Figure 39
W
arn
In
G
Do not connect wall switch to 110 V
circuit.
KT555
junction box
12/08
+
-
+
-
+
-
+
-
Junction Box
Command
Center
Wall
Cover
Screws
KT555
Figure 39 -
Snap Wall Cover in Place
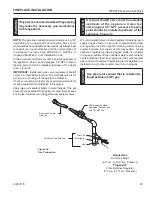
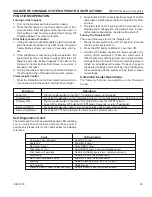
4. Route the cable end without connector into the fireplace
control housing through the plastic grommet on the rear
wall.
5. Attach the plastic connector to the 6 pins from the cable
by pushing each pin into connector. Make sure to follow
the color code on connector.
Figure 40
6. Attach connector into control board socket. Refer to
wiring schematic.
KT1293
15 ft cable plastic conn
Black
Brown
Red
Orange
Yellow
Green
15 ft. Cable
Plastic
Connector
Figure 40
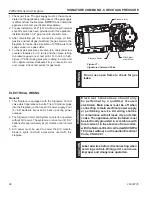
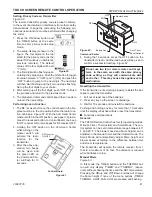
Batteries

