background image

5.0 Operations 

1210 QuickStep Programming User Manual, Ver 5.0 

 Ver-Mac - May 2011 

5 - Operations 

5.1 Accessing Main Menu 

[

 ] Enter 

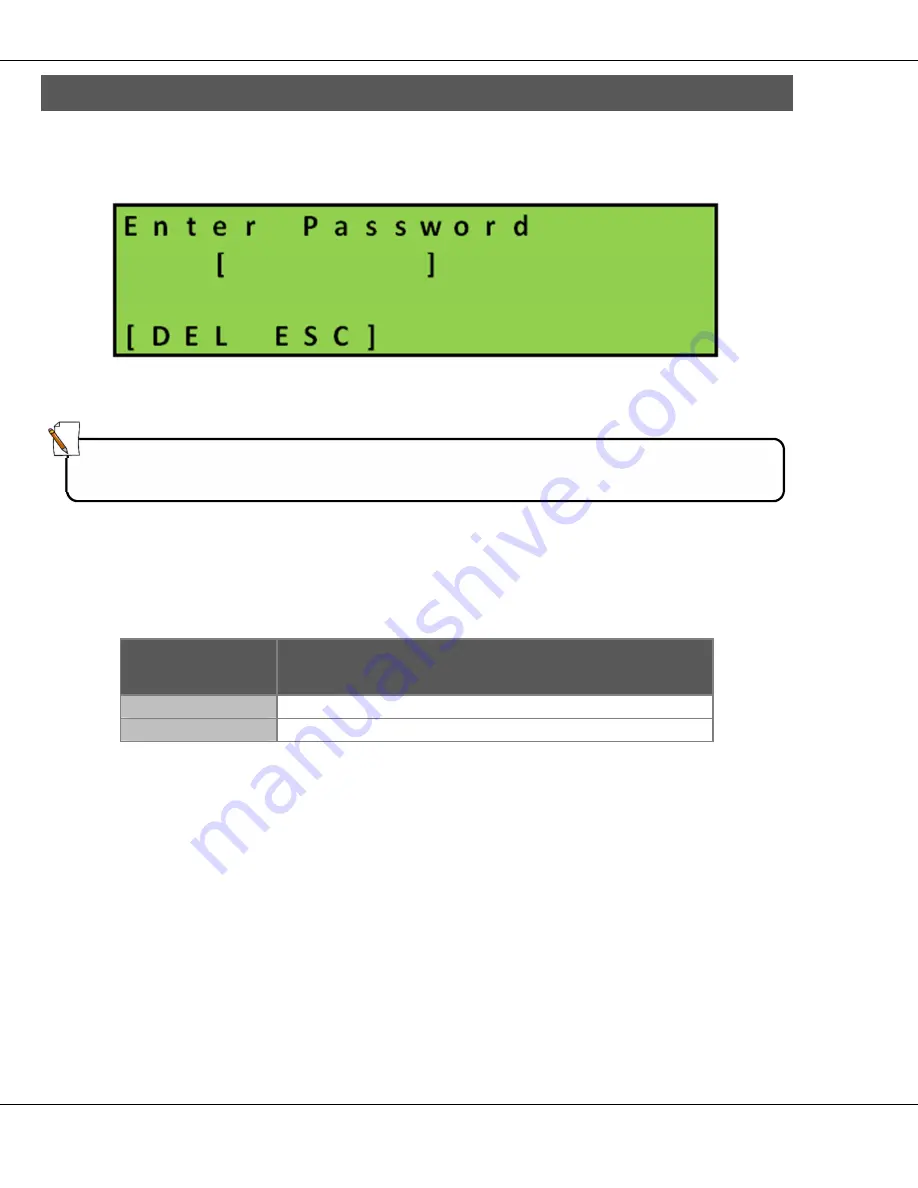
Figure 5 – Password Login Screen 

Press 

[

 ] Enter


As prompted, enter your password to access the Main menu.  

After a successful login, the screen progresses automatically to the Main 
menu. 


Key 

Function 

[ESC] 

Returns you to the Status screen. 

[DEL] 

Clears the password field. 

Table 5 – Main Menu Keys 


Note: 

Password must contain six (6) characters. 
Default factory-set password is: [111111] 

Summary of Contents for PCMS-1210 QS

Page 1: ...PCMS 1210 QS QUICKSTEP PROGRAMMING USER MANUAL VER MAC Publication UME PCMS 1210 QS V5 00 ...

Page 2: ...Page Intentionally Blank ...

Page 3: ...G USER MANUAL Information contained in this manual may be modified or corrected without notice No part of the contents of this manual may be reproduced or transmitted in any form or by any means without the written permission of the publisher MMXI VER MAC Inc TECHNICAL PUBLICATIONS All rights reserved ...

Page 4: ... automatic update For additional information concerning the latest changes to the PCMS 1210 QS and this document please consult our web site www ver mac com Technical Support For help with any difficulties concerning the PCMS 1210 QS or this manual please contact Ver Mac Support support ver mac com We also request that you notify us of any error or omission found in our publications ...

Page 5: ...r This equipment should not be installed operated or maintained without first having read and understood all the contents of this QuickStep Programming Manual Failure to read and follow the instructions contained in this manual could result in failure of the equipment property damage and serious injury Proper care is your responsibility Please work safely ...

Page 6: ...ed normal usage for which the product was designed and 2 that no unauthorized alterations or modifications have been made In the case of electronic components this warranty is for two years contingent upon the conditions that the equipment has been connected to a power source of the correct voltage and amperage and used in a manner which would be considered normal usage The purchaser must establis...

Page 7: ...equence of Message Pages with Quick Program 11 5 3 3 Inserting a Graphic Arrow in a Sequence Created With Quick Program 13 5 3 4 Editing a Quick Program Sequence 14 5 4 Message 16 5 4 1 Message Menu Explained 16 5 4 2 Creating a New Text Message 17 5 4 3 Modifying an Existing Text Message 18 5 4 4 Erasing an Existing Message 19 5 5 Sequence 20 5 5 1 Creating a New Sequence 21 5 5 2 Inserting a Pag...

Page 8: ...e 17 Modifying an Existing Message 18 Figure 18 Erasing an Existing Message 19 Figure 19 Sequence Main Screen 21 Figure 20 Sequence Edit Screen 21 Figure 21 Page Flash Time 22 Figure 22 Indicating Sequence is Being Updated 22 Figure 23 Sequence Selection Screen 23 Figure 24 Arrow Selection Screen 23 Figure 25 Sequence Number Selection Screen 24 Figure 26 Indicating Sequence is Being Updated 25 Fig...

Page 9: ...ntroller 1 1 Options Several options are available to augment the programming and communication capabilities of the basic PCMS unit and to guarantee the power supply for the system 3G modem for rapid remote communication Access to JamLogic2 Ver Mac s remote fleet management software Radar Data logger requires radar GPS tracking requires modem Built in battery charger AC Automatic charging control ...

Page 10: ...d insert any standard arrow or caution on a message page Alternatively users can undertake more complete programming of the PCMS unit at the unit installation There they can generate and save up to 99 user programmable text messages establish display time and line blink time for text message pages generate and save up to nine 9 sequences series of messages with a maximum of 6 message pages per seq...

Page 11: ...ft keys Figure 1 Handheld Unit Handheld Keys Single Function Keys Enter Gives access to the Main Menu Also confirms message content or alterations to current message content FN Activates the second functions of the keys on keypad and LED 2nd lights up ESC Returns you to the previous menu and eventually to the Main screen BS Erases the last character Dual Function Keys A Z 0 9 Most alphanumeric key...

Page 12: ...he unit Status screen shows the current status of the message board the message number MSG and a preview of the message currently displayed on the sign The bottom left corner indicates keys to enable access to the system information current software version and unit identification Status Screen Keys Displays Main Menu Displays read only information about System Displays read only information about...

Page 13: ...inue to recharge the batteries The supplied voltage may not be sufficient to reach the threshold for a return to normal operation 12 6V see Maintenance Manual Charging Batteries for in depth explanation REG DEFECT Communication with solar regulator has been lost Possible regulator defect or loose broken data cable ERR L Display has an error Message board sign is dark with no message display Note I...

Page 14: ... system information from various sources BAT the number of amps to run the sign and current battery voltage SOL number of amps feeding into the batteries from the solar panels RADAR current operating state ON OFF SPD real time captured speed and unit of measurement of speed MPH KMH Note Truck mount units have no solar regulator and so only voltage readings are displayed ...

Page 15: ...s the current QuickStep software version running on the unit and the unit serial number Unit and Software Information Line 1 Shows the unit type Line 2 Shows the name of the software on handheld controller Line 3 Shows the version of the software currently running on the handheld controller Line 4 Shows the serial number of the PCMS unit Table 4 Unit and Software Information Screen ...

Page 16: ...Login Screen Press Enter As prompted enter your password to access the Main menu After a successful login the screen progresses automatically to the Main menu Key Function ESC Returns you to the Status screen DEL Clears the password field Table 5 Main Menu Keys Note Password must contain six 6 characters Default factory set password is 111111 ...

Page 17: ... modify page s of messages include page s containing standard graphics arrows and caution signals in the message sequence control the page display timing for text messages When you access Quick Program the handheld displays on screen the last sequence that was created using Quick Program You can edit this last sequence or erase it completely and build a new sequence Note You cannot select existing...

Page 18: ...nction F1 RUN Activates newly created sequence F2 OPT Gives access to F1 TIMING used to set the length of time the page displays on the sign F4 ARROW o select and insert a page with arrows chevrons lines or caution signals o select the flash pattern for the selected graphic See Section 5 6 for in depth explanation F3 CLEAR SEQ clear the whole sequence INS DEL PAGE insert or remove pages from the s...

Page 19: ...ax 8 characters per line Use arrow keys to position the cursor and or to move to and from pages 2 To modify the text on a message page in the Quick Program sequence you can overwrite text or press SPACE to erase characters and rewrite or press F3 CLR erase entire page Then write in the new text 3 As you complete each new page press F2 OPT F1 TIMING and set the timing of the page if required Defaul...

Page 20: ...s 6 Press F1 RUN and the software updates and displays the new sequence on the message board The screen returns to Status where the Preview displays the sequence Note Identifying message page numbers are automatically assigned to all message pages in the Quick Program sequence Tip Cursor should be on last line of page 1 in order to move to page 2 ...

Page 21: ...e page where you desire an arrow or caution signal press F2 OPT F4 Arrow Figure 10 Arrow Selection Screen 2 Select the required graphic 1 8 and then select from the signal display options 1 3 3 Use arrow key to move to the next page and add any other message page s to complete your sequence see Section 5 3 2 Steps 2 6 Note The page Timing for graphic message pages is fixed and cannot be changed ...

Page 22: ...uick Program sequence you can overwrite text or press SPACE to erase characters and rewrite or press F3 CLR erase entire page Then write in the new text Use arrow keys to position the cursor and or to move to and from pages 2 To change a message page that is an arrow signal press F4 Arrow and select another arrow and signal display option 3 To insert or delete a page in the sequence press F2 OPT F...

Page 23: ...rent message page 4 Press F2 OPT F1 TIMING to set page display time for the currently selected text page 5 Press F1 RUN to update and display sequence automatically Figure 13 Updating Sequence Status Screen Alternatively when you press ESC you are prompted to save Y or N Figure 14 Saving Sequence Status Screen If Yes Sequence updates and displays to reflect the change s If No the software discards...

Page 24: ...rom 001 099 MSG 001 5 4 1 Message Menu Explained Enter Main Menu F3 Message Figure 15 Message Main Screen The following function keys are active in this screen Key Function 0 9 Use the number pad to type the required message number Use the up and down arrows to scroll through the message numbers Enter Use Enter key to select the current message and proceed to edit mode In edit mode o moves the cur...

Page 25: ... the message area Create text message using keypad to write message text arrow keys to position the cursor 3 Set line flashing F move cursor to required line press F1 to toggle Yes No 4 Press Enter to save message and return to the Message screen or Press ESC to discard changes and return to the Message screen Note To correct text content you can do one of the following type over the existing text...

Page 26: ...e area Modify the message using keypad to write message text arrow keys to position the cursor 3 Set line flashing F move cursor to required line press F1 to toggle Yes No 4 Press Enter to save message and return to Message Screen or Press ESC to discard changes and return to the Message screen 5 Press ESC once more to return to the Main Menu Note To correct text you can do one of the following ty...

Page 27: ...rite the last two digits of the MSG number or use the arrows to scroll through existing messages and press Enter 2 The blinking cursor appears at the beginning of line 1 of the text in the message area 3 To erase the entire message press DEL 4 Press Enter to confirm deletion and return to the Message Menu or Press ESC to discard change deletion and return to the Message Menu 5 Press ESC once more ...

Page 28: ...select only one sequence at a time Sequence 0 is a blank sequence and cannot be edited Sequence 0 is used to turn off the display Sequence 9 is used for remotely programmed sequences and cannot be edited on the handheld controller Sequence X is only displayed when Quick Program was used to create the current sequence When you access Sequence the screen displays the number of the selected and curre...

Page 29: ...Press Enter and use the keypad to enter the 3 digit number of the message to form page 1 of your sequence Example Enter 006 message 006 on sequence 1 page 1 4 Press Enter to confirm the page change Note Select Sequence 0 and stop the currently running sequence before editing a message or sequence Note Be sure to create and number all the messages you need for the Sequence before you start to compi...

Page 30: ... Set the page display time in seconds Default display time is 2 0 seconds Set the line flash time Press OK to save and then ESC to return to Sequence page 1 6 Use the arrow key to move to sequence page 2 Repeat Steps 3 6 for any additional pages 7 When all is complete press ESC until you return to Sequence page 1 screen Press ESC one more time to update and run the altered sequence Figure 22 Indic...

Page 31: ...ct the sequence page where you want the image to display 4 Press Enter followed by the X key Figure 24 Arrow Selection Screen 5 Select the required arrow or caution signal and then the signal display option 6 Use arrow keys to move to the next page s and continue creating the sequence 7 When complete press ESC till you return to Sequence page 1 screen Then press ESC one more time to update and run...

Page 32: ... want to make Enter the three digit message number of the replacement text message and then press F1 TIME to set any new timings for the replacement text message page or Press the X key to access the Arrow selection screen Select the image and then the signal display option or Enter 000 to create a sequence cutoff page Note Select Sequence 0 and stop the currently running sequence before editing a...

Page 33: ...25 6 Use the arrow keys to move to any other page s in the sequence that you want to modify and repeat Step 5 for each page 7 When complete press ESC to return to Sequence screen Press ESC a second time to update the altered sequence Figure 26 Indicating Sequence is Being Updated ...

Page 34: ...nals are pre programmed and cannot be changed in any way Signal Display Options ARROWS 1 Solid 2 Flashing 3 Sequential CAUTION 1 FULL 2 ALT CORN 3 SIDES 4 UP DOWN DIAMONDS Table 8 Arrow Display Option Keys Note The software assigns a message number for pages with graphics automatically It commences with X instead of 0 Example X06 Note Arrows have a display time of 2 seconds and flashing arrows hav...

Page 35: ...gs Figure 28 Utilities Menu F1 RADAR contains the settings for displaying a radar activated message on the PCMS F2 CONFIG configuration contains all the set up choices specific to the PCMS unit F3 BRIGHTNESS contains message board brightness settings manual and access to test of message board display capabilities F4 DBS If you receive an error you should contact Ver Mac Support as soon as possible...

Page 36: ...ller Figure 29 Radar Configuration Screen The Radar menu allows you to activate the radar define the lower and upper speed limits and select the unit of speed measurement Key Function F1 Toggles the radar between ON OFF F3 Defines the minimum and maximum speed limit for readings to display on the message board F4 Toggles the unit of speed between MPH and KMH ESC Saves the settings and returns to t...

Page 37: ...ire press the relevant key s Menu Screen 1 4 Figure 31 Configuration Menu Screen 1 4 Key Function F1 Language Toggles between ENglish and FRench F2 OPT Sets the remote communication connectivity option for the handheld controller 1xRTT Default used for IP communications through a cellular router CELL used for a cellular modem or cell phone BLUETOOTH used for Bluetooth connection Optional F3 MOT Ap...

Page 38: ...tances F3 BEACONS Activates the optional warning beacons See Section 6 2 2 for details Table 11 Configuration Menu Screen 2 4 Menu Screen 3 4 Figure 33 Configuration Menu Screen 3 4 Key Function Font Displays the default font 5x7 for the PCMS F2 SAVE IN Toggles between Flash default for standalone PCMS RAM used by remote systems Jamlogic2 F3 BAUD Indicates serial transmission rate for attached com...

Page 39: ...en 4 4 Figure 34 Configuration Menu Screen 4 4 Key Function F1 SOL REG Enables or disables communication between the controller and the solar regulator Toggles between Yes and No F2 DFI The Data Feedback Input toggles between Yes and No Default option Y Table 13 Configuration Menu Screen 4 4 ...

Page 40: ...ssword Figure 35 Change Password Screen This screen allows you to personalize the QuickStep password Password can be a combination of letters and numbers but must be 6 digits long Type in your current password Type in the new password Press Enter to confirm or Press ESC to return to previous screen without saving Note Factory set default password is 111111 ...

Page 41: ...r the PCMS unit is equipped with the optional Beacon Control Module Key Function F1 Toggles between SELECTED and OFF F2 Toggles the beacon pattern Full Sides or Up Down Full flashes all 4 beacons at once Sides flashes the left side followed by the right Up Down flashes the top followed by the bottom Increases or decreases the flashing speed of the beacons by 10 cycle intervals Min 60 cycles minute...

Page 42: ...ng for the minimum brightness of the display Maximum Setting for the maximum brightness of the display Table 15 Brightness Values Press Enter to adjust minimum and maximum brightness settings o Type in your minimum brightness level value as a three 3 digit number Example enter 10 as 010 o Type your maximum brightness level as a three 3 digit number F5 This activates the test mode to enable you to ...

Page 43: ...y 2011 1210 QuickStep Programming User Manual Ver 5 0 35 6 4 DBS F4 If your handheld controller displays these messages you should contact Ver Mac Support as soon as possible Figure 36 DBS Screen Figure 37 Alternate DBS Screen ...

Page 44: ... MMXI VER MAC Inc TECHNICAL PUBLICATIONS All rights reserved PRINTED IN CANADA ...

Reviews: