VWS2E
- 8 -
VELLEMAN
E. Snapshot
:
Press this button to take a snapshot of the current image which will be saved in the designated destination.
F. Close the Player
.
NOTE:
•
When pausing the playback picture, press “
” button to go to the previous frame or press “
” button
to go to the next frame.
•
In the playback mode of the software AP, press ”
“ button to check the authenticity of the
BACKUP
VIDEO
. If the
BACKUP VIDEO
has been altered, the video image will turn to light red and the playback will be
paused.
ADVANCE SETTINGS
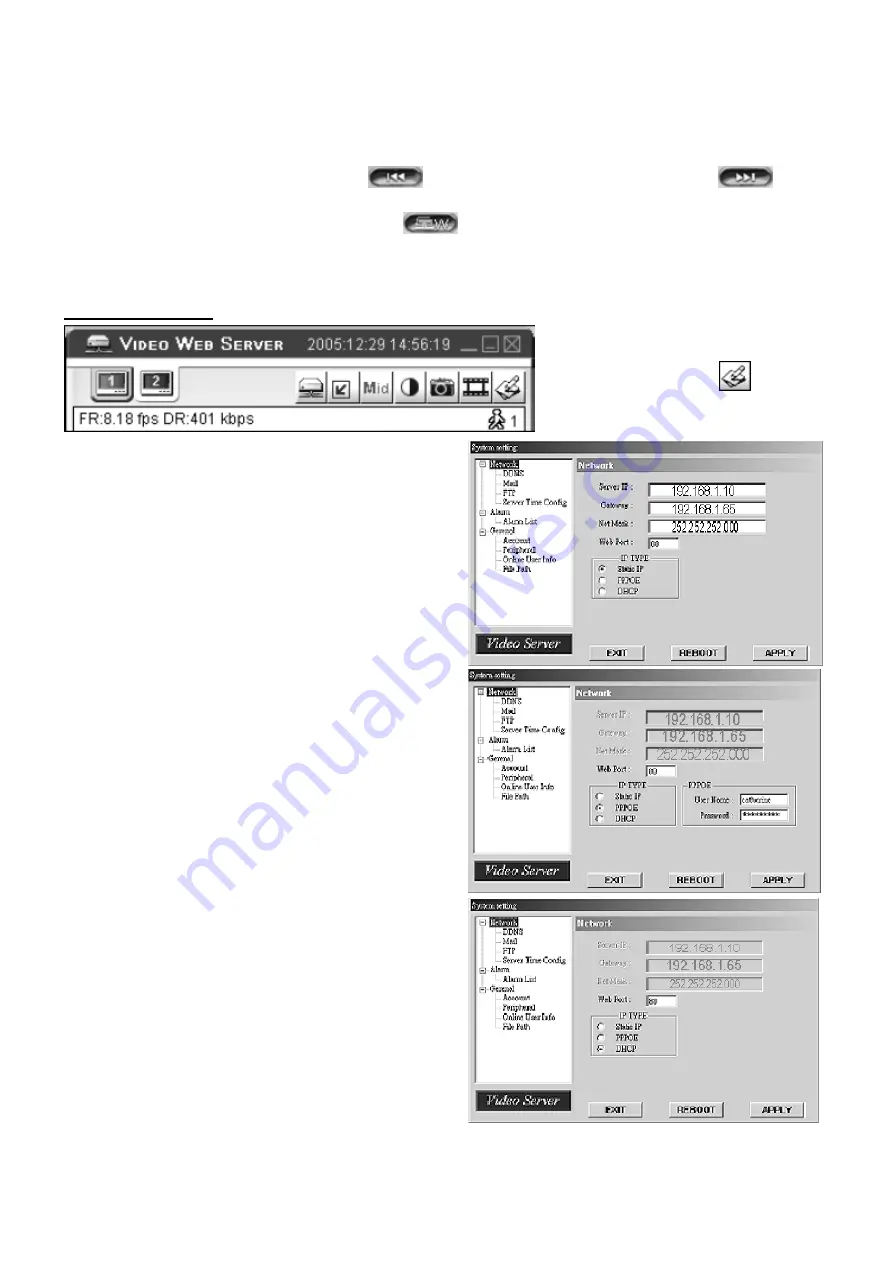
Press the “System Config
” button to
enter the system setting page.
NETWORK
The network configuration allows the DVR to connect to an
Ethernet network or dial-up.
1.
Static IP:
Enter the server IP, gateway, net mask and web port
and press APPLY to confirm.
2.
PPPoE:
Enter the username and password provided by your ISP
supplier and press APPLY to confirm.
3.
DHCP:
This DHCP function needs to be supported by router or
cable modem network with DHCP service. Choose the
DHCP IP type and press APPLY to confirm.
NOTE:
PPPoE and DHCP network connection type will
require applying DDNS service to get a hostname to
correspond to dynamic IP address. Refer to “
Appendix
4 – DDNS Application
” for details.
NOTE:
Some routers may need to restart the DVR to
get the IP address.


