VMM501
V. 01 – 17/01/2019
9
©Velleman nv
2.
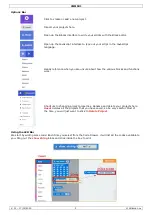
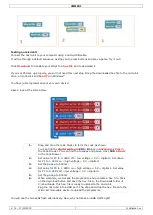
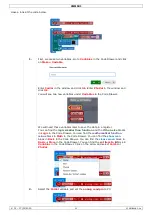
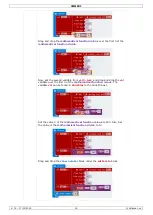
Set P2 to be a pull-up.
3.
Set the
digital read pin
to P2.
4.
Set the
digital write pin
P0
to
0
(active low (0 V)).
Set the
digital write pin
P1
to
1
(active high (5 V)).
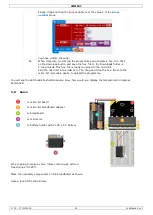
5.
Set the
pause
to 500 ms.
6.
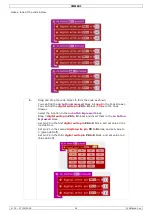
Set the
digital write pin
P0
to
1
(active high (5 V)).
Set the
digital write pin
P1
to
0
(active low (0 V)).
7.
Set the
pause
to 500 ms.
8.
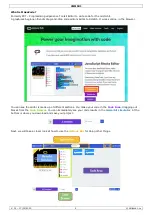
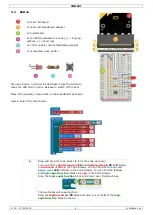
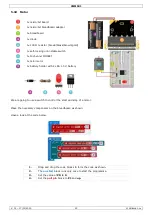
When complete, we compile the programme and generate a hex. file. Click
on the download button and save the hex. file to the Downloads folder
C:\downloads. This hex. file is ready to upload to the micro:bit.
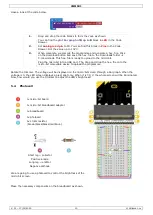
Plug the micro:bit into a USB port. The, drag and drop the hex. file onto the
micro:bit removable device to upload the programme.
Press the button and you will see the LED flash alternatively. Now, how to light the red LED with the button
pressed and light the green LED with the button released?
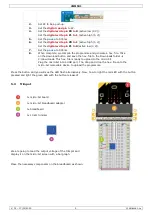
5.3
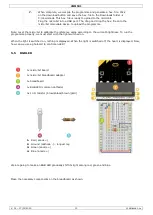
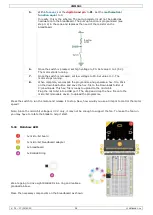
Trimpot
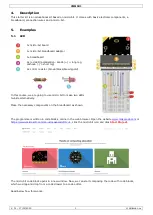
1x micro:bit board
1x micro:bit breadboard adapter
1x breadboard
1x 10 kΩ trimmer
We are going to read the output voltage of the trimpot and
display it on the micro:bit screen with a bar graph.
Place the necessary components on the breadboard as shown.


