VMM501
V. 01 – 17/01/2019
13
©Velleman nv
7.
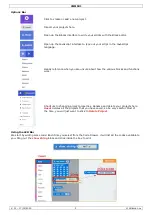
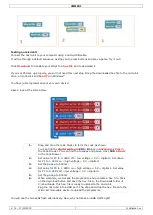
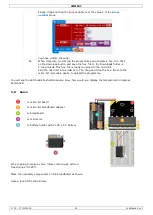
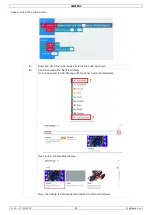
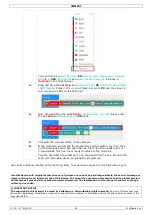
When complete, we compile the programme and generate a hex. file. Click
on the download button and save the hex. file to the Downloads folder
C:\downloads. This hex. file is ready to upload to the micro:bit.
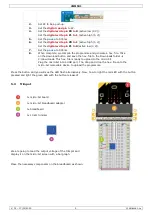
Plug the micro:bit into a USB port. The, drag and drop the hex. file onto the
micro:bit removable device to upload the programme.
Note: reset the micro:bit to calibrate the reference value according to the current brightness. To run the
programme properly, we must start with the light switched on.
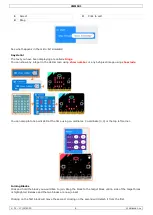
When the light is switched on, nothing is displayed. When the light is switched off, the heart is displayed. Now,
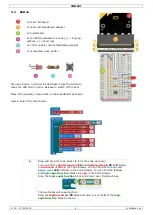
how can we use a photocell to control an LED?
5.5
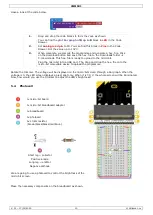
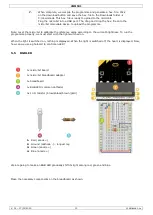
RGB LED
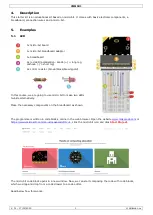
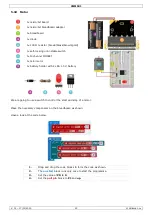
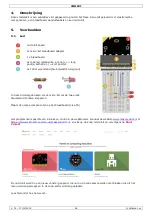
1x micro:bit board
1x micro:bit breadboard adapter
1x breadboard
1x RGB LED (common cathode)
3x 10 Ω resistor (brown/black/brown/gold)
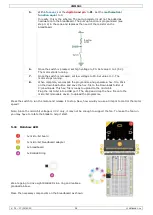
1.
Red (anode +)
2.
Ground (cathode -) – longest leg
3.
Green (anode +)
4.
Blue (anode +)
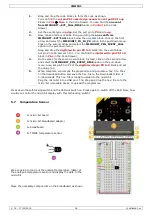
We are going to make an RGB LED gradually shift its light among red, green and blue.
Place the necessary components on the breadboard as shown.


