background image


ProStar 400 Autosampler Control Manual 

-7- 

03-914947-28:R1


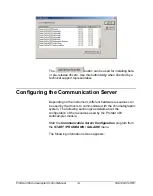
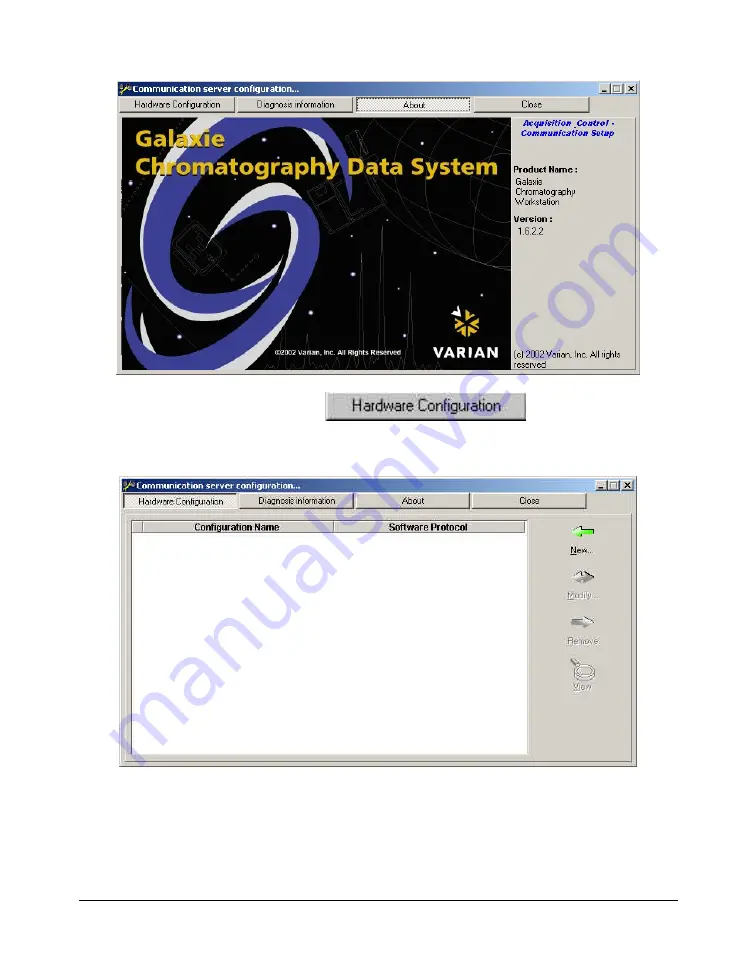
Click on the 

 button and a new 

screen appears where the type of hardware used by the 
instrument for communication can be configured. 


In this screen, all the hardware types previously configured are 
listed with their name and the name of their software protocol for 
communication. 

Summary of Contents for ProStar 400

Page 1: ...Varian Inc 2700 Mitchell Drive Walnut Creek CA 94598 1675 USA Varian Inc 2002 03 914947 28 Rev 1 ProStar 400 Autosampler Control Galaxie Driver Manual...

Page 2: ...ting a New System 13 Configuring the Varian ProStar 400 Autosampler 15 Configuring the Synopsis 18 Building a Method 20 Creating a New Method 20 Control Method Section for the Varian Prostar 400 23 In...

Page 3: ...General This document describes the installation and configuration of the Varian ProStar 400 Autosampler driver It also explains how to build a control method for this driver how to start and view a...

Page 4: ...ights to install the driver The Varian drivers must be installed only on the server 1 When you insert the Galaxie CD into your CD drive the CD Browser will start automatically If it does not you can l...

Page 5: ...Next button read and accept the License Agreement and enter your driver Serial Number in the corresponding field The serial number is provided on your driver serial number card and is different from...

Page 6: ...up steps 1 2 and 3 again The following screen will appear Then press Next The drivers will be automatically reinstalled or upgraded Click on Finish at the end of the installation to exit the maintenan...

Page 7: ...the Communication Server Depending on the instrument different hardware resources can be used by the drivers to communicate with the chromatographic system The following section gives details about t...

Page 8: ...the button and a new screen appears where the type of hardware used by the instrument for communication can be configured In this screen all the hardware types previously configured are listed with th...

Page 9: ...by GPIB RS232_CP3800 communication by RS232 RS232_INTERFACE communication by RS232 RS232_PC communication by RS232 NOTE The Varian ProStar 400 Autosampler module uses the RS232 communication protocol...

Page 10: ...ical name to the card in the Configuration Name field NOTE Once the hardware has been configured it is no longer possible to change the Configuration Name If the RS232_INTERFACE type has been chosen y...

Page 11: ...umber of the Serial Port to which the instrument is connected on the computer or the Star 800 MIB box Enter the following communication parameters in the corresponding fields available for the ProStar...

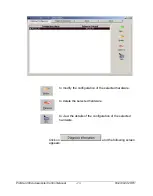
Page 12: ...ontrol Manual 11 03 914947 28 R1 to modify the configuration of the selected hardware to delete the selected hardware to view the details of the configuration of the selected hardware Click on and the...

Page 13: ...ble hardware resources and software protocols are listed NOTE This form is dedicated to diagnostic purposes only Once all the hardware needed by the different kinds of instruments have been correctly...

Page 14: ...em name and an optional description then press Next 4 Select which station is the Acquisition Control Server for the system Only one Data Acquisition Control Server can be named as the owner The Seque...

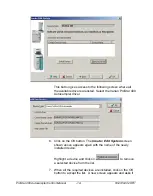
Page 15: ...e Varian ProStar 400 Autosampler driver 6 Click on the OK button The Create Edit System screen shown above appears again with the name of the newly installed device Highlight a device and click on to...

Page 16: ...ing the Varian ProStar 400 Autosampler Click on the button corresponding to the Varian ProStar 400 driver and the configuration screen appears The toolbar allows you to easily scroll through the confi...

Page 17: ...Server Configuration program In the Autosampler Device Identifier field enter the device identifier of the ProStar 400 Autosampler NOTE To find or set the address on the sampler itself you must press...

Page 18: ...eck Partial loopfill option if installed in the autosampler Hardware parameter group Tray type Vial type Three choices are available 48 large vials tray with 48 vials of 5 ml 92 standard vials 4 washe...

Page 19: ...layed in the synopsis screen To configure the synopsis as the real instrument configuration move each module then connect it appropriately To do this select one anchor for each of the two modules the...

Page 20: ...creen NOTE Once the system has been created and correctly configured it must be associated with one or more projects in order to start acquisitions Remember to check the Control and View boxes in the...

Page 21: ...g of final results To initially set up a method it is not necessary to define all of the sub method sections however you must fill in the instrument control section prior to starting an acquisition 1...

Page 22: ...hod is created for a particular system When starting an acquisition the name of the system that performs the acquisition must be correct since method access is limited only to those methods associated...

Page 23: ...atography Data System The next step is the definition of each of the method sections The control section must be defined in order to start an acquisition In the following part of this guide only the c...

Page 24: ...ress the F and 4 buttons on the Autosampler The Autosampler becomes in a serial mode If you want to manually use the Varian ProStar 400 press the F and 0 buttons on the Autosampler Once the new method...

Page 25: ...the active method from the instrument to print the current method Click on the button to display the ProStar 400 control method section It contains only one sub section Injection Click on this sub sec...

Page 26: ...he Acquisition sub section of the method Options parameter group Select one of the three available choices Tray Cooling if installed Tray Cooling Automatic Stop if installed Needle Wash Tray cooling c...

Page 27: ...strument control method has been correctly programmed an analysis can be started The next section briefly describes how to start an acquisition Quick Start Single Acquisition 1 Press the button In the...

Page 28: ...Chromatography Data System the Injection Volume the Vial position and the Rack number if required must be entered Other parameters associated with each acquisition channel can be entered in the Channe...

Page 29: ...of samples and the sequence name 2 The sequence is displayed Complete the sequence information columns refer to the Galaxie Chromatography Data System User s Guide The Method Name the Run Name the Ru...

Page 30: ...Autosampler Status Click on the button corresponding to the Prostar 400 Autosampler driver and the autosampler status screen will appear It contains three sub sections Status Remote Control Tray Cooli...

Page 31: ...h the instrument the LED is green when the communication between Galaxie and the autosampler is OK The ROM version field gives the ROM version of the autosampler During acquisition the injected vial a...

Page 32: ...eter group Use the button to advance the tray and the button to stop it Tray cooling Window This window is activated if the tray cooling has previously been configured in the Galaxie Configuration Man...

Page 33: ...rror LED indicates if an error has occurred NOTE Although it is possible to program setpoints from 0 C to 40 C the ProStar 400 Autosampler can only control the temperature down to ambient temperature...

Page 34: ...o do so just position the mouse cursor on the desired vial and the vial number will be displayed in the tray center The second item indicates from which vial the injection had been performed and the i...

Reviews: