background image

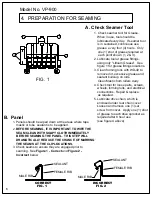
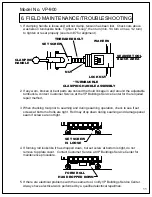
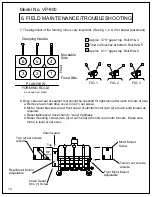
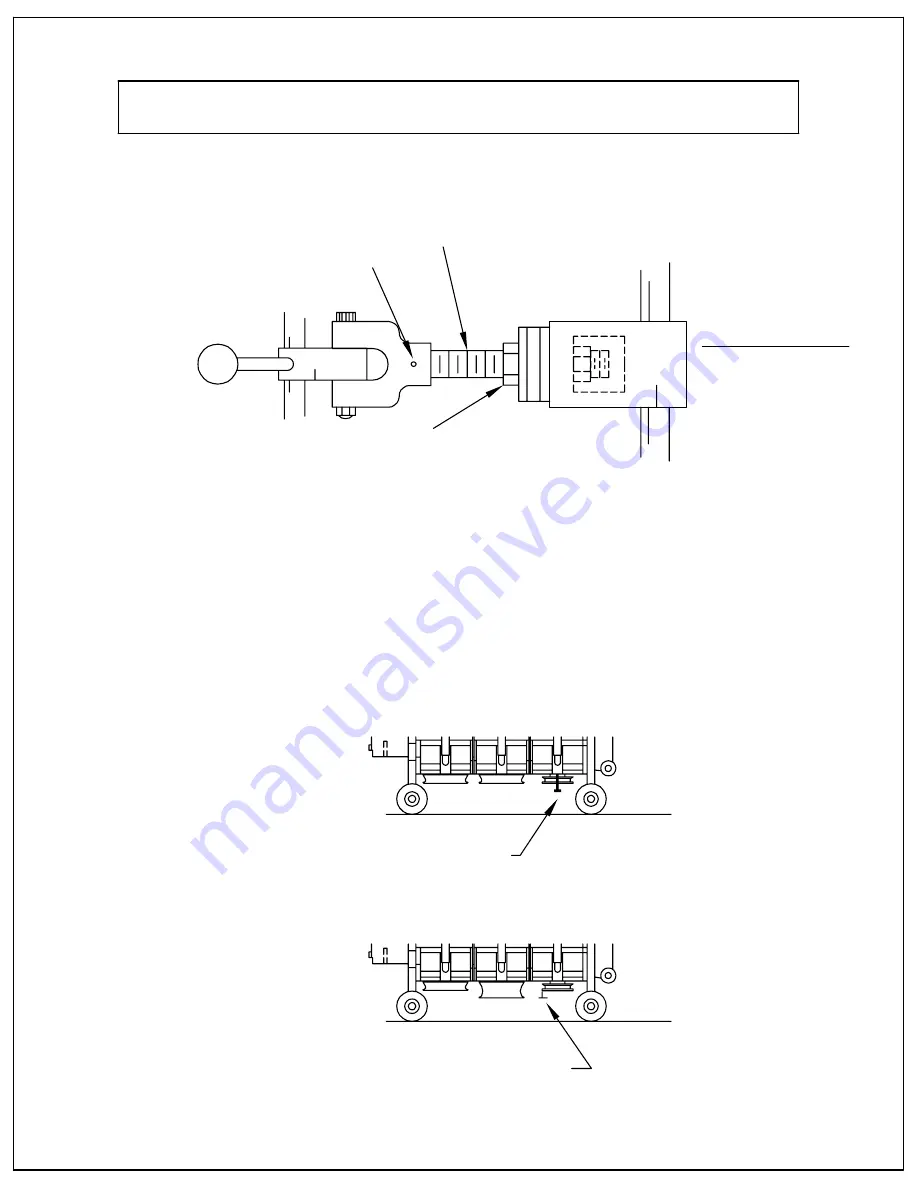
THREADED BOLT

SET SCREW

WAHERS

NUT

LOCK NUT

SEAMER TOOL

CLAMPING

BLOCK AREA

HANDLE

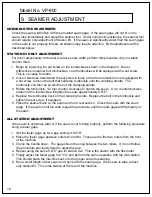
1. If clamping handle is loose and will not clamp, tension has been lost.  Check nuts above

washers on turnbuckle bolts.  Tighten to "snug", then turn (min. 1/4 turn or max, 1/2 turn)
to tighten or reset properly (see item #7 for alignment).

2. If any worn, broken or bent parts are noticed that hold linkage in and around the adjustable

turnbuckle, contact Customer Service at the VP Buildings Service Center for the rerquired
repair method.

3. When checking tool prior to seaming and during seaming operation, check to see if set

screws at bottom of rolls are tight.  Roll may drop down during seaming and damage panel
seam if screws are not tight.

4. If forming roll looks like it has dropped down, but set screw at bottom is tight, do not

remove top plate cover.  Contact Customer Service at VP Buildings Service Center for
maintenence procedure.

5. If there are electrical problems with the seamer tool, notify VP Buildings Service Center.

Always have electrical work performed by a qualified electrical repairman.

SET SCREW

IS LOOSE

FORM ROLL

HAS DROPPED DOWN

Model No. VP-900

*TURNBUCKLE

CLAMPING HANDLE ASSEMBLY

11

6. FIELD MAINTENANCE/TROUBLESHOOTING

Summary of Contents for SSR 900

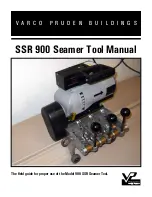
Page 1: ...V A R C O P R U D E N B U I L D I N G S SSR 900 Seamer Tool Manual The field guide for proper use of the Model 900 SSR Seamer Tool...

Page 2: ......

Page 3: ...e required to safely erect the metal building system and to perform the SSR Seaming Operation Unplug the electrical power source before performing any service on the seamer tool Check and maintain all...

Page 4: ...5 Seaming Operation Start 7 10 6 Field Maintenance Troubleshooting 11 13 7 Seaming Information 14 8 Hand Crimping Information 15 1 VP SSR Hand Crimping Tool 17 2 Uses of Hand Crimping Tool 18 3 Step 1...

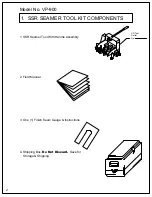
Page 5: ...mer Tool With Handle Assembly 2 Field Manual 3 One 1 Finish Seam Gauge Instructions 4 Shipping Box Save for Storage Shipping VP Tool Serial No Model No VP 900 2 Do Not Discard 1 SSR SEAMER TOOL KIT CO...

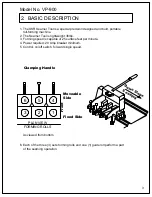
Page 6: ...ace feet per minute 4 Power required 20 Amp breaker minimum 5 Control on off switch forward single speed Down Slope 6 Each of the three 3 sets forming rolls and one 1 guide roll perform a part of the...

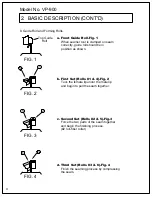
Page 7: ...Tuck the female lip under the male lip and begin to pull the seam together c Second Set Rolls 2 5 Fig 3 Force the two parts of the seam together and begin the finishing process 2 roll fiber roller d T...

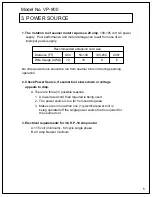
Page 8: ...be run from seamer tool cord during seaming operation 2 Check Power Source if seamer tool slows down or voltage appears to drop A There are three 3 possible reasons 1 A lower rated cord than required...

Page 9: ...n rolls Clean Mastic from rollers daily 4 Check tool for loose parts screws wheels forming rolls and electrical connections Repair replace as required 5 Lubricate drive chain which is enclosed under r...

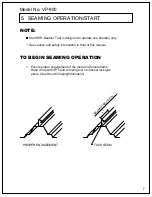
Page 10: ...in front of this manual TO BEGIN SEAMING OPERATION 1 Ensure proper engagement of the male and female hems Hand crimp with VP hand crimping tool or channel lock type S E A M D I R E C T I O N 1 TUCK S...

Page 11: ...o the locked position 2 Position seamer on the beginning edge of the SSR Panel so that the first two stands of rollers straddle the seam and rest on the panel 6 5 4 Model No VP 900 Direction of Seamer...

Page 12: ...of female lip Also it will slow down due to the additional thickness of metal This heavier load requirement can be detrimental to the seamer tool if it should come to a complete stall The operator sho...

Page 13: ...tarting Seamer Tool at MIDPOINT OF SEAM It is possible to start Seamer Tool Model No VP 900 in the middle of a seam run however it is not recommended If required page 12 item 8 Guide Roll and forming...

Page 14: ...od 3 When checking tool prior to seaming and during seaming operation check to see if set screws at bottom of rolls are tight Roll may drop down during seaming and damage panel seam if screws are not...

Page 15: ...ed for tightness after each 8 hours of use a Remove rear chain drive cover one 1 set screw b Motor mount brackets are at front rear of electric motor two 2 at each end loosen as required c Reset tight...

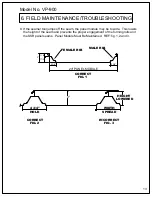
Page 16: ...the proper engagement of the forming rolls and the SSR panel seams Panel Module Must Be Maintained REF fig 1 2 and 3 4 3 4 HOLD WIDTH SPREAD CORRECT FIG 2 INCORRECT FIG 3 HEIGHT LOWERED 3 CORRECT FIG...

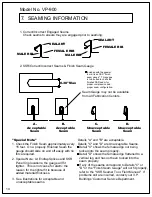
Page 17: ...ide on and off easily with no force required 2 Special Note At Endlap Splices and SSR Panel Clip locations the gauge will fit tighter This is not cause for alarm the reason for the tighter fit is beca...

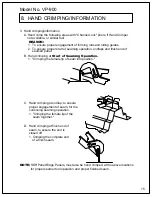
Page 18: ...C Hand crimping at endlap to ensure proper engagement of seam for the continuing seaming operation 1 Crimping the female lip of the seam together D Hand crimping at finish end of seam to ensure the e...

Page 19: ...am and check with the seam gage If the seam is wide adjust only station 3 This is the station at the rear of the machine Begin by loosening the set screw on the turnbuckle as shown in the diagram Due...

Page 20: ...Model No VPHC 17 17 1 VP SSR HAND CRIMPING TOOL...

Page 21: ...Model No VPHC 17 STEP 20 STEP 1 2 page 19 20 of this manual STEP 1 2 page 19 20 of this manual 18 areas 1 Hand Crimp of Starting End of SSR for the seamer tool operation Female Leading Edge Only as s...

Page 22: ...VP SSR HAND CRIMPING TOOL Step 1 Positioning Stage 1 Place hand crimping tool on SSR rib over female leading edge female edge will fit into notch Fold handle as shown STAGE 2 STAGE 1 SEAM AFTER PHASE...

Page 23: ...o VPHC 17 20 4 VP SSR HAND CRIMPING TOOL Place hand crimping tool on SSR rib over female leading edge female edge will fit into notch Fold handle as shown STAGE 2 STAGE 1 SEAM AFTER PHASE 2 CRIMP SEAM...

Page 24: ...al or manufacturing and is not cause for rejection For field installation questions call your local VP Service Center The job number is included on all building plans Arkansas 870 534 6030 California...

Reviews: