


48
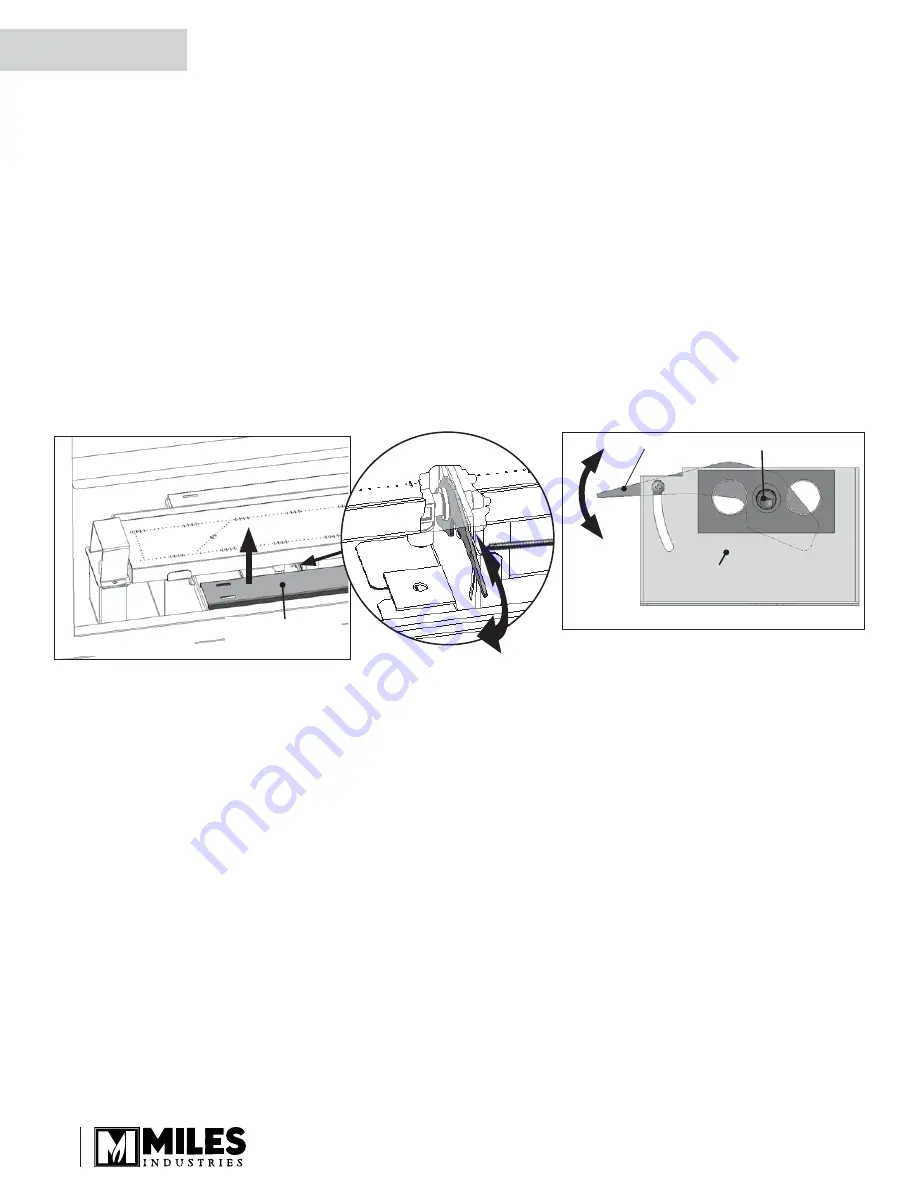
Remove front middle
platform support
Accessing air shutter
Close
Open
Injector elbow bracket,
burner side
Injector elbow
Air shutter
Setting air shutter
Install Trim and Barrier Screen
Install the trim chosen by the customer for the
fi
replace.
Install as well the barrier screen which is provided with
the trim.
Show the customer how to remove the barrier screen
to access the controls.
Follow the instructions provided with the trim and leave
those instructions behind for the customer’s future
reference.
Check Operation
Turn the
fi
replace
fl
ame up and down using the
wall switch to con
fi
rm that the full range of inputs is
achieved—see the wall switch operation instructions
on page 9.
Set Aeration
(if necessary)
Light the
fi
re and allow the unit to warm up for 10–15
minutes to evaluate the
fl
ame picture. The burner is
equipped with an adjustable shutter to control primary
aeration (NG only). The shutter is factory-set to an
aeration gap which will give optimum performance for
the vast majority of installations.
In a few unusual installations, the
fl
ame picture may
be improved by adjusting the aeration. The need for
adjustment should be determined only by operating the
appliance with the fuel bed and window installed.
Increasing aeration
will cause the
fl
ames to appear
more transparent and blue showing more ceramic
effects glow.
Decreasing aeration
will cause the
fl
ames to appear
more yellow or orange showing less ceramic effects glow.
Too little aeration may result in black carbon
forming and dropping into the fi rebox.
To access the air shutter, remove the front middle
platform as indicated. The air shutter is located under
the burner as shown in the illustrations.
Air Shutter
Installation
QUALIFIED
INSTALLER
Summary of Contents for 1500INO (NG)
Page 56: ......


