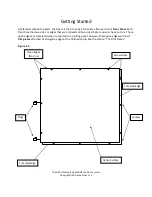
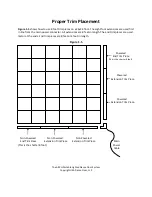


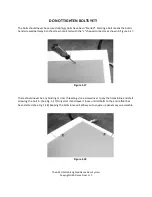


Screwing the Floor Panels Together
One inch stainless steel screws are used to
hold the floor pa els to ea h other a d keep the pa el’s le el
with each other. Screws should never ever be t
ight. At first the s re s should o l e started a d kept
loose during assembly as shown in figure 1-7. This will keep the panels free to move as the panels
square up to each other. Only after all screws have been started in all the panels and edging the screws
may be secured. If you are installing beveled edging start all those screws as well before securing any
other screws.
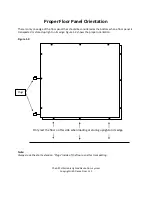
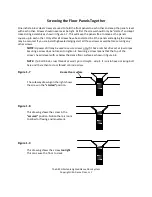
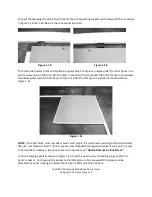
NOTE:
A power drill may be used to secure screws only if it has a ratchet drive set at low torque.
Securing a screw does not mean to tighten it. Securing a screw means that the top of the
s re ’s head is le el ith or elo the da e floor surfa e as sho
i figure
-8.
NOTE:
If a bolt binds, cross threads
or won’t go in straight…
skip it. It is ok to have a missing bolt
here and there then to cross thread or bind a screw.
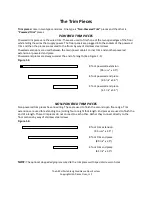
Figure 1-7
Dance Floor surface
The cutaway drawing on the right shows
the screw in the
started
position.
Figure 1-8
This drawing shows the screw in the
secured
position. Notice there is room
to allow for flexing and movement.
Figure 1-9
This drawing shows the screw
too tight
.
This can cause the floor to crack.
The ARCH Portable Lighted Dance Floor System
Copyright USA Dance Floor, LLC


