22
DS1099-106
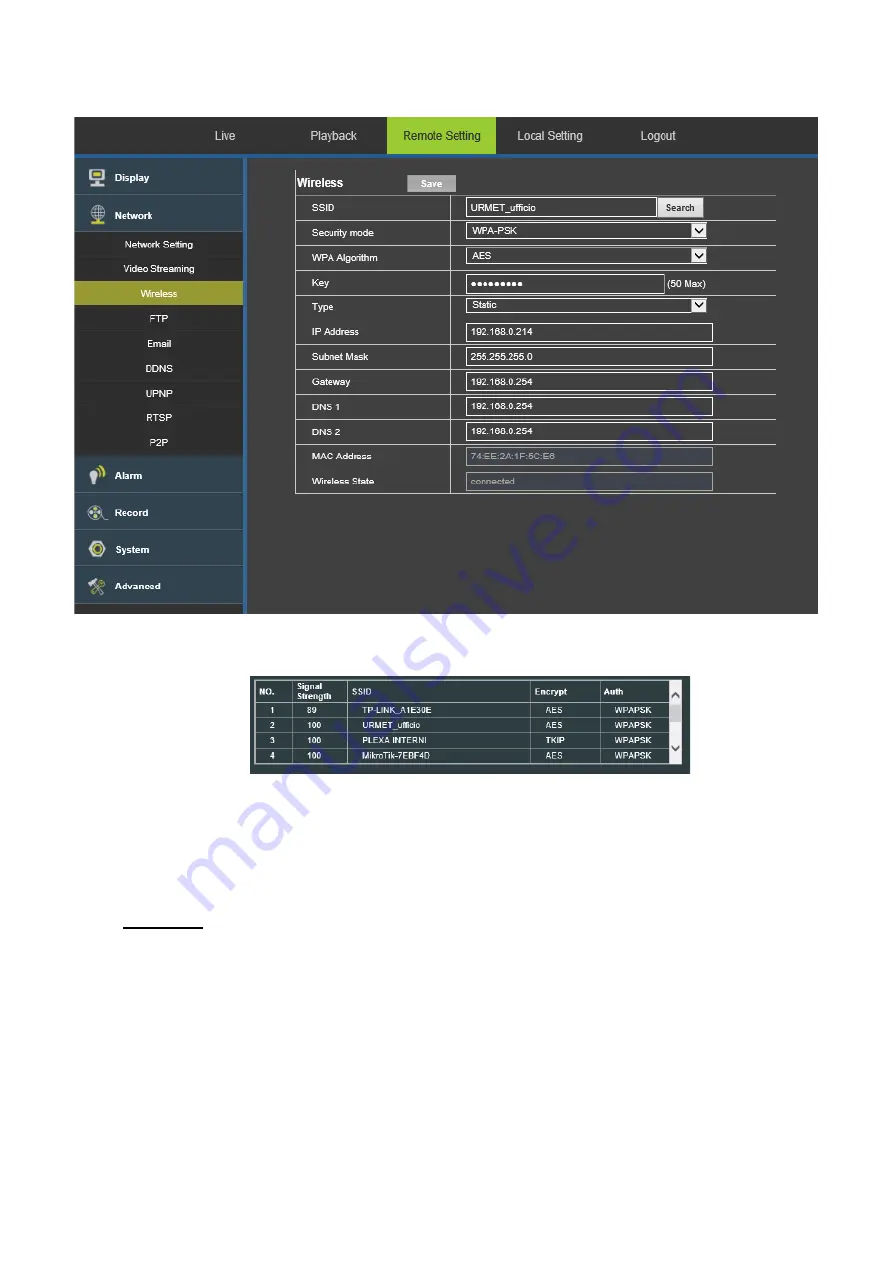
3) Wireless
Click on
【
Network
】
) →
【
Wireless
】
to access the following interface.
Press the “
Search
” button to open the following page showing all the available WiFi networks and the signal power
detected for each one:
Select the SSID of the WiFi network you want to connect the camera to, enter the network key and save the
configuration by pressing the
Save
button.
IMPORTANT
: It is advisable to check that the WiFi signal received by the camera is higher than or equal to 60.
Disconnect the camera network cable to make it switch to WiFi mode.
IMPORTANT
: The camera will set its wireless network interface in DHCP mode when it connects to a WiFi network.
Only if the camera has to be recorded by a network device like HVR/NVR it is advisable to set a static IP address after
having appropriately connected and configured the camera in the network. Make sure that the IP address you want to
assign to the camera is not already used in the network. It is better to use an address outside the range of addresses
assigned by means of DHCP.
Select “
Type = Static
” and fill in the following fields: IP address, Subnet mask, Gateway and DNS.
Press
Save
to save the changes.


