


LT-3200 Switch
6
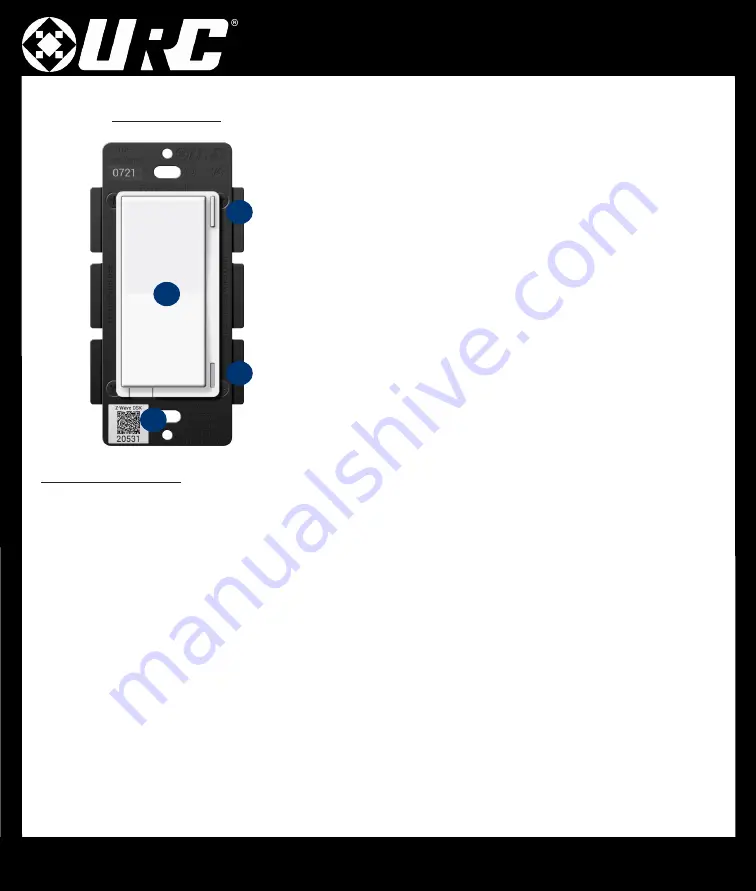
A. Config Button:
This button is used to enter the configuration menu on
your switch. When you hold it down for 10-15 seconds, the
LED Bar
(
B
) will light up
Yellow
to indicate you are in config mode. It can also
be used to trigger a favorite scene. After setting up the scene, tap the
button one time to trigger it.
B. RGB LED Notification Bar:
This LED bar serves as a visual display
for whether your lights are on or off and offers visual notifications
based on events that are setup via the Gateway. It can be further
configured, disabling or setting certain brightness levels.
C. Responsive Paddle:
The paddle works in a similar manner to a
standard switch. Pressing up will turn the light on while pressing
down will turn the light off. The switch can be tapped up or down 1-5
times to trigger a specific scene.
D. Air Gap Switch:
This will cut the power to the load your switch is
wired to.
LT-3200 Switch
Including A Switch
Below are the steps for including (pairing) a switch to a Gateway.
Plan, Prep, and Install:
•
Locate an area to install the switch that is within a recommend distance from the Gateway.
•
Walls, ceilings, and even furniture may degrade communication between devices.
•
Remember to turn off the power prior to installation.
•
Check the signal range by holding the config button for
5-10 seconds
.
[
Green
=
Good Signal
/
Red
=
Poor Signal
]
Including to the Network:
•
Put the Gateway into
inclusion
mode.
•
Once started, press the config button on the switch three times and the LED Bar will flash blue. If included
successfully, the bar will turn green. If it turns red, the inclusion process failed.
Switch Not Including? Try an Exclusion:
•
Put the Gateway into
exclusion
mode.
•
Once started, press the config button on the switch three times. The LED Bar will turn Green if
excluded successfully.
A
B
C
D


