Sticker B goes here
These instructions should be read and understood fully before
installation and should be kept for future reference.
Model Number:
PE 200AV T1000
(referred to as the
PE Socket
)
WHAT’S IN THE BOX
PE Socket with snap-on white front fascia, 2 screws (clipped to the
back), plastic fascia removal tool, Power Ethernet Quick Installation
Instructions and Power Ethernet Quick Setup Guide (this guide).
Please ensure that the instructions and safety information provided in
the Power Ethernet Quick Installation Instructions have been followed.
Once the PE Sockets are installed, setting up the network is very easy.
SETTING UP A NETWORK FOR THE FIRST TIME:
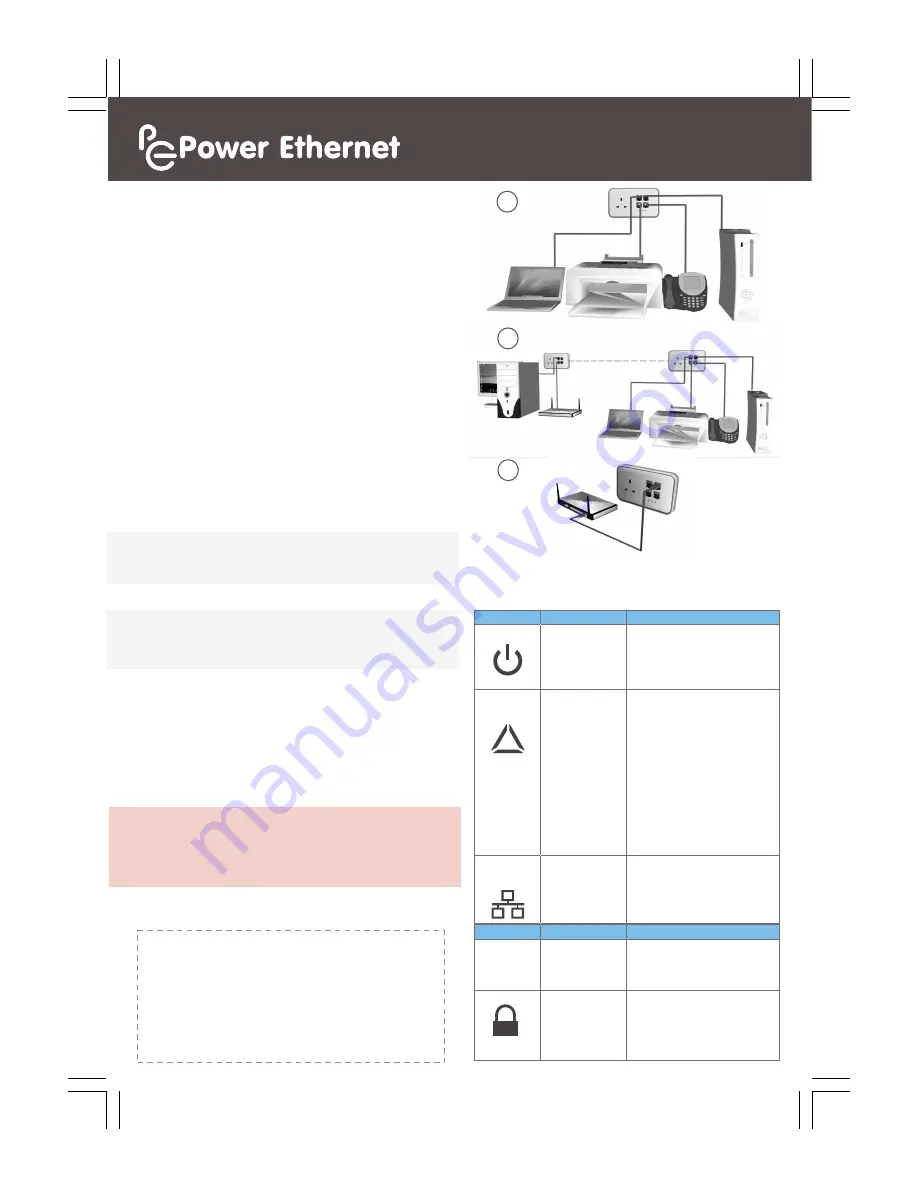
The PE Sockets are designed to automatically connect together to form
a single meshed network secured with 128bit AES encryption.
Each PE Socket comes with 4 Ethernet ports and once installed, all the
Ethernet ports on each PE Socket will automatically linked together.
1. Connect a laptop, PC, printer, VoIP handset or game console using a
CAT5 cable to any Ethernet port on one of the PE Sockets.
2. Connect the other Ethernet devices to the other PE Sockets using
CAT5 cables.
3. To share Internet access among all these devices, simply connect the
Internet router to any one of the PE Sockets using a CAT5 cable.
That simple!
Now enjoy a fast secure network with Internet
connectivity everywhere a PE Socket has been installed.
1
2
NEED MORE HELP?
All documentation, software and FAQs can be found online at
http://
help.powerethernet.com
3
EXPANDING THE POWER ETHERNET NETWORK.
To expand the network, install as many PE Sockets as needed (up to 64
sockets on a single phase) and they will automatically connect together
as soon as they are powered on.
In more complex installations, including multiple electrical phases, and
for troubleshooting tips and the Windows management software,
please consult the
PE User Manual
which can be downloaded from
http://
help.powerethernet.com
PRODUCT INFORMATION
Thank you for purchasing your PE Sockets. Please register your new
PE Sockets at http://
help.powerethernet.com
and join the mailing list
to stay up to date with Power Ethernet’s latest developments.
NOTE
: Two or more PE Sockets are required in order to create a
Powerline network. The PE Sockets must be electrically connected
sharing the same power phase in order for PE Sockets to provide a
network connection between them.
NOTE:
Whenever there is an active Ethernet connection, the Network
Activity light on that PE Socket will light up, the PE Socket will wake up
(power light goes green) and it will connect with other PE Sockets.
STEP 2: Quick Setup Guide
The sticker below shows the Serial Number and Device Password for this
PE Socket (a spare sticker is included in the envelope). It is
recommended to record the installation location of the socket and keep
this information safe as it is used by the optional Windows management
software and the Serial Number may be required when requesting
technical support.
LIGHTS
STATE
DESCRIPTION
Power
Solid green.
Red.
Flashing.
Dimmed red.
Off.
Power is on.
Sleep mode.
Unit is in pairing mode.
Forced hibernation.
No power.
PLC
Connection
Off.
Solid.
(Solid colour
denotes
connection
speed.)
No Powerline network activity
PLC network connection (paired).
Green
: Powerline network is
detected with high transfer
speed (suitable for HD video
streaming).
Orange
: Powerline network is
detected with medium
transfer speed (suitable for
SD video streaming).
Red
: Powerline network is
detected with low transfer
speed.
Network
Activity
Off.
Blink.
Solid green.
Unit is sleep mode or no active
Ethernet connection.
Network activity.
Network connection is detected.
BUTTON
PRESSES
DESCRIPTION
Reset
Press for 3
seconds.
Press for 7+ secs.
Reset / Wakes up the PE Socket.
This restarts the 15 minute timer.
Forced hibernation mode.
Join/Leave
Press for 0.5 to 3
seconds.
Press for 10+
seconds.
Initiate pairing mode for next 2
minutes. Power light will flash.
Unit leaves the current Powerline
network and generates a random
Network Password.
R


