UT9930
2
Warning
- Beware of materials after cutting.
They may be hot and/or sharp when handled.
Recoilless Air Saw
Installation
The UT9930 Recoilless Air Saw is designed to operate with 90
PSIG. Lower pressure (below 90 PSIG) will reduce perfor-
mance of the tool while higher air pressure (over 90 PSIG)
raises the performance of the tool beyond its rated capacity and
could cause serious damage to tool and operator.
Always use clean dry air. Excessive moisture and dirt will
greatly reduce the life of any air tool. We recommend the
installation of an in-line filter-regulator-lubricator as close to the
tool as possible.
A 1/4" air hose is required up to a length of 8 ft. If more length is
required, a 3/8" air hose should be connected to the 1/4" hose
to ensure the tool has the necessary air supply. Be sure all
hoses and fitting are the correct size and tightly secured.
Lubrication
1.
An automatic in-line filter-regulator-lubricator is recom-
mended to increase tool life and keeps the tool operating
properly. The in-line lubricator should be regularly
checked and filled with Marvel air tool oil or equivalent.
Proper adjustment of the in-line lubricator is performed by
placing a sheet of paper next to the tool exhaust ports and
holding the throttle open approximately 30 seconds. (The
lubricator is properly set when a light stain of oil collects on
the paper). Excessive amounts of oil should be avoided as
it will decrease tool performance.
2.
In the event that it becomes necessary to store the tool for
an extended period of time (overnight, weekend, etc.), it
should receive a generous amount of lubrication at that
time. The tool should be run for approximately 30 seconds
to ensure oil has been evenly distributed throughout the
tool. The tool should be stored in a clean and dry environ-
ment.
3.
Recommended lubricants:
Use Marvel Air Tool Oil or any other high grade turbine oil
containing moisture absorbents, rust inhibitors, metal
wetting agents and an EP (extreme pressure) additive.
Use care during use
Refer to blade manufacturer's specifications on "teeth per inch"
configuration. If not available, please refer to general blade
matching chart in this manual. Check that blade is secure,
lubricated, and does not have bent or missing teeth. Guide tool
through cut. Do not use excessive force while cutting. Opera-
tors may have to acquaint themselves with the unique operat-
ing characteristics of this tool.
Installing & Changing Saw Blades
Before the tool is connected to the air supply, clear the air hose
of accumulated dust and moisture. Before removing a tool for
service or changing accessories, make sure the air line is shut-
off and drained of air. This will prevent the tool from operating if
the throttle is accidently engaged.
1.
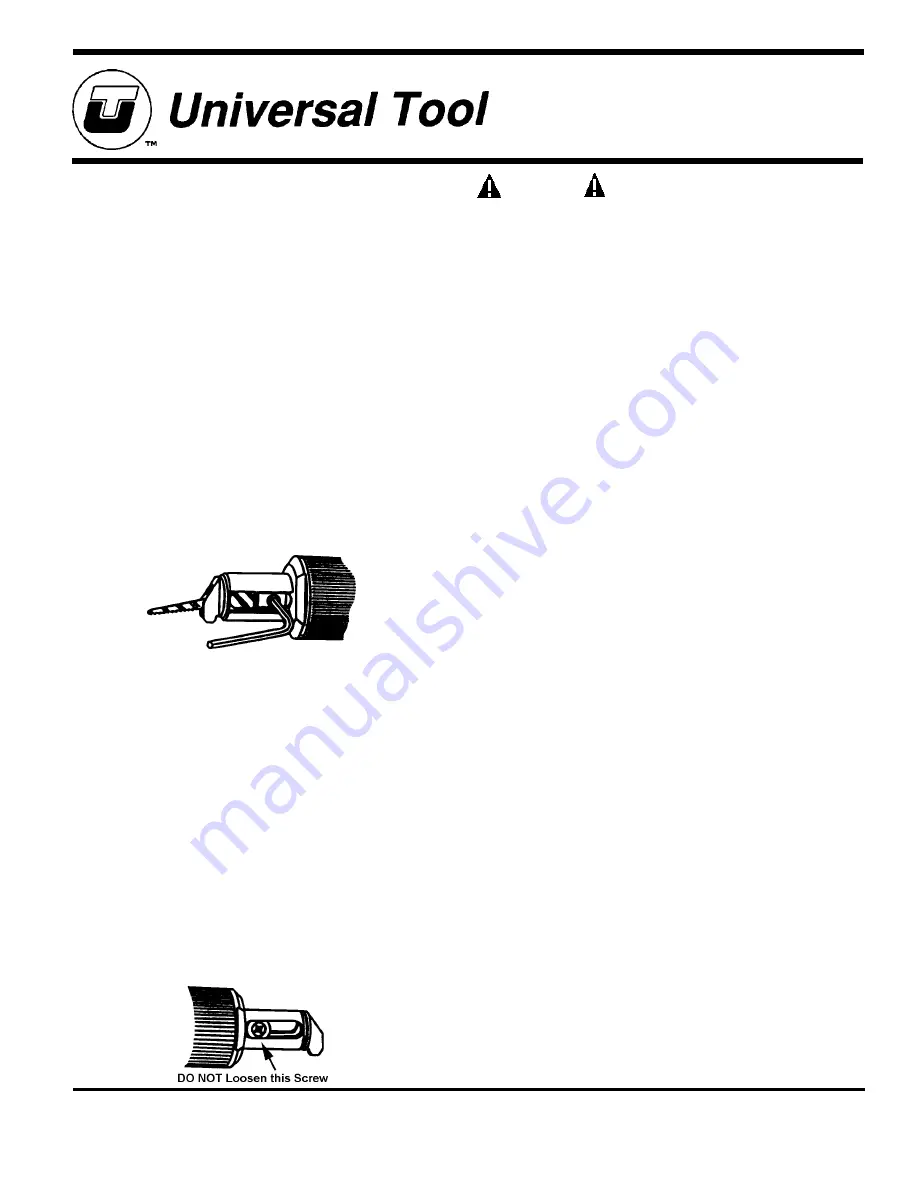
Twist front cover (Ref. No. 5) to expose the front left side of
tool (See Fig. 1) and loosen blade lock screw (Ref. No. 4)
with a standard 1/8" hex wrench.
2.
Slide the new saw blade through the front and into the
piston extension (Ref. No. 7). Tilt blade down and retighten
the blade lock screw. DO NOT OVERTIGHTEN.
NOTE: Lock screw has special threads matched with piston
extension assembly. If screw is lost, replace only with original
parts to ensure safety and proper performance.
3.
Ensure that the blade teeth are pointed down. Twist front
cover down to protect opening.
4.
Lubricate tool through inlet with air tool oil and run in a
protected area to check operation. Use only new, straight,
and properly sized blades.
NOTE: DO NOT LOOSEN OR REMOVE PHILLIPS HEAD
SCREW ON OTHER SIDE OF TOOL! (See Figure 2) Use
strong Loctite (No. 270) to reset this screw if loosened.
Figure 1
Figure 2
Operation
This saw operates slightly different than traditional pneumatic
saws. Metal thickness should be 16 gauge or thinner, although
this saw will cut up to 3/8" threaded rod. Secure material to be
cut with a vise of other suitable clamps. High alloy steel may
need lubrication while cutting to improve performance. Keep
front of tool against work while cutting and guide tool through
work. There are no benefits gained by using excessive force
while cutting. The 360° lever handle will lock in place once
throttle is depressed.


