background image

35

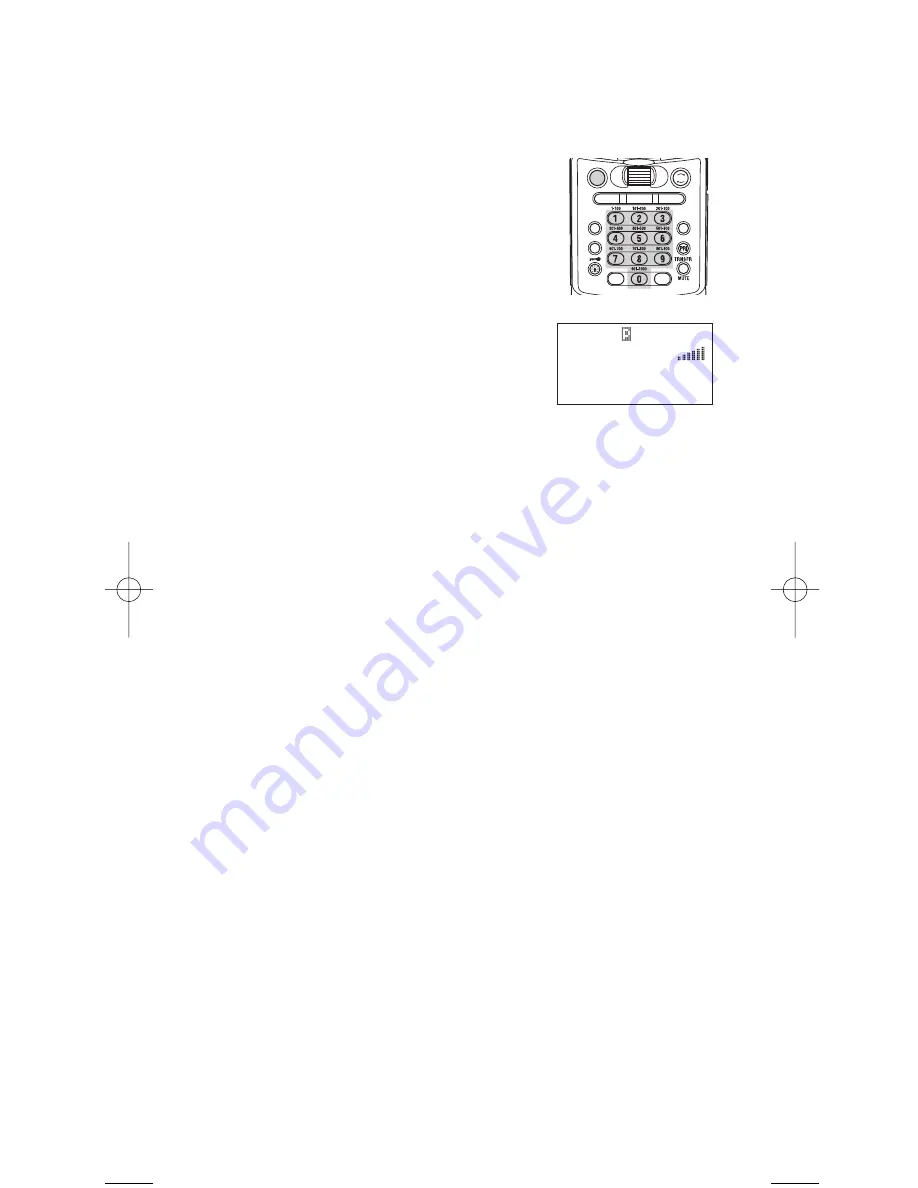
Changing the Priority Channel

You cannot eliminate the Priority Channel, but you can
change it to any one of the 100 available channels in each
bank.

1. Press 

HOLD/MAN

.

2. Select a new Priority Channel:

a. Enter the channel number using

the keypad.

b. Then press 

HOLD/MAN

again.

3. Press and hold 

PRI

for 2 seconds to

designate this channel as your new
Priority Channel.
Two beeps indicates that the Priority
Channel has been changed. The 

P

icon appears on the display.

Note

: • Priority in Trunking mode works just the same,

except you set them for talkgroup IDs, instead of
setting priorities for channels. The scanner only
checks priority talkgroups between transmission, 
in 4 second intervals.

• Priority Scan is disabled while 

M

E

or 

L

(Trunking

type) icons are illuminated (a beep will sound if you
try to scan). To make it possible, turn OFF each
function  then press 

PRI

to select 

PRIORITY ON

.

Priority Channel Plus Scan

You can scan only the Priority Channels (except for the lock
out channels) in the banks you selected. To activate Priority
Channel Plus 

(Only in Scan mode):

1. Press 

PRI

to select 

PRIORITY PLUS

.

2. Press 

PRI

to select 

PRIORITY ON

or 

PRIORITY

OFF

on the display to deactivate Priority Channel Plus

Scan.

Note:

Priority or Priority Plus Scan are disabled while Search
mode is selected.

HOLD/

MAN

SCAN

CH/
FRQ

MENU/BACK

L/O

.

SELECT

REVERSE

TRUNK

E

RSM

SEARCH

AIR/STEP

          C 001

 512.0000  FM

UHF TV 1

UNIDEN Group A 

UBC3300XLT OM  5/14/04  3:29 PM  Page 35

Summary of Contents for UBC3300XLT

Page 1: ...UBC3300XLTSCANNER ...

Page 2: ......

Page 3: ...eypad Equivalents 17 Programming 26 Storing Frequencies into Channels in Menu Mode 26 Deleting a Stored Frequency 27 Editing a Stored Frequency 27 Duplicate Frequency Alert 27 Transfer Frequencies 28 Storing Text Tags 28 Beep Alert 29 Programming Tips 30 Scanning 31 Storing Frequencies During Scanning 31 RF Attenuation Feature 32 Setting the Delay Mode for Frequency 32 Channel Lockout 33 Restoring...

Page 4: ...ween Scan List Memories 57 I Call Motorola EDACS 57 Multi Track 58 EDACS Reception 60 EDACS Tracking 60 Programming EDACS System Frequencies 60 An EDACS Trunked system 61 Special EDACS Features 62 EDACS SCAT 63 LTR Reception 64 LTR Tracking 64 Motorola Reception 65 Motorola Tracking 65 Fleet Map Programming 66 Selecting Preset Fleet Map 66 Programming a Fleet Map 67 Programming a Hybrid System 67 ...

Page 5: ...87 2950 FM 15kHz Offset 4 87 3000 107 9500 WFM 50 5 108 0000 136 9875 AM 12 5 108 0000 136 9916 8 33 6 137 0000 143 9875 FM 12 5 7 144 0000 145 9875 FM 12 5 8 146 0000 155 9900 FM 10 9 156 0000 157 4250 FM 12 5 10 157 4300 160 5900 FM 10 11 160 6000 162 0250 FM 12 5 12 162 0300 173 9900 FM 10 13 174 0000 215 9500 WFM 50 14 216 0000 224 9950 FM 5 15 225 0000 399 9500 AM 50 16 400 0000 440 0000 FM 1...

Page 6: ...rse Key 11 Earphone Jack 12 Volume ON OFF Control 13 Squelch Control 14 Remote Jack 15 VFO Control 16 Resume Key 17 AIR STEP Key 18 Search Key SEARCH 19 Numeric Keypad 20 Trunk Key TRUNK 21 Priority Key PRI 22 Transfer Mute Key TRNSFR MUTE 23 Enter Select Key E RSM 2 1 3 4 5 6 7 8 9 10 22 23 21 20 19 18 17 16 15 14 13 12 11 SEARCH SCAN UBC3300XLT AIR STEP CH FRQ MENU BACK L O SELECT REVERSE TRUNK ...

Page 7: ... Out Mode Indicator Scan Search Direction Indicator Chain Search Mode Indicator Air Service Search Mode Indicator Scan Mode Indicator ID Scan Mode Indicator ID Search Mode Indicator Channel Type Conventional Type Trunk Type Morola Tracking Type LTR Tracking Type EDACS Tracking Type Receiving Mode Indicators Signal Meter Battery Indicator ICON P L O SRCH SRVC SCAN ID SCAN ID SEARCH C M L E AM FM WF...

Page 8: ...ry Programming To receive an alert for activity on specific IDs while trunk tracking turn on the Beep Alert for that ID for example replace the frequency on channel 5 to 155 000 To receive an alert for activity on a specific channel turn on the Beep Alert for that channel Rotate the VFO control to enter the text and using RSM or HOLD MAN to move the cursor After the text is entered press UBC3300XL...

Page 9: ...ant to track Press To silence the scanner s audio output set the scanner to Mute On Press and hold Rotate the VFO control to enter the tag and use RSM or HOLD MAN to move the cursor and then press MUTE SEARCH To begin searching between the Range press To change the alpha tag on the specific search range of frequencies that you set do the following Rotate the VFO control to enter the tag and use RS...

Page 10: ...enforcement officials should be able to provide you with information regarding the laws in your community Changes or modifications to this product are strictly prohibited or operation of this product in any way other than as detailed by this Owner s manual Could void your authority to operate this product The screen displays used in this manual are representations of what might appear when you use...

Page 11: ... frequency in your scanner s memory which is used by someone you want to monitor For example the police in your area may broadcast on 460 500 MHz the fire department on 154 445 MHz the highway department on 37 900 MHz etc So when your scanner stops on a frequency you usually know who it is and more importantly you can stop on a channel and listen to an entire conversation This type of scanning is ...

Page 12: ...f scanning is difficult and frustrating TrunkTracker III changes this Not only does your new UBC3300XLT scan channels like a conventional scanner it actually follows the users of a trunked radio system Once you know a talkgroups ID you won t miss any of the action If you re a new scanner enthusiast you may want to read the first part of this manual and use your scanner in conventional mode before ...

Page 13: ... coverage is not continuous 10 Priority Channels You can assign one priority channel in each bank Assigning a priority channel allows you to keep track of activity on your most important channel s while monitoring other channels for transmissions You can also assign Trunking priority Talkgroups Priority Plus Scan Allows you to scan only priority channels Unique Data Skip Allows your scanner to ski...

Page 14: ... into an assigned bank CTCSS DCS The scanner can receive and search for subaudible tones LCD Back Light LCD illuminates when you press the Light Lock key You can select the lighting length of time in the Menu mode Battery Save In Scan Hold mode and no transmission your scanner automatically reduces its power requirements to extend the battery life 10 ...

Page 15: ...st program frequencies into available channels To obtain frequency information for your area contact your local dealer Information on the Internet If you have access to the internet you may want to visit the following website for additional information www bearcat1 com ...

Page 16: ...r Scanner Package If any of these items are missing or damaged immediately contact your place of purchase UBC3300XLT Hand held Scanner AC Adapter Charger AD 629 Ni MH Battery BP 250 Rubber Antenna Beltclip Operating Guide ...

Page 17: ... can use your scanner while the battery charges To fully charge the battery leave the AC Adapter Charger connected for 14 16 hours Note Disconnect the AC Adapter Charger from the unit when charging is complete Low Battery Indicator When the battery pack is low and needs to be charged appears on the display You will also hear a beep every 15 seconds as an audible alert HOLD MAN CH FRQ RSM SCAN AIR ...

Page 18: ...volume listening can lead to permanent hearing loss Set the VOLUME to the lowest setting before you begin listening After you begin listening adjust the VOLUME to a comfortable level Once you set the VOLUME do not increase it Over time your ears adapt to the volume level so a volume level that does not cause discomfort might still damage your hearing Connecting the Optional REMOTE Cable You can tr...

Page 19: ...ur scanner 1 Press HOLD MAN until you do not hear a signal 2 Make sure that the VOLUME is set to a comfortable listening level 3 Think of the Squelch Control as a gate Turn the SQUELCH control fully counter clockwise This raises the Squelch Gate so high that only very strong signals can get through 4 Turn SQUELCH clockwise until you hear a hiss This lowers the Squelch Gate so that everything gets ...

Page 20: ...an follow along Two things to remember are rotate the VFO through the menu and press E to execute the command For simplicity we have chosen to rotate the VFO control up or down in order to scroll through the menu and the E key for entering or executing a command Once you have pressed the E key and executed the final choice for instance ON or OFF the display backs up to the previous level of option...

Page 21: ...ther scanner using the numeric keypad or VFO control Use this Menu item to select the search range that you want to program You can program range 1 through 10 one at a time For each of the ranges the following options can be modified 1 CHAIN SEARCH You must turn Chain Search feature ON in order to use the Chain Search feature 2 SEARCH RANGE 1 RANGE Enter the upper and lower frequency limits of the...

Page 22: ...ns on any frequencies that are active within your search range s By selecting CTCSS or DCS you can set the radio to receive only a particular subaudible tone to be received during your search You can also lockout a particular CTCSS or DCS tone You may wish to do this if you want to search a range but not hear transmissions on any frequency that has a particular subaudible tone Note Through the Sys...

Page 23: ...g the E key in Scan Hold mode after programming a frequency This will bring up the Tone Data menu without having to navigate the Menu By doing this you will receive all transmissions on the frequency regardless of the subaudible tone except the one which you have locked Any transmissions with that tone will not be received 4 BEEP ALERT You can set a Beep Alert on a per channel basis to alert you w...

Page 24: ...annel basis with this Menu item 2 TRUNK Choose the Trunk bank The following options are available for the selected trunk bank only Repeat using a different trunk bank if necessary 1 TRUNK TYPE You will need to assign the correct trunking type for the bank you are about to program If you want to listen to a Motorola Type I system you will need to use this Menu option to assign the same If you do no...

Page 25: ... a Beep Alert to the ID Whenever that ID is active you will hear three beeps at the start of the transmission 4 DELAY You can set a delay for a trunk system on a bank by bank basis The delay time is 2 seconds and this setting can not be changed 5 ID LIST TAG Assign an alphanumeric tag to any or all of the 10 Scan Lists for the system During ID Scan Mode you will see the ID List Tag on the bottom t...

Page 26: ...Your UBC3300XLT defaults to I CALL OFF mode You can hear these conversations by using this Menu item to turn the I CALL function to ON In Search mode with I CALL ON you will hear both talkgroup calls and I CALLs You can also set I CALLs to I CALL ONLY during which you will monitor only I CALLs in Search mode You can also program I CALL IDs into Scan List memory OR 8 ID SCAN LIST LTR When scanning ...

Page 27: ...de you with the flexibility that you get with AFS The UBC3300XLT defaults to show the talkgroup number in AFS mode Agency Fleet Subfleet For details on AFS see pages 61 63 OR 0 END CODE MOTOROLA When this function is disabled the radio looks for squelch before returning to the control channel instead of waiting for the disconnect tone Only in rare instances will you need to adjust the default sett...

Page 28: ...t setting is 2 OFF 5 PC CONTROL Use this function to set the transfer speed baud rate at which your personal computer PC communicates with the scanner when downloading information into your scanner See page 72 for details 6 CLONE You can clone all the programming including frequencies talkgroups and alpha tags as well as bank settings and other parameters from one UBC3300XLT to another UBC3300XLT ...

Page 29: ... on any non trunked channel the scanner will begin to search for any subaudible tone that is being used on a transmitted frequency The scanner will check each CTCSS tone sequentially and it will find DCS tones instantly 9 BANK TAG Allows you to set an alphanumeric text tag for individual banks in the scanner 1 10 The 0 key represents bank number 10 For example you may wish to set the bank one text...

Page 30: ... VFO and pressing E 4 Select a channel a Enter the channel number using the keypad b Then press E 5 Select 1 FREQUENCY and press E a Enter the frequency number using decimal key and the keypad b Then press E 6 Enter the alpha tag and press E See page 28 7 The following display appears select the location you want Note To clear a mistake while entering the frequency press decimal key repeatedly unt...

Page 31: ...ENTIONAL by rotating the VFO and pressing E 3 Select the channel number you want to edit by rotating the VFO and pressing E 4 Select 1 FREQUENCY by rotating the VFO and pressing E 5 Edit the frequency by using decimal key and the keypad and pressing E Duplicate Frequency Alert If you enter a frequency which has been stored in another channel you will hear a beep and the channel stored displays WAR...

Page 32: ...er by storing text tags for easy identification of banks channel transmissions trunking talkgroup IDs etc The text tags can be set at the Menu mode Refer to Understanding the Menu System on page 16 For programming text tags for trunked talk group ID s please refer to page 49 Assigning a Bank Tag to a Bank 1 Press MENU BACK 2 Select 3 SYSTEM OPTION 9 BANK TAG by rotating the VFO and pressing E 3 Se...

Page 33: ...ng the letters press HOLD MAN RSM or decimal key repeatedly until the display is cleared Beep Alert The scanner can alert you with three beeps at the beginning of a transmission on an assigned frequency Assigning the Beep Alert to a Channel This alert can be set ON OFF for every channel in Conventional mode In conventional mode 1 Press MENU BACK 2 Select 2 SCAN OPTION 1 CONVENTIONAL by rotating th...

Page 34: ...gramming five new frequencies into channels 4 through 8 start with channel 4 After you finish programming a channel rotate the VFO up to go to the next higher channel Write down your programmed channels and frequencies and put them in a convenient place in case of accidental reprogramming Frequencies are rounded off according to the step of each channel When you are overwriting a tagged channel wi...

Page 35: ... scanning enter the bank s number on your keypad The bank s indicator will display again 3 During normal scanning the scanner skips unprogrammed or locked out channels 4 When a transmission is received the scanner stops on that channel When the transmission ends scanning resumes automatically Another method is as follows 1 Press HOLD MAN 2 While the VFO setting is in the channel mode rotate the VF...

Page 36: ...loading the scanner The RF attenuation is set at the Menu mode 1 Press MENU BACK 2 For Search mode select 1 SERVICE OPTION 2 CHAIN SEARCH 4 ATTENUATOR 1 ON by rotating the VFO and pressing E OR For Scan mode select 2 SCAN OPTION 1 CONVENTIONAL by rotating the VFO and pressing E Then select the channel number by rotating the VFO and pressing E Select 5 ATTENUATOR by rotating the VFO and pressing E ...

Page 37: ...LD MAN 2 Select a channel a Enter the channel number using the keypad b Press HOLD MAN again OR Rotate the VFO up or down to change the channel 3 Press L O to lockout the channel L O appears on the display Lockout in Scanning Mode If the scanner keeps stopping on a particular channel due to noise or frequent transmissions you may want to keep that channel from scanning 1 Wait until the scanner sto...

Page 38: ...eps when all the channels have been restored Priority Scan When Priority Scan is turned ON your scanner checks the priority channel in the banks you selected every 2 seconds for activity If a signal is present on the priority channel your scanner monitors the channel until the transmission ends then resumes normal scanning You can designate one channel in each bank as a Priority Channel By default...

Page 39: ... scanner only checks priority talkgroups between transmission in 4 second intervals Priority Scan is disabled while M E or L Trunking type icons are illuminated a beep will sound if you try to scan To make it possible turn OFF each function then press PRI to select PRIORITY ON Priority Channel Plus Scan You can scan only the Priority Channels except for the lock out channels in the banks you selec...

Page 40: ...en press SEARCH OR Another method is as follows 1 Press and hold SEARCH for 2 seconds 2 Select range number 1 RANGE and program the lowest and highest frequencies the same way as step 3 and 4 above Note The scanner can continuously search up to 10 ranges Chain Search You can select or deselect the search range freely by pressing the corresponding number with the keypad The scanner automatically in...

Page 41: ...rotating the VFO and pressing E 2 Select 1 ON by rotating the VFO and pressing E 3 Press SEARCH to search up to 10 ranges continuously Note If CHAIN SEARCH is OFF only 1 range can be searched When searching stops press RSM to resume searching When you rotate the VFO while searching you can change the search direction to up or down When searching in WFM it will stop before reaching the desired freq...

Page 42: ... L O when stopping at the frequency you want to skip or when in Search Hold mode Note You can program up to 200 skip frequencies The 201st skip frequency entered causes the first skipped frequency to unlock If all frequencies in the search range are set to skip a beep sounds and it moves to Search Hold mode To resume searching 1 Cancel the Frequency Skip set OR 2 Reset the Search Frequency range T...

Page 43: ...uencies you want to store Auto Storing The scanner automatically stores active frequencies if Auto Store feature is turned ON But the frequencies already stored can not be stored To make use of this feature set a search range first see page 36 then enter into the Menu mode If you start this feature without setting a search range NO LIMIT DATA appears on the display 1 Press MENU BACK 2 Select 1 SER...

Page 44: ...smission the scanner will begin searching all possible subaudible tones one of which may also be in use The scanner counts up through the CTCSS tones and instantly determines any possible DCS tone See page 90 for a listing of the tones that the UBC3300XLT decodes Note When Tone Search is active in Scan mode once the CTCSS or DCS display flashes a tone repeatedly meaning that it has found the tone ...

Page 45: ...ode press E instead of pressing L O on step 1 or 2 above CTCSS Continuous Tone Coded Squelch System DCS Digital Coded Squelch For example the scanner shows the following displays When Search mode and Tone Search are selected the display shows the frequency and tone data alternately If the Delay feature has been set while in Tone Search mode it resumes scanning after a 2 second delay C 001 512 0000...

Page 46: ...ypad You will see the range number that you have selected disappears from the display For more information on these options refer to the Menu Descriptions section and Additional Features section Options ATTENUATOR for more information see page 32 1 Press MENU BACK 2 Select 1 SERVICE OPTION 2 CHAIN SEARCH 4 ATTENUATOR by rotating the VFO and pressing E 3 Select 1 ON by rotating the VFO and pressing...

Page 47: ...hen you rotate the VFO while the Air Service Search is active you can change the search direc tion to up or down To stop the search press HOLD MAN Rotate the VFO to move up or down one programmed frequency or press RSM to resume searching When the unit is in the air service search a user can change the frequency step for air band between 12 5kHz and 8 33kHz by pressing the AIR STEP Air Service Sea...

Page 48: ...To restore all skipped frequencies press and hold L O for 2 seconds 44 SRVC 12 5k 118 0250 AM SERVICE SEARCH AIR ...

Page 49: ...ent When programming you decide which Location to program the Talk Groups This is similar to how you program frequencies into channels Here you need to program Talk Group ID s into Locations STEP 1 Selecting or Changing Trunking System Type Before using the Trunk Tracking system you must select the bank and trunk type You can only track one trunked system per bank total of 10 trunked systems 1 Pre...

Page 50: ... the VFO and pressing E 4 Select 2 TRUNK CHANNEL and enter the channel number by rotating the VFO and pressing E 5 Select 1 FREQUENCY and enter a frequency for the trunked system using the keypad and pressing E 6 Enter the alpha tag and press E See page 49 7 You can also change the step size in this menu See page 92 Note To clear a mistake while entering the frequency press decimal key twice and t...

Page 51: ...the trunking system users into categories For example you might use List 1 for police IDs List 2 for fire department IDs List 3 for emergency medical service IDs etc Once IDs are stored in lists you can scan them like you scan conventional frequencies and you can lockout any one up to 9 of the 10 scan lists by pressing the corresponding numeric key When an ID is active the scan list number will ap...

Page 52: ... an individual talkgroup see page 21 To enter a Type 2 Talk Group ID 1 Enter the ID you want to store 2 Press E To enter a Type 1 ID For a Type I ID the block number Fleet number and Subfleet number make up the talk group ID number Please see page 88 1 Enter the ID you want to store ID Block number Fleet number decimal key Subfleet number 2 Press E To enter an EDACS ID 1 Enter the ID you want to s...

Page 53: ...essing E 3 Select the bank number by rotating the VFO and pressing E You can also enter the Bank number by using the keypad bank 4 Select 3 TALK GROUP and ID location number by rotating the VFO and pressing E 5 Select 2 ALPHA TAG by rotating the VFO and pressing E 6 The cursor appears on the display Rotate the VFO to change letters and press HOLD MAN or RSM to move right or left Both capital and l...

Page 54: ...tively listen to a talkgroup in your Scan Lists TRUNKED SEARCH lets you hear all system talkgroup activity unit to unit I Calls may be received as well This is the best way to get started ID SEARCH HOLD works with Search mode to let you quickly freeze reception on an interesting transmission Or you can manually specify a talkgroup with Direct Entry in ID Hold ID LOCKOUT works with Search and Scan ...

Page 55: ...n List must always be active If you try and deactivate all the Scan Lists Scan List 1 will automatically be active 3 To restore a Scan List to active scanning press its number again 4 Press SEARCH to return to Trunk Tracking Search mode Remember When you press and hold TRUNK for 2 seconds you can switch Trunk Tracking modes Scan or Search Note While ID scanning to change all trunking banks to the ...

Page 56: ... in Motorola EDACS and LTR systems You should read the appropriate parts of this guide to understand the formats The display indicates the bank and the type of trunked system you are monitoring You can change this to display a bank tag by using the System Option menu Regardless of the system you won t know exactly who you are receiving until you listen for a while or refer to frequency guides or i...

Page 57: ...cularly important in trunked systems because in many areas water meters door alarms traffic signals and other mechanical devices are assigned IDs just like other users Also some departments scramble or encumber their communications and you may want to lock out these unintelligible broadcasts To Lockout an ID press L O when the ID you want to lockout displays The ID is locked out You can Lockout up...

Page 58: ...nking you can also check all IDs locked out 2 Select 2 SCAN OPTION 2 TRUNK by rotating the VFO and pressing E 3 Enter the bank number using the keypad and pressing E 4 Select 6 L O ID REVIEW Restoring Locked out IDs To unlock a single ID follow these steps 1 Press MENU BACK 2 Select 2 SCAN OPTION 2 TRUNK by rotating the VFO and pressing E 3 Select the bank number by rotating the VFO and pressing E...

Page 59: ...f 2 seconds is automatically set for each talkgroup for ID Scan mode and ID Search mode To set the delay feature enter into the Menu mode 1 Press MENU BACK 2 Select 2 SCAN OPTION 2 TRUNK by rotating the VFO and pressing E 3 Select the bank number by rotating the VFO and pressing E 4 Select 4 DELAY and pressing E 5 Select 1 ON or 2 OFF by rotating the VFO and pressing E Note If you want to verify t...

Page 60: ...ority will be checked first For example the Priority ID in List 1 will be checked before the Priority in List 2 etc Note This function does not work in LTR tracking Programming Scan Lists During Search To select a Scan List location and store an ID during Search mode follow these steps 1 When your scanner stops on an ID you want to store press HOLD MAN 2 Press TRNSFR and the smallest empty Scan Li...

Page 61: ...alkgroup Unit IDs will display differently according to the type of trunked system and will replace the n s shown here EDACS and MOTOROLA TYPE 1 innnnn MOTOROLA TYPE 2 7nnnnn Hint There are thousands of Unit IDs in typical systems but relatively few I Calls at a given moment so it is normally best to let the scanner receive any I Calls without trying to specify particular units I CALLS IN SEARCH M...

Page 62: ...Lists just like talkgroup IDs for use by ID Scan and Scan Hold modes To program a specific I Call Unit ID into a Scan Lists EDACS or Motorola Type 1 Press decimal key followed by the Unit ID digits then E Motorola Type 2 Press 7 followed by the Unit ID digits then E HINT There is a special code to let you receive all I Call IDs with a single Scan Lists entry Simply press decimal key 0 E This will ...

Page 63: ...bank or to the next active bank If the scanner finds that a talkgroup in one of your active Scan Lists you will begin to hear that communication and the scanner will of course display the proper talkgroup number and any alpha tag When the communication ends the scanner will wait for 2 seconds for any further replies and if none the scanner will move to the conventional channels in the same bank or...

Page 64: ...transmissions switch between the thirteen system frequencies Notice how the dotted line shows talkgroup 02 023 moving from channel to channel Your UBC3300XLT can clearly and automatically follow this talkgroup or any other as you select EDACS systems are organized in a logical way that keeps related talkgroups together Your scanner is designed to take maximum advantage of this organization to make...

Page 65: ...u see at a glance who you are monitoring And with the partial entry feature you can easily include nearby related channels in the same Fleet or Agency You can just as easily exclude entire unwanted Fleets and Agencies When in Search mode with the system frequencies programmed and your scanner locked to the control channel you can select a desired city by keying in the Agency part of the AFS talkgr...

Page 66: ... 4 levels By entering only the desired part of an AFS talkgroup you can select 2048 talkgroups 128 talkgroups 8 talkgroups or a single talkgroup For example you could program every talkgroup in a police department with just 4 key presses You can use the AFS Partial Entry feature anywhere that you need to specify EDACS talkgroup Your UBC3300XLT can also enter or display EDACS talkgroups in decimal ...

Page 67: ...ys the original talkgroups cease to be used If you were monitoring one of these talkgroups you might think there was no traffic but in fact the talkgroup was operating at the different temporary number If a talkgroup in your Scan List is patched your scanner will continue to receive it under its new identity until the patch has ended When a patch is being received the radio will display PATCH ID a...

Page 68: ...bers These numbers are in the form AHHUUU where A Area code 0 or 1 H Home repeater 01 through 20 U User ID 000 through 254 When the scanner receives a transmission on a channel set to the LTR mode it first decodes the LTR data included with the transmission In the ID Search mode the scanner stops on the transmission and displays the talkgroup ID on the display In the ID Scan mode the scanner only ...

Page 69: ...Type II systems are slightly more advanced because the central computer maintains a database which is used to determine each radio s affiliation s Changes to a Type II system are easier than Type I because the system manager only needs to update the database instead of reprogramming individual radios Another difference between the systems is that Type I systems are arranged in a Fleet Subfleet hie...

Page 70: ...y monitoring either a Type I or Hybrid systems These systems are applied only when STATUS BIT is OFF see page 69 You may also notice that you are missing responses when you hold on an active ID Unlike Type II Type I Hybrid systems require a Fleet Map that sets specific Fleet Subfleet parameters It is easy to select a Fleet Map for your scanner what is not always easy is selecting or programming a ...

Page 71: ...elect the size code for the first block by rotating the VFO 4 Press E The next available block displays 5 Repeat step 3 and 4 until you have selected a size code for each block For details about each size code see Fleet Map Size Codes in the Appendix Programming a Hybrid System A Hybrid system is simply a Type I system with some blocks designated as Type II blocks To program a Hybrid system follow...

Page 72: ...NK TYPE 1 ON 4 TYPE2 UHF or 5 TYPE2 VHF by rotating the VFO and pressing E 5 Select BASE CONFIG from 1 3 by rotating the VFO and pressing E 6 Enter a new Base Frequency with the keypad 7 Press E The display changes for entering the Spacing Frequency 8 Enter a new Spacing Frequency with the keypad Note You can only enter within a range of 5 100 kHz and 5 or 7 5 or 12 5 kHz multiples 9 Press E The d...

Page 73: ...ode and select 2 SCAN OPTION 2 TRUNK select bank number 9 STATUS BIT This feature does not apply to EDACS and LTR operation within the scanner Then rotate the VFO to change the setting 1 ON to 2 OFF and press E to program your change Control Channel Only Mode When this function is activated trunking is performed using Control Channel data only Voice channel also known as DATA channel frequencies d...

Page 74: ... 4 frequency plans This plan applies only when the scanner searches the 800 MHz range Since a default plan is automatically used when the scanner searches the 900 MHz range a user does not need to select a plan Note You can assign a Fleet Map to TYPE 1 or Hybrid systems scanned in Control Channel Only mode by going into the Menu You can also program IDs set a delay alpha tags and all the other par...

Page 75: ...ol Channel instead of waiting for the Disconnect Tone Only in rare instances will you need to adjust the default settings The condition to return to Control Channels depends on whether the signal is present or not To set this function to ON OFF select 2 SCAN OPTION 2 TRUNK select bank number 0 END CODE Select 1 DETECT or 2 IGNORE ...

Page 76: ...into the remote port in accordance with the direction of the mark which is on the right side of the scanner Plug the other end of the cable DB 9 serial connector into a personal computer s serial port A few PC s may require an adapter most will not Of course make sure your PC is turned ON To program your scanner You can program and control your scanner remotely from a PC After connecting the scann...

Page 77: ... 4800 9600 19200 bps adjustable Start Stop 1 bit 1 bit Data Length 8 bit Parity bit None Code ASCII code Flow Control None Return Code Carriage Return only Clone Mode You will need to purchase a Gender Changer and a null modem adapter Gender Changer cables are available as male to male or male to female Even if the Gender Changer you buy already has the male to male connectors you will still have ...

Page 78: ...urn the radios ON Prepare each scanner for clone mode as follows 1 Press MENU BACK 2 Select 3 SYSTEM OPTION 6 CLONE by rotating the VFO and pressing E 3 Determine the scanner that has the frequency data that you want to transfer This one must be set up as the Master Unit and the other must be set as the Slave Unit 4 On the scanner that is the Master Unit select MASTER then press E 5 On the scanner...

Page 79: ...is not successful the following error message will appear Note To clear ERROR press decimal key To exit the Clone mode press MENU BACK repeatedly Note Once you have completed the cloning of the scanners reset the scanners by turning the scanners OFF and then ON again This is particularly important to know if you wish to Clone another scanner right away CLONE MASTER UNIT CLONE COMPLETE MASTER UNIT ...

Page 80: ...Select 3 SYSTEM OPTION 1 DIMMER 2 DIMMER TIME by rotating the VFO and pressing E 3 Select 1 15 SECONDS or 2 INFINITE by rotating the VFO and pressing E Enter Lock You can lockout the keypad to prevent re programming of channels talkgroups and tones see page 84 1 Press MENU BACK 2 Select 3 SYSTEM OPTION 4 ENTER LOCK by rotating the VFO and pressing E 3 Select 1 ON by rotating the VFO and pressing E...

Page 81: ...FO and pressing E Reverse Mode This key will allow you to observe the reverse frequency of the repeater While pressing REVERSE the standard pair frequency will be displayed For a list of the standard pair frequencies refer to the table Reverse List in the Appendix If the frequency that you have chosen does not have an offset frequency the display will indicate ERROR and NO REVERSE Channel Step Sel...

Page 82: ...up ID Scan Lists To switch the setting for the VFO control press and hold HOLD MAN for 2 seconds This will change modes from Channel to Frequencies or Frequencies to Channels 1 In Conventional mode when the setting for the VFO is channel rotate the VFO to move up to step up through channels or down to step down through channels If you are in Trunk Manual mode you will step through Scan List memory...

Page 83: ... source of the noise If possible a higher elevation may provide better reception Cleaning Disconnect the power to the unit before cleaning Clean the outside of the scanner with a mild detergent To prevent scratches do not use abrasive cleaners or solvents Be careful not to rub the LCD window Do not use excessive amounts of water Repairs Do not attempt any repair The scanner contains no user servic...

Page 84: ...key again 2 Adjust the SQUELCH control 3 Check to see if all channels are Locked Out 4 Check to see if Key Lock is ON see page 76 Problem Suggestion Scanner won t track 1 Missing the Data Frequency 2 Change to a Type 1 Scanner setup Review Fleet Map Programming on page 66 Scanner won t stop 1 No IDs have been programmed during Scan List mode 2 The IDs you have stored are not active Scanner will no...

Page 85: ...81 Problem Suggestion When APCO P25 CARD NOT INSTALLED appears while you are using the unit Select 3 SYSTEM OPTION 0 P 25 CARD 2 DISABLE ...

Page 86: ...Hz FM 1240 0 1300 000 MHz FM Operating Temperature 20 C to 60 C 4 F to 140 F Scan Rate 100 channels per second MAX conventional mode Search Rate 100 steps per second MAX Normal Search 300 steps per second MAX Turbo Search Scan Delay 2 seconds Audio Output 240 mW nominal 8Ω internal speaker 38 mW nominal 32Ω stereo headphone 9 mW nominal 64Ω earphone Internal Speaker 8 ohms 36 mm outer diameter Pow...

Page 87: ...it is the sound of the system s central computer directing talkgroups to particular voice working frequencies within the system CTCSS Continuous Tone Controlled Squelch System refers to a system where the radio receivers are equipped with tone responsive devices which allow audio signals to appear at the audio output select voice processing such as scrambling or control repeater functions only whe...

Page 88: ...in her group all the patrol vehicles on the east side of town for example The units within this group comprise what is typically known as a talkgroup There are some communications which are direct unit to unit conversations where one individual converses with another individual The call is initiated by a radio and is directed to another single radio Within the system no one outside of these two us...

Page 89: ...ers to Motorola Type II systems There is a method by which special types of communications utilize unique talk group numbers For example if all emergency calls are set to occur on a specific talk group number then you will not miss the transmission even if you have not programmed all the talk group numbers With the Status Bit on and you have programmed the unique number then you don t have to worr...

Page 90: ...E CODE 4 SIZE CODE 4 SIZE CODE 12 SIZE CODE 12 SIZE CODE 4 SIZE CODE 4 SIZE CODE 4 SIZE CODE 4 Block 1 0 2 3 4 5 6 7 Preset Map 7 Size Code SIZE CODE 10 SIZE CODE 10 SIZE CODE 11 SIZE CODE 4 SIZE CODE 4 SIZE CODE 4 SIZE CODE 4 SIZE CODE 4 Block 1 0 2 3 4 5 6 7 Preset Map 8 Size Code SIZE CODE 1 SIZE CODE 1 SIZE CODE 2 SIZE CODE 2 SIZE CODE 3 SIZE CODE 3 SIZE CODE 4 SIZE CODE 4 Block 1 0 2 3 4 5 6 ...

Page 91: ...0 Block 1 0 2 3 4 5 6 7 Size Code SIZE CODE 3 SIZE CODE 3 SIZE CODE 11 SIZE CODE 4 SIZE CODE 4 SIZE CODE 0 SIZE CODE 0 SIZE CODE 0 Block 1 0 2 3 4 5 6 7 Size Code SIZE CODE 4 SIZE CODE 4 SIZE CODE 4 SIZE CODE 11 SIZE CODE 11 SIZE CODE 0 SIZE CODE 12 SIZE CODE 12 Block 1 0 2 3 4 5 6 7 Size Code SIZE CODE 3 SIZE CODE 10 SIZE CODE 10 SIZE CODE 11 SIZE CODE 0 SIZE CODE 0 SIZE CODE 12 SIZE CODE 12 Bloc...

Page 92: ...the last digit s identifies the Subfleet The details concerning how the size codes are selected by a Type I system designer are highly dependent on the specific needs of the systems users Some organizations may want many subfleets with only a few radios each while another organization may want only a few subfleets with many radios each Your task is to program your fleet map with the same size code...

Page 93: ... CODE 14 can only be assigned to Block 0 Since these SIZE CODES require multiple blocks you will be prompted for the next available block when programming a Fleet Map For example if you assign Block 0 as an SIZE CODE 12 you will be prompted for Block 2 the next block available instead of Block 1 And if you assign Block 0 as SIZE CODE 14 you would not see another prompt because all available blocks...

Page 94: ... 1 MHz 143 750 4 375 MHz 143 900 4 25 MHz 144 510 144 890 0 6 MHz 145 110 145 490 0 6 MHz 146 010 146 385 0 6 MHz 146 415 146 505 1 MHz 146 595 1 MHz 146 610 146 985 0 6 MHz 147 000 147 390 0 6 MHz 147 415 147 505 1 MHz 147 595 1 MHz 147 600 147 990 0 6 MHz 148 125 4 375 MHz 148 150 4 25 MHz 222 120 223 380 1 6 MHz 223 720 224 980 1 6 MHz 420 000 424 9875 5 MHz 425 000 429 9875 5 MHz 440 000 444 9...

Page 95: ...ON 2 OFF 1 ON 2 OFF 1 ON 2 OFF 1 CTCSS 2 DCS 3 OFF 1 ON 2 OFF 1 2 3 4 5 RANGE STEPS MODE ALPHA TAG TRUNK 1 SERVICE OPTION ENTER LOWER ENTER UPPER 1 5KHz 2 6 25KHz 3 7 5KHz 4 10KHz 5 12 5KHz 6 20KHz 7 25KHz 8 50KHz 9 100KHz 0 AUTO 1 AM 2 FM 3 WFM 4 NFM 5 AUTO PLAN 1 PLAN 2 PLAN 3 PLAN 4 1 ON 2 OFF UBC3300XLT Flow Charts ...

Page 96: ... FORM EDACS END CODE MOTOROLA CNTRL CH ONLY TYPE1 TYPE2 800 900 1 2 1 ON 2 OFF 1 ON 2 OFF 1 ON 2 OFF 3 ONLY 1 ON 2 OFF 1 ON 2 OFF 1 AFS 2 DECIMAL 1 DETECT 2 IGNORE TYPE2 800 TYPE1 SYSTEM 1 PLAN1 2 PLAN2 3 PLAN3 4 PLAN4 5 OFF TYPE 2 900 SYSTEM 1 ON 2 OFF FREQUENCY STEPS ALPHA TAG 1 5KHz 2 6 25KHz 3 7 5KHz 4 10KHz 5 12 5KHz 6 20KHz 7 25KHz 8 50KHz 9 100KHz 0 AUTO 1 2 3 4 5 6 7 8 9 1 2 ON OFF TYPE2 8...

Page 97: ...ODE BANK TAG SELECT BANK P 25 CARD BATTERY SAVE DIMMER LIGHT DIMMER TIME 1 ON 2 OFF 1 ON 2 OFF 1 ON 2 OFF 1 2400 bps 2 4800 bps 3 9600 bps 4 19200 bps 5 OFF MASTER SLAVE 1 ON 2 OFF 1 CSQ 2 TONE SQ 3 TONE SEARCH 1 ENABLE 2 DISABLE 1 ON 2 OFF 1 HIGH 2 MEDIUM 1 15SECONDS 2 INFINITE 3 SYSTEM OPTION ...

Page 98: ...atchobori Chuo ku Tokyo 104 8512 Japan declare under our sole responsibility that this equipment Uniden Bearcat model UBC3300XLT is in compliance with the essential requirements and other relevant provisions of the EMC R TTE and LVD Council Directives of the EU ...

Page 99: ...Memo 95 ...

Page 100: ...2004 UBZZ01315AZ ...

Reviews: