


UMAX Astra MX3 Owner’s Guide
43
Note:
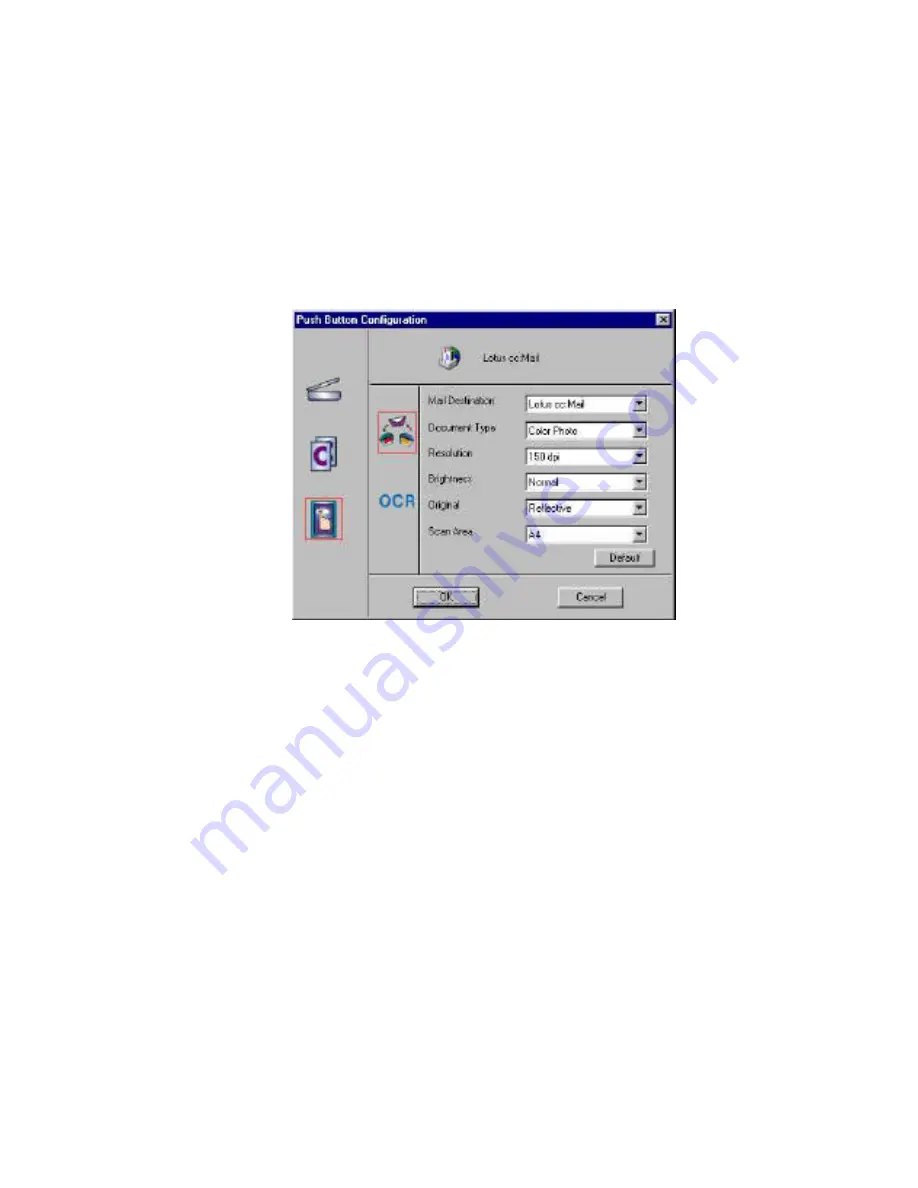
The Custom icon controls the values for both the E-mail and OCR
(optical character recognition) features. You configure the variables for each
function separately.
To configure the Custom button for the E-mail function:
1.
If the E-mail icon is not selected, (enclosed in a red box) click on the
E
-
icon.
2.
Select the e-mail application (only Microsoft Exchange and Lotus cc:Mail
are supported) to send the scanned image to, by clicking on the arrow to
the right of the Mail Destination field.
3.
Select the type of image you are scanning by clicking on the arrow to the
right of the Document Type field and choosing one of the available
document types from the pull-down menu.
4.
Select the desired resolution by clicking on the arrow to the right of the
Resolution field and choosing one of resolution presets from the pull-
down menu.
5.
Select a scanning intensity level (brightness) by clicking on the arrow to
the right of the Brightness field and choosing the desired brightness level
from the pull-down menu.
6.
Original indicates the type of material the original image is printed on.
Select either Reflective or Transmissive by clicking the arrow to the right
of the Original field.
7.
Select the file size for the scanned image by clicking on the arrow to the
right of the Scan Area field and choosing the desired dimensions from the
pop-up menu.


