background image

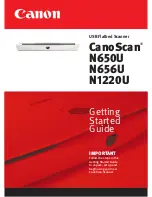
N650U/N656U/N1220U Getting Started

     1

English

Canon Color Image Scanner

CanoScan N650U/N656U/N1220U

Getting

   Started

• CanoScan, ScanGear and Canon Plug-in Module are trademarks of Canon Inc.
• Adobe, Adobe Acrobat and Adobe Photoshop are trademarks of Adobe Systems Incorporated.
• Macintosh, Power Macintosh and Mac OS are trademarks of Apple Computer, Inc., registered in

the U.S. and other countries.

• iMac is a trademark of Apple Computer, Inc.
• Microsoft and Windows are registered trademarks of Microsoft Corporation in the U.S. and

other countries.

• OmniPage Pro and OmniPage SE are trademarks of Caere Corporation.
• Other names and products not mentioned above may be trademarks or registered trademarks

of their respective companies.

Copyright © 2000 Canon Inc. All rights reserved.

Warning

When you use this product, you should pay attention to the following legal issues:

• Scanning of certain documents, such as bank notes (bank bills), government bonds

and public certificates, may be prohibited by law and may result in criminal and/or
civil liability.

• You may be required under law to obtain authorization from a person possessing

copyrights or other legal rights to the item being scanned.

If you are uncertain of the legality of scanning any particular item, you should consult
your legal adviser in advance.

Use of a shielded cable is necessary to comply with the technical

requirements of the EMC Directive.

Summary of Contents for CANOSCAN N650U

Page 1: ...ration Other names and products not mentioned above may be trademarks or registered trademarks of their respective companies Copyright 2000 Canon Inc All rights reserved Warning When you use this prod...

Page 2: ...N650U N656U N1220U Getting Started Detailed information on how to use Canon Plug in Module CS U Canon Plug in Module CS U User s Guide Electronic Manual This Guide Electronic Manual Detailed informat...

Page 3: ...e scanner Weighing only 1 5 kilograms 3 3 pounds this scanner is so light that it can easily be placed or moved to suit your convenience Scans Books and Other Thick Materials Two stage document cover...

Page 4: ...operate with home assembled or private label PCs The scanner cannot be operated when connected to a USB port on an expansion card Macintosh Computer Macintosh with built in USB ports Operating System...

Page 5: ...lling the Driver Software 17 3 Installing the Application Software 22 4 Testing the Scanner Operation 26 CHAPTER 3 Using the Macintosh Platform 1 Installing the Software 33 2 Connecting to the Compute...

Page 6: ...bols This symbol indicates precautions that must be taken when operating the equipment Ensure that you read all warnings This symbol indicates supplementary operating procedures and other useful infor...

Page 7: ...th flammable liquids fire or electrical shock may result Do not place the following objects on top of the equipment If the internal electrical parts come in contact with these objects fire or electric...

Page 8: ...nt If these fluids enter this equipment and contact the electrical parts fire or electrical shock may result If anything enters the equipment immediately unplug the USB cable and contact your retailer...

Page 9: ...hat the cable reach from the scanner to the electrical outlet Do not set up in areas where there is an excessive fluctuation in temperature or humidity Also do not move the equipment from high humidit...

Page 10: ...ter after removing it from the package First inspect the package contents and then release the lock that protected the scanner during transport Failure to release the lock may damage the scanner 1 Ins...

Page 11: ...and Macintosh versions of the software Since it contains vital information and software that cannot be redistributed store it in a safe place Please see page 59 of this guide for information regarding...

Page 12: ...Mark Align document edges here Document Glass Place documents here Scanning Unit Core component of the scanner comprising the light source and sensing units Usually found at the front of the scanner...

Page 13: ...e into the computer s USB port If left locked a malfunction or problems may occur 1 Peel off the seal at the front of the scanner 2 Gently turn the scanner over as illustrated Do not tilt the scanner...

Page 14: ...s Although the installation dialogs for the driver software for Windows 2000 Professional hereafter Windows 2000 may differ slightly the basic procedures are the same Please note that you must log on...

Page 15: ...cted devices are off If the power is on shut down the computer and peripheral devices in that order 2 Confirm that the scanning unit has been unlocked p 13 Make sure to unlock the scanner before plugg...

Page 16: ...not be properly detected by the computer Attach the scanner directly to a USB port on the computer or to a 500 mA self powered USB hub The scanner does not have a power switch The power is activated a...

Page 17: ...described in this guide If the installation does not proceed smoothly first read the Troubleshooting section on the CanoScan Setup Utility CD ROM and apply its recommendations before reinstalling the...

Page 18: ...4 Click the Next button 5 Confirm that the Search for the best driver for your device option is selected and click the Next button 6 Place the CanoScan Setup Utility CD ROM in the computer s drive 7...

Page 19: ...etc and find the Scangear folder Select the English folder within it and click the OK button 10 Click the Next button If you click the Next button before the computer has a chance to finish reading th...

Page 20: ...rive If you are prompted to insert the Windows 98 CD ROM during installation follow the instructions on the next page DO NOT PRESS THE CANCEL BUTTON 12 Click the Finish button when the following dialo...

Page 21: ...lick the Browse button A dialog will appear 3 Select the CD ROM drive and click the OK button You will return to the Copying Files dialog 4 Click the OK button When the files are copied the window sho...

Page 22: ...s It can stitch images together convert file formats and create albums This program is hereafter referred to as PhotoStudio 2000 ArcSoft PhotoBase Approx 50 MB A multimedia management program that can...

Page 23: ...uage After you select a language the following window will automatically display If the CanoScan Setup Utility menu window does not display double click the My Computer icon then the CD ROM icon 2 Cli...

Page 24: ...m Do not restart the computer or remove the CD ROM from the drive while the installation is proceeding unless so directed by the CanoScan Setup Utility These actions would disrupt the installation Do...

Page 25: ...oolbox English Disk1 Setup exe To install PhotoStudio 2000 D Pstudio Setup exe To install PhotoBase D Pbase Setup exe To install Caere OmniPage Pro D Omnipage English Setup exe To install Adobe Acroba...

Page 26: ...n program such as PhotoStudio 2000 or ScanGear Toolbox CS For details please read What is a TWAIN Driver p 47 Starting ScanGear Toolbox CS 1 Place your item on the document glass as illustrated Open t...

Page 27: ...eview the image approximately as it will be scanned If required the item can be repositioned or the scanning settings changed to obtain an optimal image 1 Click the Preview button When the calibration...

Page 28: ...the mouse button You can change the scan area by dragging one of the frame handles black dots You can move the scan area by clicking inside it and dragging You can deselect the scan area by clicking...

Page 29: ...en the progress bar reaches 100 The ScanGear CS U window will close Never lift the document cover during the scanning process The scanned image will be saved to the C drive in the My Documents folder...

Page 30: ...k the close box icon at the window s upper right The size of the image in the window will depend on the scanning resolution used For ScanGear CS U operating details please read Using ScanGear CS U on...

Page 31: ...r monitor choose 75 dpi For scanning print photos and magazine clippings choose 150 300 dpi For printing on a inkjet printer choose a resolution approximately half the printer s rating 180 dpi 360 dpi...

Page 32: ...scanner with an unaltered first generation iMac Bondi blue iMac you will need to update the firmware and system and possibly upgrade the Mac OS For more information please read the Troubleshooting top...

Page 33: ...scanners and digital cameras and process them with editing and retouching tools special effects and enhancements This program is hereafter referred to as PhotoStudio 2000 ArcSoft PhotoBase Approx 2 MB...

Page 34: ...e computer The software should be installed without the scanner being connected to the computer 3 Turn on the computer 4 Place the CanoScan Setup Utility CD ROM in the computer drive The language sele...

Page 35: ...the software is being installed in this example you may selectively install only the programs you require Programs that have the mark removed by clicking them will not be installed Please note that Ca...

Page 36: ...ox Installer To install PhotoStudio 2000 PhotoStudio English ArcSoft PhotoStudio To install PhotoBase PhotoBase English ArcSoft PhotoBase To install OmniPage SE OmniPage English OmniPage 8 SE Installe...

Page 37: ...he scanner to the computer Please position the scanner in a safe and stable location as described in Setup and Operating Conditions p 9 1 Confirm that the scanning unit has been unlocked p 13 Make sur...

Page 38: ...detected by the computer Attach the scanner directly to a USB port on the computer or to a 500 mA self powered USB hub The scanner does not have a power switch The power is activated as soon as the co...

Page 39: ...m an application program such as PhotoStudio 2000 or CanoScan Toolbox CS For details please read What is a Plug In p 49 Starting CanoScan Toolbox CS 1 Place your item on the document glass as illustra...

Page 40: ...quick trial scan used to confirm the positioning size and coloring of the item Place an item on the scanner and preview the image approximately as it will be scanned If required the item can be repos...

Page 41: ...the image area you wish to scan The mouse cursor will change to a shape 2 Hold the mouse button down and drag the mouse diagonally to include the area you wish to scan A dotted frame crop frame will a...

Page 42: ...an button The scanner will start the final scan The progress bar will show how the scan is progressing The scanned image will display in the CanoScan Toolbox CS image editing window Never lift the doc...

Page 43: ...se read Using Canon Plug in Module CS U on page 48 or the Canon Plug in Module CS U User s Guide electronic manual For CanoScan Toolbox CS operating details please read Scanning with CanoScan Toolbox...

Page 44: ...e File Size Estimates for Scanning a Letter Size Original in Color 100 dpi 3 MB 300 dpi 26 MB 600 dpi 105 MB 1200 dpi 418 MB Resolution Guidelines For uploading to a web site or viewing on a computer...

Page 45: ...electronic manuals 1 Using ScanGear CS U 46 2 Using Canon Plug in Module CS U 48 3 Scanning with ScanGear Toolbox CS 50 4 Scanning with CanoScan Toolbox CS 54 5 Scanning with ArcSoft PhotoStudio 2000...

Page 46: ...AIN drivers Window in the Simple Mode All you need do is select the Image Type to scan immediately at the optimal settings Window in the Advanced Mode Set the Color Mode and Output Resolution to scan...

Page 47: ...ectronic Manual Place the CD ROM in the drive click View the Electronic Manuals and click ScanGear CS U For details please read Viewing Electronic Manuals with Adobe Acrobat Reader p 59 What is a TWAI...

Page 48: ...plication program It is also called a plug in module see the next page for information about plug in modules Click the Tone Adjustment button to access five methods of adjusting the image coloring Too...

Page 49: ...or other plug in compliant application programs Please refer to each program s manual for the correct procedure since it varies between programs How to View the Electronic Manual Place the CD ROM in...

Page 50: ...ter To use the email function a MAPI compliant Messaging Application Programming Interface program such as Microsoft Outlook or Microsoft Exchange must be installed and enabled To use the fax function...

Page 51: ...ox CS can greatly simplify scanning procedures The following shows the advantages gained when ScanGear Toolbox CS is used with the bundled program PhotoStudio 2000 The chart shows the procedural diffe...

Page 52: ...To Scan without Displaying the ScanGear CS U Window 1 Click the Settings button on the toolbar to display the ScanGear Toolbox CS Settings dialog 2 Click the Custom1 tab 3 Place a check in the Easy A...

Page 53: ...lick the Settings button on the toolbar to display the ScanGear Toolbox CS Settings dialog again 2 Click the Prefs tab 3 Select Custom1 in the When Scanner Push Button pressed field 4 Click the OK but...

Page 54: ...applications to the toolbar click the Unassigned buttons and select the application files Convenient Applications of CanoScan Toolbox CS Selecting or performing repetitive scanner functions with one t...

Page 55: ...on and select Programs ArcSoft PhotoStudio 2000 and PhotoStudio 2000 PhotoStudio 2000 will start 2 Click the File menu and select Acquire ScanGear CS U will start and display its main window Macintosh...

Page 56: ...button and select Programs ArcSoft PhotoBase and PhotoBase 2 0 PhotoBase will start 2 Click the Edit menu and select Acquire In the Select Source dialog select CanoScan N650U N656U or CanoScan N1220U...

Page 57: ...Software Windows 1 Click the Windows Start button and select Programs Caere Applications and OmniPage Pro 9 0 OmniPage Pro will start 2 Click the Scan Image button on the toolbar or open the Process...

Page 58: ...d image will display in OmniPage Pro You must have previously selected Canon Plug in Module CS U as the scanner driver To do this open the Settings menu and select Settings Panel or Select Scanner The...

Page 59: ...intosh PhotoStudio 2000 User s Guide PhotoBase User s Guide OmniPage User s Guide An electronic manual is a manual that can be read on a computer display using the reader software Adobe Acrobat Reader...

Page 60: ...ct Quit 4 If you have finished viewing all manuals close Adobe Acrobat Reader When Adobe Acrobat Reader closes the manual selection window of the CanoScan Setup Utility will display 5 Close the CanoSc...

Page 61: ...English Before Transporting the Scanner 62 Care and Maintenance 63 Major Specifications 64 System Information 65 APPENDICES...

Page 62: ...items on the document glass platen close the document cover and then connect the USB cable to the computer s USB port Check to see that the scanning unit has correctly returned to the front of the sca...

Page 63: ...anner s back panel Immediately remove any moisture that contacts these components by wiping them with a dry cloth Do not use a sodden cloth or apply a liquid directly to any portion of the scanner Any...

Page 64: ...1 Color 16 2 msec line Grayscale 5 3 msec line B W 5 3 msec line Preview Speed Approximately 15 seconds Start Button Yes Interface USB Connectors USB B type Maximum Document Size A4 Letter 216 x 297...

Page 65: ...an expiration date of seven years after production ceases Replacement parts refer to any part that is required for the optimal operation of the equipment Date of Purchase Dealer Tel Dealer Address Sc...

Page 66: ...hout notice 3 Notwithstanding the considerable care taken in preparing this guide please note that Canon Inc does not accept liability for any results arising from the operation of the equipment or so...

Reviews: