58
N650U/N656U/N1220U Getting Started
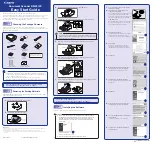
Macintosh
1. Open the [OmniPage 8 SE Folder] folder and double-click the
[OmniPage 8 SE] icon. OmniPage SE will start.
2. Click the [Scan Image] button on the toolbar, or open the
[Process] menu and select [Scan Image]. Canon Plug-in Module
CS-U will start and display its control panel.
3. Select [Black & White] as the scan mode and [OCR(300dpi)],
[OCR(400dpi)] or [OCR(600dpi)] as the output device. Click the
[Scan] button. The scanned image will display in OmniPage Pro.
• You must have previously selected Canon Plug-in Module CS-U
as the scanner driver. To do this, open the [Settings] menu and
select [Settings Panel] or [Select Scanner]. Then select [CanonPI
CS-U 3.8].
• If the toolbar button displays as [Load Image], select [Scan
Image] from the button below it. Or if the Process menu item is
labeled [Load Image], open the [Process] menu and select
[Process Settings] and [Scan Image].
How to View the Electronic Manual
Place the CD-ROM in the drive, click [View the Electronic Manuals]
and click [Caere OmniPage Pro/SE]. For details, please read
Viewing
Electronic Manuals with Adobe Acrobat Reader (p. 59)
.