background image


19 


Step 7  

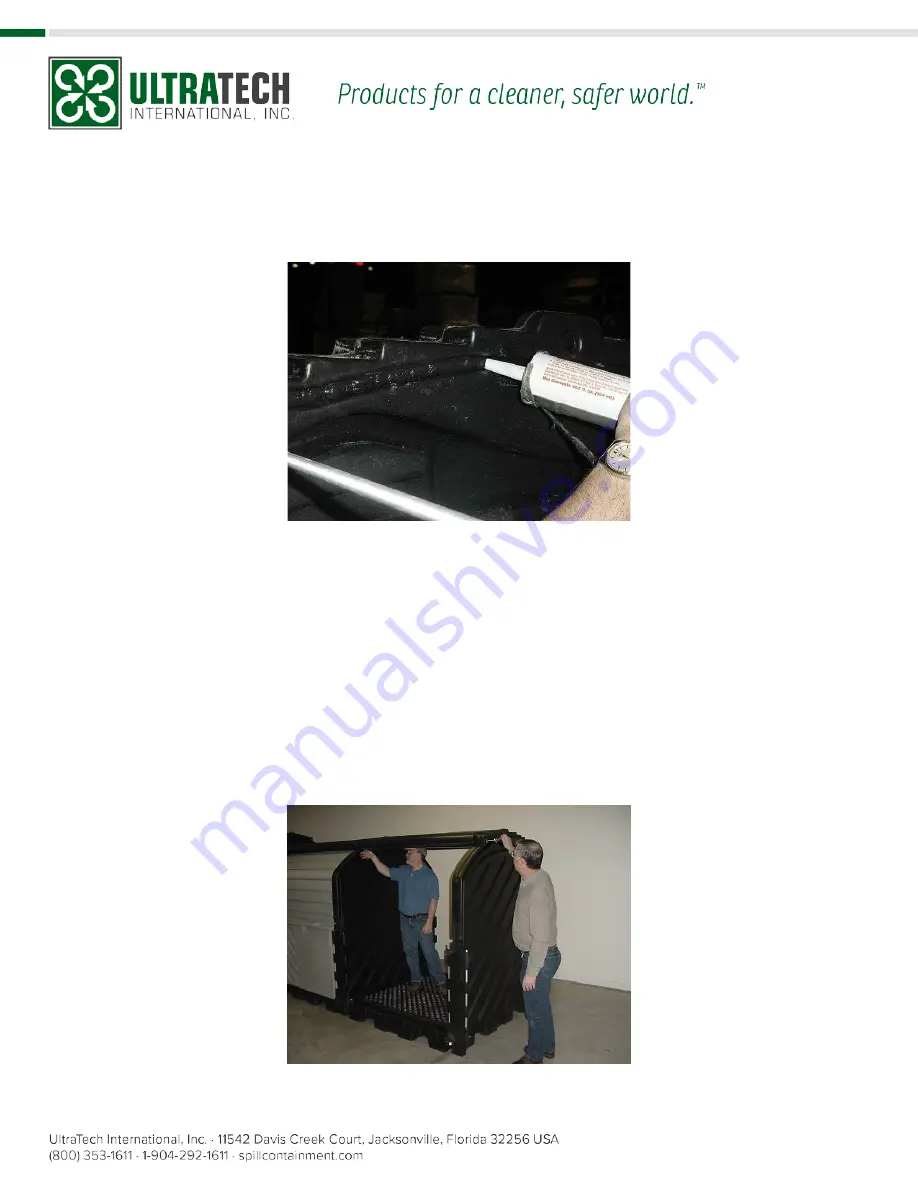
Thoroughly caulk (23) the interior track of the center walls (8) the full length and 

depth of the groove that mates with the roof tongue.  Caulk as shown in the 

photograph.  


Step 8 

Place the roof (9) into the interior wall grooves.  Once the roof is into the 

grooves, thread the top two interior wall nut assemblies (1) onto the threaded 

rods (2).  Using a 9/16” wrench, hold the interior wall nut assembly (1) on the 

interior wall (8) from turning, while using a 9/16” socket and ratchet on the 

outside of the other interior wall.  Tighten the unit until the roofline starts to 

bow.  Make sure the roof tongues are in the grooves of the walls.  Repeat for the 

other interior wall nut assembly (1).  Tighten the four jam nuts (3) to the interior 

wall nut assemblies (1) on the top two threaded rods(2). 


Summary of Contents for Ultra-Hard Top P8 Plus

Page 1: ...us 9654 9655 Ultra Hard Top P20 Plus 9656 9657 4 Drum Hard Top Extension Kit 9658 9659 Shown 9652 12 Drum Ultra Hard Top P12 Plus assembled Note 2 people will be required to assemble any of the roll t...

Page 2: ...ly Part 1 Page 7 8 Parts List for the 12 Drum Roll Top Hardcover Sub Assembly Part 1 Page 9 Exploded Views for the 12 Drum Roll Top Hardcover Sub Assembly Part 2 Page 10 11 Parts List for the 12 Drum...

Page 3: ...on page 21 when adding the End Wall unit to complete the assembly 9656 9657 Ultra Hard Top P20 Plus This unit comes as three 4 Drum units and two Extender Kits Two 4 drum unit will consist of one End...

Page 4: ...4...

Page 5: ...5...

Page 6: ...c Rod Cover 4 11 3 8 x 1 1 2 Flat Washer 4 12 3 8 16UNC x 59 1 2 L Threaded Rod 8 13 3 8 16UNC x 2 Hex Head Bolt 2 14 End Wall 2 15 Right Hand Door 4 16 Left Hand Door 4 17 Hinge Pin Tube 8 18 Roll Do...

Page 7: ...7...

Page 8: ...8...

Page 9: ...oof 2 10 Black Plastic Rod Cover 4 11 3 8 x 1 1 2 Flat Washer 2 12 3 8 16UNC x 59 1 2 L Threaded Rod 4 13 3 8 16UNC x 2 Hex Head Bolt 1 14 End Wall 1 15 Right Hand Door 4 16 Left Hand Door 4 17 Hinge...

Page 10: ...10...

Page 11: ...11...

Page 12: ...stic Rod Cover 2 11 3 8 x 1 1 2 Flat Washer 2 12 3 8 16UNC x 59 1 2 L Threaded Rod 4 13 3 8 16UNC x 2 Hex Head Bolt 1 14 End Wall 1 15 Right Hand Door 2 16 Left Hand Door 2 17 Hinge Pin Tube 4 18 Roll...

Page 13: ...13...

Page 14: ...14...

Page 15: ...Head Bolt 1 7 4 Drum Heavy Duty Pallet Sump W Grates 1 8 Interior Wall 1 9 Roof 1 10 Black Plastic Rod Cover 2 15 Right Hand Door 2 16 Left Hand Door 2 17 Hinge Pin Tube 4 18 Roll Door 2 19 20UNC x 1...

Page 16: ...comes out the whole way Repeat for the opposite side Take a pair of channel locks or pliers and pull out the hinge pin tube 17 from the hinged door 15 or 16 Repeat for the other three doors Step 2 Re...

Page 17: ...Note The threaded rod may come off as well The threaded rod must be removed anyways Make sure you remove the top 2 nuts threaded rods first This will allow the roof to be removed safely Save these ro...

Page 18: ...2 3 10 go on the bottom Note The jam nuts 3 and black covers 10 should already be on the threaded rods if not please install them before attaching the threaded rods 2 Step 6 Slide the pallet 7 back i...

Page 19: ...nterior wall nut assemblies 1 onto the threaded rods 2 Using a 9 16 wrench hold the interior wall nut assembly 1 on the interior wall 8 from turning while using a 9 16 socket and ratchet on the outsid...

Page 20: ...er there should not be a gap between the roof and sidewall in this area Wipe off or smooth out any sealant that may have squeezed out of the seams Step 10 Place the top edge of the roll top door 18 in...

Page 21: ...inge pin tube is fully seated all the way through the hinge holes Repeat this step for the remaining right door 15 and to the remaining left doors 16 Step 12 Tighten the bottom two threaded rods 2 by...

Page 22: ...installed Note If this is an existing assembly with an interior wall 8 on the end The hex head bolt 6 and hardware will need to be removed from the roof 9 and interior wall 8 It will be reused in Ste...

Page 23: ...es of the walls 8 14 Once in place start the top two washer 11 and locknuts 5 onto the threaded rods 12 Using your wrench hold the interior nut assembly 1 from moving Then tighten the locknut 5 until...

Page 24: ...ea Wipe off or smooth out any sealant that may have squeezed out of the seams Note Hex head bolt 13 goes on the end wall Step 18 Place the top edge of the roll top door 18 into the notches of the side...

Page 25: ...d tap the hinge pin tube with a hammer until the hinge pin tube is fully seated all the way through the hinge holes Repeat this step for the remaining right door 15 and to the remaining left doors 16...

Page 26: ...26 Step 21 Place the black plastic caps 22 on the outside exposed threads...

Reviews: