EN
UltiMaker S7
Installation and user manual
14
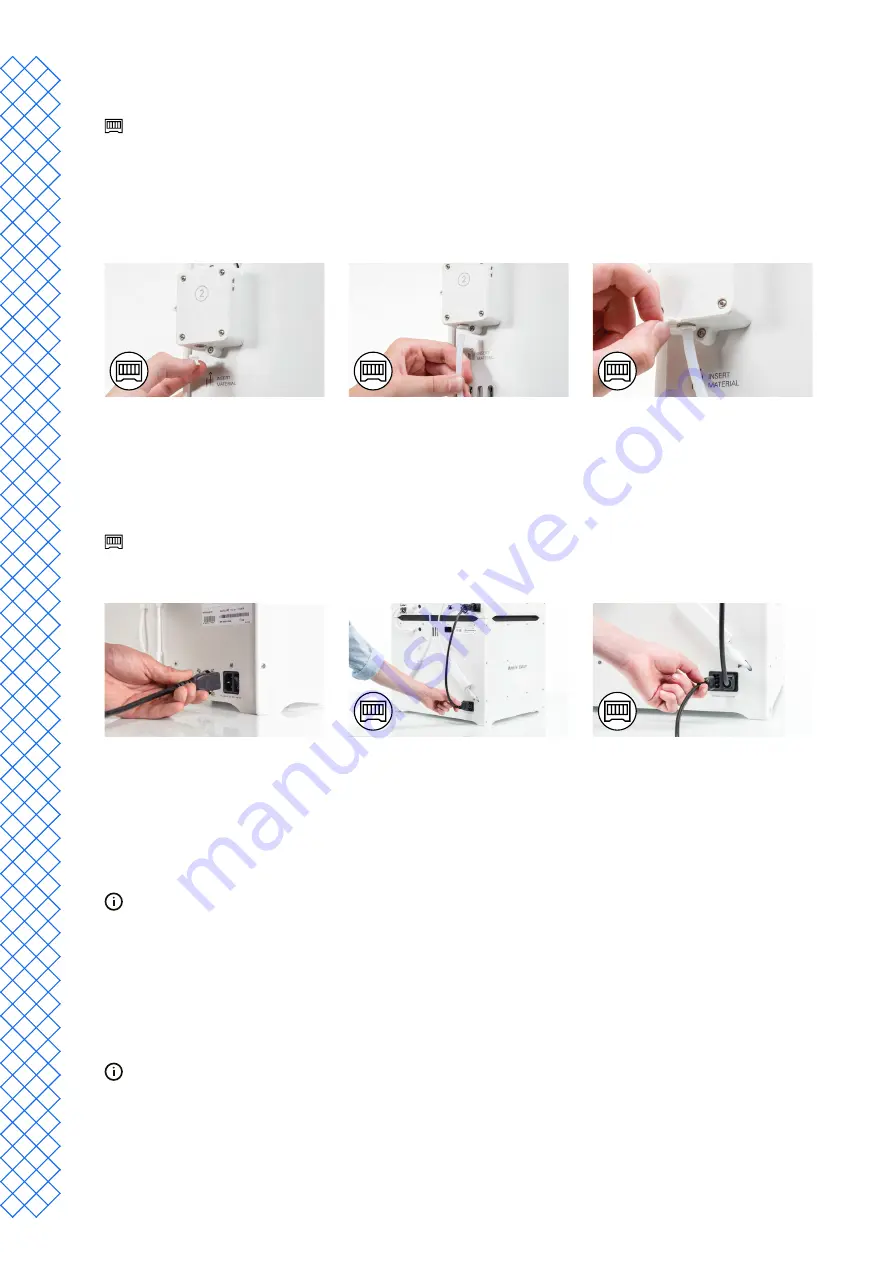
Connect the Material Station Bowden tubes
This section describes how to connect the Bowden tubes of the Material Station to the feeders of the
UltiMaker S7. If you do not have a Material Station, skip this section.
1. Insert a tube coupling collet in the bottom of each feeder of the UltiMaker S7.
2. Insert the left Bowden tube of the Material Station into the left feeder, and the right Bowden tube
into the right feeder
3. Secure the Bowden tubes with clamp clips.
Connect the power cable
1. Connect the power cable to the power socket at the back of the printer.
2. Plug the other end of the cable into a wall outlet.
If the UltiMaker S7 is installed in combination with a Material Station, first connect the power extension cable.
Connect one side to the printer and the other to the double power entry port of the Material Station. Connect
the power cable to the Material Station and the other end to a power outlet.
3.4 Welcome setup
To perform the setup steps, turn on the printer with the power switch at the back. You will first be asked to select
your preferred language. After this, the welcome setup will appear on the touchscreen. Follow the steps on the
touchscreen and described on the next pages of this user manual.
The language on the printer can always be changed later. Find this option in the
Preferences
menu, under
Settings
→
Language
.
Build plate
In this step of the welcome setup, you must confirm that you have installed the flexible build plate. If you have not
yet done so, follow the instructions in
section 3.3
to correctly place the flexible build plate.
If the build plate is not recognized by the printer, it is not installed correctly. Ensure the plate is fully aligned
with the back of the base plate, so the build plate detection sensor is activated.
Summary of Contents for S7
Page 4: ...1 Safety and compliance...
Page 8: ...2 Introduction...
Page 11: ...3 Installation...
Page 20: ...4 Operation...
Page 29: ...5 Maintenance...
Page 33: ...6 Troubleshooting...
Page 36: ...7 Warranty...


