background image


54 

http://www.tyan.com 

3.4.4  DMI Event Logging 

This section allows you to fine tune the DMI Event Logging configuration. 


Event Log Capacity 

It reports the space available in the DMI event log.  If set to [Full], the event log has 
no more available space to store DMI events. (read only) 

Event Log Validity  

It reports the validity of the DMI event log. (read only) 

View DMI Event Log 

It allows you to view the contents of the DMI event log. (read only) 

Event Logging 

Select [Enabled] to allow logging of DMI events. 
Options: 

Enabled

 / Disabled 

Mark DMI Events as Read 

Press [Enter] to mark DMI events as read. 

Clear all DMI Event logs 

When set to [Enabled], BIOS event log will be cleared.  
Options: 

Disabled

 / Enabled 

Summary of Contents for S5211

Page 1: ...on Phoenix Phoenix AwardBIOS are trademarks of Phoenix Technologies Microsoft Windows are trademarks of Microsoft Corporation SuSE is a trademark of Novell IBM PC AT and PS 2 are trademarks of IBM Corporation Notice Information contained in this document is furnished by MiTAC International Corporation and has been reviewed for accuracy and reliability prior to printing MiTAC assumes no liability w...

Page 2: ...essor and Cooling Fan 24 2 7 Attaching Drive Cables 27 2 8 Installing Add in Cards 28 2 9 Installing Optional SO DIMM Modules 29 2 10 Connecting External Devices 30 2 11 Installing the Power Supply 31 2 12 Finishing Up 31 Chapter 3 BIOS Setup 3 1 About the BIOS 33 3 2 Main BIOS Setup 35 3 3 Main Menu 36 3 4 Advanced Menu 43 3 5 Security Menu 62 3 6 Power Menu 63 3 7 Boot Menu 64 3 8 Exit Menu 65 C...

Page 3: ... 66 33 IDE cable 6 x Serial ATA cables 1 x USB2 0 cable 1 x S5211 S5211 1U user s manual 1 x S5211 S5211 1U Quick Reference guide 1 x TYAN driver CD 1 x I O shield If any of these items are missing please contact your vendor dealer for replacement before continuing with the installation process ...

Page 4: ...4 http www tyan com NOTE ...

Page 5: ...l Core TM 2 Extreme Intel Core TM 2 Quad processor Q6000 sequence Intel Core TM 2 Duo processor E6000 sequence 1333 1066 800 FSB supported Expansion Slots S5211 Two 2 PCI E x 16 slots w x8 bus NOTE If a PCI E x16 VGA adapter is inserted into PCI E slots the VGA card will only work at PCI E x1 speed this is a chipset limitation Two 2 PCI X 1 0 64 133 slots Two 2 32 33 PCI 2 3 slots S5211 1U One 1 P...

Page 6: ...ring Watchdog timer support Port 80 code display LED Back Panel I O Ports Stacked PS 2 mouse keyboard ports Stacked 2 USB ports RJ45 port for OPMA One 9 pin COM port One 15 pin VGA port Two side by side RJ 45 ports Optional Modules M3295 IPMI 2 0 Remote System Management card Renesas H8S2167 BMC controller BT KCS logging support IPMI over LAN Remote power on off and reset M3296 IPMI 2 0 Remote Sys...

Page 7: ...motherboard from the antistatic bag Unplug the power from your computer power supply and then touch a safely grounded object to release static charge i e power supply case For the safest conditions TYAN recommends wearing a static safety wrist strap 2 Hold the motherboard by its edges and do not touch the bottom of the board or flex the board in any way 3 Avoid touching the motherboard components ...

Page 8: ...tyan com 2 1 Board Image Toledo i3210W S5211 This picture is representative of the latest board revision available at the time of publishing The board you receive may or may not look exactly like the above picture ...

Page 9: ...p www tyan com Toledo i3200R S5211 1U This picture is representative of the latest board revision available at the time of publishing The board you receive may or may not look exactly like the above picture ...

Page 10: ...10 http www tyan com 2 2 Block Diagram NOTE If a PCI E x16 VGA adapter is inserted into PCI E slots the VGA card will only work at PCI E x1 speed this is a chipset limitation Toledo i3210W S5211 ...

Page 11: ...11 http www tyan com NOTE If a PCI E x16 VGA adapter is inserted into PCI E slot the VGA card will only work at PCI E x1 speed this is a chipset limitation Toledo i3200R S5211 1U ...

Page 12: ...ectors This diagram is representative of the latest board revision available at the time of publishing The board you receive may not look exactly like the above diagram Jumper Legend OPEN Jumper OFF without jumper cover CLOSED Jumper ON with jumper cover ...

Page 13: ...nector TYFP1 JP9 18 pin Front Panel Connector TYFP2 J22 12 pin Front Panel Connector reserved for OEM only J23 LCM Connector reserved for OEM only IPMB J4 IPMB Connector J11 IPMI Connector for TYAN M3295 M3296 J10 Riser Power Connector J24 Barebone Fan Connector reserved for OEM only JP4 PCI X Speed Select Jumper CMOS JP3 Clear CMOS Jumper ...

Page 14: ...14 http www tyan com FAN1 TYFP1 FAN2 FAN3 FAN6 FAN4 TYFP2 FAN5 ...

Page 15: ...r OEM only 1 11 2 12 Pin Signal Pin Signal 1 LAN1 LED 2 LAN1 LED 3 LAN2 LED 4 LAN2 LED 5 NC 6 NC 7 ID LED 8 ID LED 9 ID SW 10 ID SW 11 Key Pin 12 Reserved TYFP1 JP9 Front Panel Header The Front Panel Header is used to connect some control or signal wires from motherboard to chassis such as HDD LED power LED power button and reset button Chassis Intrusion 18 17 SMBUS Clock GND 16 15 SMBUS Data Key ...

Page 16: ...16 http www tyan com COM2 IPMB USB2 USB1 J10 J23 ...

Page 17: ... these pin definitions to connect a port to COM2 TYAN does not provide cable for this header It is designed for OEM use only Pin Signal Pin Signal 1 DCD 2 DSR 3 Rx 4 RTS 5 Tx 6 CTS 7 DTR 8 RI 9 GND 10 NC IPMB J4 IPMP Connector 1 Pin Signal Pin Signal 1 IPMB_SDA 2 GND 3 IPMB_SCLK 4 NC J10 Riser Power Connector GND V5 12V GND 1 Pin Signal Pin Signal 1 12V 2 GND 3 GND 4 V5 J23 LCM Header reserved for...

Page 18: ...18 http www tyan com JP4 J24 SATA3 SATA4 SATA2 SATA1 SATA5 SATA0 CMOS ...

Page 19: ...Pin 4 Pin 5 Pin 6 Pin 7 GND TXP TXN GND RXN RXP GND JP4 PCI X Speed Select Jumper 3 1 Pin 1 2 Closed 133MHz Default 1 3 Pin 2 3 Closed 100MHz max CMOS JP3 Clear CMOS Jumper 3 1 Normal Default 1 3 Clear Use this jumper when you have forgotten your system setup password or need to clear the system BIOS settings How to clear the CMOS data Power off system and disconnect the power supply from the AC s...

Page 20: ...mply lay the motherboard inside the chassis and align the screw holes of the motherboard to the studs inside the case If there are any studs missing you will know right away since the motherboard will not be able to be securely installed Some chassis include plastic studs instead of metal Although the plastic studs are usable TYAN recommends using metal studs with screws that will fasten the mothe...

Page 21: ...The following diagram shows common types of DDRII memory modules Key points to note before installing memory For optimal dual channel DDRII operation always install memory in pairs beginning with DDRII1 and DDRII3 Memory modules of the same type and density are required for dual channel DDRII operation Mismatched memory may cause system instability Only DDRII 800 667 un buffered ECC memory modules...

Page 22: ... 4 Populated Empty Empty Populated 4 Populated Empty Populated Populated 4 Empty Populated Populated Empty 4 Empty Populated Empty Populated 4 Empty Populated Populated Populated 4 Populated Populated Populated Empty 4 Populated Populated Empty Populated 4 Dual Channel Asymmetric Populated Populated Populated Populated 4 Note 1 The same size DIMM is populated in each channel For example Channel A ...

Page 23: ...1 Press the locking levers in the direction shown in the following illustration 2 Align the memory module with the socket The memory module is keyed to fit only one way in the socket 3 Seat the module firmly into the socket by gently pressing down until it sits flush with the socket The locking levers pop up into place Key slot ...

Page 24: ...should be installed carefully Make sure you are wearing an antistatic strap and handle the processor as little as possible Follow these instructions to install your processor and heat sink 1 Locate the processor socket on the motherboard and lift the locking lever to a fully open position 2 Lift the load plate to a fully open position 3 Insert the processor into the socket and make sure that pin 1...

Page 25: ... you have installed the processor the heatsink should be installed to ensure that the processor runs efficiently and does not overheat Use the heatsink supplied for best results Follow these instructions to install the heatsink shown 1 Take out the heatsink from the package Turn the heatsink upside down and you can see that the heatsink has already applied a layer of thermal compound PnP cap therm...

Page 26: ...own and insert the heat sink spring mechanism as shown 3 Align the heatsink with the four holes around the processor socket 4 Press the heatsink down until the four screws are securely seated in the holes 5 Use screw drive to secure the four screws ...

Page 27: ...end s into the drive s Each standard IDE cable has three connectors two of which are closer together The BLUE connector that is furthest away from the other two is the end that connects to the motherboard The other two connectors are used to connect to drives Note Always remember to properly set the drive jumpers If only using one device on a channel it must be set as Master for the BIOS to detect...

Page 28: ... E x16 slot w x8 bus NOTE If a PCI E x16 VGA adapter is inserted into this slot the VGA card will only work at PCI E x1 speed this is a chipset limitation PCI X 1 0 64 133 slot 32 33 PCI 2 3 slot NOTE YOU MUST ALWAYS unplug the power connector from the motherboard before performing system hardware changes Otherwise you may damage the board and or expansion device Simply find the appropriate slot f...

Page 29: ... Open the spring levers as shown 2 Insert the SO DIMM card as shown making sure that the card is the right way up The card will fit in only one way and the screw holes in the card should line up exactly with the mounting posts on the motherboard 3 Push the SO DIMM card down into place and make sure the spring levers click into place as shown NOTE The SO DIMM expansion cards will fit in the slot on...

Page 30: ...Definition The three onboard Ethernet ports have green and yellow LEDs to indicate LAN status The chart below illustrates the different LED states 10 100 1000 Mbps LAN Link Activity LED Scheme Left LED Right LED Link Slow Blinking Green Off 10 Mbps Active Blinking Green Off Link Slow Blinking Green Green 100 Mbps Active Blinking Green Green Link Slow Blinking Green Orange 1000 Mbps Active Blinking...

Page 31: ...NOTE YOU MUST unplug the power supply before plugging the power cables to motherboard connectors 2 12 Finishing Up Congratulations on making it this far You re finished setting up the hardware aspect of your computer Before closing up your chassis make sure that all cables and wires are connected properly especially IDE cables and most importantly jumpers You may have difficulty powering on your s...

Page 32: ...32 http www tyan com NOTE ...

Page 33: ...essing unit CPU memory and I O subsystems This BIOS has been customized by adding important features such as virus and password protection power management and chipset tuning features that control the system This section will guide you through the process of configuring the BIOS for your system setup Starting Setup The BIOS is immediately activated when you turn on the computer The BIOS reads syst...

Page 34: ... in the Chipset section unless you are sure of the outcome TYAN or your system manufacturer has carefully chosen the chipset defaults for best performance and reliability Even a seemingly small change to the Chipset setup options may cause the system to become unstable or unusable Setup Variations Not all systems have the same BIOS setup layout or options While the basic look and function of the B...

Page 35: ...tems Main Use this menu for basic system configuration Advanced Use this menu to set the Advanced Features available on your system Security Use this menu to configure security settings for your system Power Use this menu to configure power options for your system Boot Use this menu to configure boot options for your system Exit This contains the various BIOS exit options ...

Page 36: ...the Main Setup screen Users use the arrow keys to highlight the item and then use the PgUp or PgDn keys to select the value you want in each item System Time Date setup System Time Adjusts the system clock HHHours 24hr format MMMinutes SSSeconds System Date Adjusts the system date MMMonths DDDays YYYYYears Installed Memory Available to OS Used by devices This displays the amount of system memory a...

Page 37: ...ws you to specify the number of sectors per block for multiple sector transfers Options Disabled 2 Sectors 4 Sectors 8 Sectors 16 Sectors LBA Mode Control Enables or disables LBA Mode In LBA Mode instead of referring to a cylinder head and sector number each sector is instead assigned a unique sector number In essence the sectors are numbered 0 1 2 etc up to N 1 where N is the number of sectors on...

Page 38: ...unks of data from the drive into a 32 bit group which is then transmitted to the processor or memory This results in a small performance increase Options Enabled Disabled Transfer Mode These modes determine the speed at which data is transferred to and from the drive The Auto option automatically determines the correct transfer rates Options Auto Standard Fast PIO 1 Fast PIO 2 Fast PIO 3 Fast PIO ...

Page 39: ...instead of data that are more critical to the system s performance In addition if any program writes into this memory area it will result in a system crash So it is recommended that you write protect this area for optimal system performance Options NULL Write Protect Cache Video BIOS Area This feature is only valid when the video BIOS is shadowed It enables or disables the caching of the video BIO...

Page 40: ...Base 0 512K Control caching of 512K base memory Options Write Through Write Back Cache Base 512 640K Control caching of 512K 640K base memory Options Write Through Write Back Cache Extended Memory Area Control caching of system memory above one megabyte Options Write Through Write Back Cache A000 AFFF Cache DC00 DFFF Control caching of the memory blocks Options Disabled Write Back Write Through Wr...

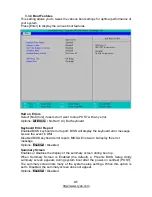
Page 41: ...eport BIOS will display the keyboard error message save the event in DMI Disabled BIOS keyboard error report BIOS will not warn display the error message Options Enabled Disabled Summary Screen Enables or disables the display of the summary screen during boot up When Summary Screen is Enabled the default a Phoenix BIOS Setup Utility summary screen appears during system boot after the power on self...

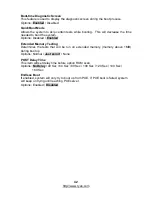
Page 42: ... Options Disabled Enabled Extended Memory Testing Determines the tests that will be run on extended memory memory above 1MB during boot up Options Normal Just zero it None POST Delay Time This item will set delay time before option ROM scan Options No Delay 40 Sec 60 Sec 80 Sec 100 Sec 120 Sec 140 Sec 160 Sec Endless Boot If enabled system will only try to boot up from PXE If PXE boot is failed sy...

Page 43: ...ESCD However sometimes the BIOS may not be able to detect the hardware changes A serious resource conflict may occur and the operating system may not even boot as a result This is where the Reset Configuration Data BIOS feature comes in This BIOS feature allows you to manually force the BIOS to clear the previously saved ESCD data and reconfigure the settings All you need to do is enable this BIOS...

Page 44: ...m Set this option to DOS if such a hard drive is present Else set this option to Other Virtually all modern hard disks have these characters so leave this option at DOS unless you know otherwise Options DOS Other Route Port 80h cycles to This feature allows you to route Port 80h I O cycles to LPC or PCI bus Options PCI LPC Legacy USB Support Enables support for legacy USB Options Enabled Disabled ...

Page 45: ...hdog function POST Watchdog timer counting start at Power on stop at OS Boot OS Start at OS Boot Power on Start at power on Options Disabled POST OS Power on Watchdog Timer This feature allows you to enable watchdog timer Options 2 Mins 4 Mins 6 Mins 8 Mins 10 Mins Memory Reclaiming It allows you to enable or disable the system memory remap function Options Enabled Disabled ECC Error Condition Sel...

Page 46: ...peration This feature is used to choose Native Mode for ATA However certain OS is not supported under Native Mode Options Auto Serial ATA SATA RAID Enable When this option is enabled the Silicon Image RAID BIOS is loaded on system start up allowing for configuration of hardware RAID arrays With the SATA RAID ROM option disabled the drives attached to the controller can only act independently of on...

Page 47: ...rated Device Control Sub Menu USB Dev 29 Controls the USB device by selecting the listed USB functions Options Fun 0 1 2 3 7 Disabled USB Dev 26 Controls the USB device by selecting the listed USB functions Options Fun 0 1 2 7 Disabled ...

Page 48: ...48 http www tyan com 3 4 1 1 1 LAN Control Sub Menu LAN1 LAN2 Enables the onboard LAN controller Options Enabled Disabled Option ROM Scan Initializes device expansion ROM Options Disabled Enabled ...

Page 49: ...49 http www tyan com 3 4 1 2 PCI Express Sub Menu PCI Express Base Address GMCH Base Address DMI Base Address Egress Port Base Address ICH9 RCB Base Address Read only ...

Page 50: ... Express Graphics Port This feature is used to control the PCI Express Graphics port Options Auto Enabled Disabled Debug PEG Port 1 2 Enabled PEG Port 1 2 Number PEG 1 2 Width PEG Port 1 2 Slot Number PEG 1 2 Power Limit PEG 1 2 Slot Card Detect Read only ...

Page 51: ...er threads within the physical package Options Enabled Disabled Core Multi processing Determines whether the second core is enabled Disabled the second core is disabled Enabled the second core is enabled Options Disabled Enabled Single Logical Proc Mode Multiple Core Processor Only single thread and core is enabled Options Disabled Enabled Machine Checking Microsoft windows new linux kernel suppor...

Page 52: ... Options Disabled Enabled No Execute Mode Protection This feature is used to enable the function of No Execute Mode Protection Options Enabled Disabled Frequency Ratio Select the internal frequency multiplier of the CPU Options BIOS CPU Detect Default Frequency Hi Ratio Select the Hi ratio for the Intel Speedstep CPU Selecting unsupported ratios will cause hang Clear CMOS to recover Options BIOS C...

Page 53: ...onfigure I O devices Serial Port A B This defines how the serial port A B is detected and configured Options Disabled Enabled Auto Base I O Address Set the base I O address for serial port A B Options 3F8 2F8 3E8 2E8 Interrupt Set the interrupt for serial port A B Options IRQ3 IRQ4 ...

Page 54: ...pace to store DMI events read only Event Log Validity It reports the validity of the DMI event log read only View DMI Event Log It allows you to view the contents of the DMI event log read only Event Logging Select Enabled to allow logging of DMI events Options Enabled Disabled Mark DMI Events as Read Press Enter to mark DMI events as read Clear all DMI Event logs When set to Enabled BIOS event lo...

Page 55: ...onment Control Interface PECI Tmax Thermal control circuit TCC Activation Temperature FAN Fail LED Indicator When it is set to Enabled the LED will be on when the FAN failed Options Disabled Enabled Auto Fan Control This feature is used to set function of Auto Mode Fan Control Options Enabled Disabled PWM Duty Cycle This item allows you to set minimum PWM Duty Cycle Options 0 30 40 50 Note This it...

Page 56: ...56 http www tyan com 3 4 5 1 Voltage Monitoring Sub Menu All items on this submenu can not be modified in user mode Read only ...

Page 57: ...led Clear System Event Log When set to Enabled system event log will be cleared Options Disabled Enabled Existing Event Log number Remaining Event Log number It displays the number of existing event logs and remaining event logs Read only SYS Firmware Progress It records the continual development of BIOS POST Options Disabled Enabled BIOS POST Errors Enabled BIOS will halt display error message if...

Page 58: ...chdog Disable or select Watchdog Timer count mode Options Disabled mSecond Second Minute Timer for loading OS SEC Watch dog timer value Options 10 255 Time Out Action Select what to do when Watchdog time out Options No Action System Reset 3 4 6 1 System Event Log Sub Menu All items on this submenu can not be modified in user mode Read only ...

Page 59: ...59 http www tyan com 3 4 6 2 System Event Log list mode Sub Menu All items on this submenu can not be modified in user mode Read only ...

Page 60: ...60 http www tyan com 3 4 6 3 Realtime Sensor Data Sub Menu All items on this submenu can not be modified in user mode Read only ...

Page 61: ... Options 19 2K 300 1200 2400 9600 38 4K 57 6K 115 2K Console Type Enables the specified console type Options VT100 VT100 8bit PC ANSI 7bit PC ANSI VT100 VT UTF8 Flow Control Enables Flow Control Options None XON XOFF CTS RTS Console Connection It indicates whether the console is connected directly to the system or a modem is used to connect Options Direct via Modem Continue C R after POST Enables ...

Page 62: ...allows the user to set the user password Diskette access This option allows the user to control access to diskette drives Options Supervisor Disabled Fixed disk boot sector This option allows the user to write protect boot sector on hard disk to protect against viruses Options Normal Write Protect Password on boot When enabled the system will ask for a password at every boot The system will contin...

Page 63: ...n allows you to power on the system by PCI or PCI X card When enabled an input signal from PME on the PCI card awakens the system from a S5 state Options Enabled Disabled After Power Failure Sets the mode of operation if an AC Power Loss occurs The two modes are Enabled restores the previous power state before loss occurred Disabled keeps the power off until the power button is pressed Options Pow...

Page 64: ... 3 7 Boot Use this screen to select options for the Boot Settings Configuration Boot Priority Order It shows the boot priority for installed devices Excluded from boot order It lists devices to be excluded from boot order ...

Page 65: ...S setup after saving the changes made Exit Discarding Changes This exits BIOS setup after discarding the changes made Load Setup Defaults This loads the factory default values Discard Changes This discards all changes made without exiting BIOS setup Save Changes This saves all changes made without exiting BIOS setup ...

Page 66: ...66 http www tyan com NOTE ...

Page 67: ...type of error is a memory error Before contacting your vendor or TYAN Technical Support be sure that you note as much as you can about the beep code length and order that you experience Also be ready with information regarding add in cards drives and O S to speed the support process and come to a quicker solution 4 2 Flash Utility Every BIOS file is unique for the motherboard it was designed for F...

Page 68: ...ore CPU control word during warm boot 4Bh QuietBoot start optional 13h Initialize PCI Bus Mastering devices 4Ch Shadow video BIOS ROM 14h Initialize keyboard controller 4Eh Display BIOS copyright notice 16h 1 2 2 3 BIOS ROM checksum 50h Display CPU type and speed 17h Initialize cache before memory autosize 51h Initialize EISA board 18h 8254 timer initialization 52h Test keyboard 1Ah 8237 DMA contr...

Page 69: ...3h Configure non MCD IDE controllers BAh Initialize DMI parameters 84h Detect and install external parallel ports BBh Initialize PnP Option ROMs 85h Initialize PC compatible PnP ISA devices BCh Clear parity checkers 86h Re initialize onboard I O ports BDh Display MultiBoot menu 87h Configure Motherboard Devices BEh Clear screen optional 88h Initialize BIOS Data Area BFh Check virus and backup remi...

Page 70: ...ck force recovery boot 9Eh Enable hardware interrupts 86h Checksum BIOS ROM 9Fh Determine number of ATA and SCSI drives 87h Go to BIOS A0h Set time of day 89h Set Huge Segment 88h Initialize Multi Processor 92h Initialize Run Time Clock 8Ah Initialize OEM special code 93h Initialize video 8Bh Initialize PIC and DMA 8Fh Initialize System Management Mode 8Ch Initialize Memory type 94h Output one bee...

Page 71: ...GP card Network card or SCSI card SMDC does not require any hardware specific driver As long as a standby power comes into the system SMDC will begin looking after the system TYAN SMDC provides diversified methods to communicate with the hardware IT manager has the flexibility to choose among Keyboard Controller Style KCS Block Transfer BT style Intelligent Chassis Management Bus ICMB Intelligent ...

Page 72: ...DC will continue to function even if the system is not powered on How SMDC and TSO Work The brief descriptions below will help explain how these items function Agent a system with SMDC installed The SMDC is installed in the Agent system that uses a compatible supported Tyan motherboard Manager manages the Agent The Manger is set up to manage the Agent that has the SMDC The Manager and Agent should...

Page 73: ...s are built in Bandwidth refers to carrying capacity The greater the bandwidth the more data the bus phone line or other electrical path can carry Greater bandwidth then also results in greater speed BBS BIOS Boot Specification is a feature within the BIOS that creates prioritizes and maintains a list of all Initial Program Load IPL devices and then stores that list in NVRAM IPL devices have the a...

Page 74: ...ed and open jumpers jumpers and jumper pins are active when they are on or closed and inactive when they are off or open CMOS Complementary Metal Oxide Semiconductors chips that hold the basic startup information for the BIOS COM port another name for the serial port which is called as such because it transmits the eight bits of a byte of data along one wire and receives data on another single wir...

Page 75: ...on helps properly configure the system each time it boots Fault tolerance a term describing a system where one component can quickly be replaced without causing a loss of service such as in a RAID system Firmware low level software that controls the system hardware Form factor an industry term for the size shape power supply type and external connector type of the Personal Computer Board PCB or mo...

Page 76: ...another part to catch up This is most common when the system sends data out to a peripheral device and it waiting for the peripheral to send some data back peripherals tend to be slower than onboard system components Mirroring see RAID NVRAM ROM and EEPROM are both examples of Non Volatile RAM memory that holds its data without power DRAM in contrast is volatile OEMs Original Equipment Manufacture...

Page 77: ...n as mirroring which stores the data within at least two hard drives but does not stripe RAID level 1 also allows for faster access time and fault tolerance since either hard drive can be read at the same time RAID level 0 1 is both striping and mirroring providing fault tolerance striping and faster access all at the same time RAIDIOS stands for RAID I O Steering a type of RAID technology from In...

Page 78: ...CPU shut down SRAM Static RAM unlike DRAM this type of RAM does not need to be refreshed in order to prevent data loss Thus it is faster and more expensive SSI Server System Infrastructure an industry initiative intended to provide ready to use design specifications for common server hardware elements chassis power supplies and racks to promote and support server industry growth Standby mode in th...

Page 79: ...formation http www tyan com 3 Contact your dealer for help BEFORE calling TYAN 4 Check the TYAN user group alt comp periphs mainboard TYAN Returning Merchandise for Service During the warranty period contact your distributor or system vendor FIRST for any product problems This warranty only covers normal customer use and does not cover damages incurred during shipping or failure due to the alterat...

Page 80: ...on a circuit different from that of the receiver Consult the dealer on an experienced radio television technician for help Notice for Canada This apparatus complies with the Class B limits for radio interference as specified in the Canadian Department of Communications Radio Interference Regulations Cet appareil est conforme aux norms de Classe B d interference radio tel que specifie par le Minist...

Reviews: