C2-6104A O
PERATION
M
ANUAL
5
6
FRONT PANEL CONTROLS
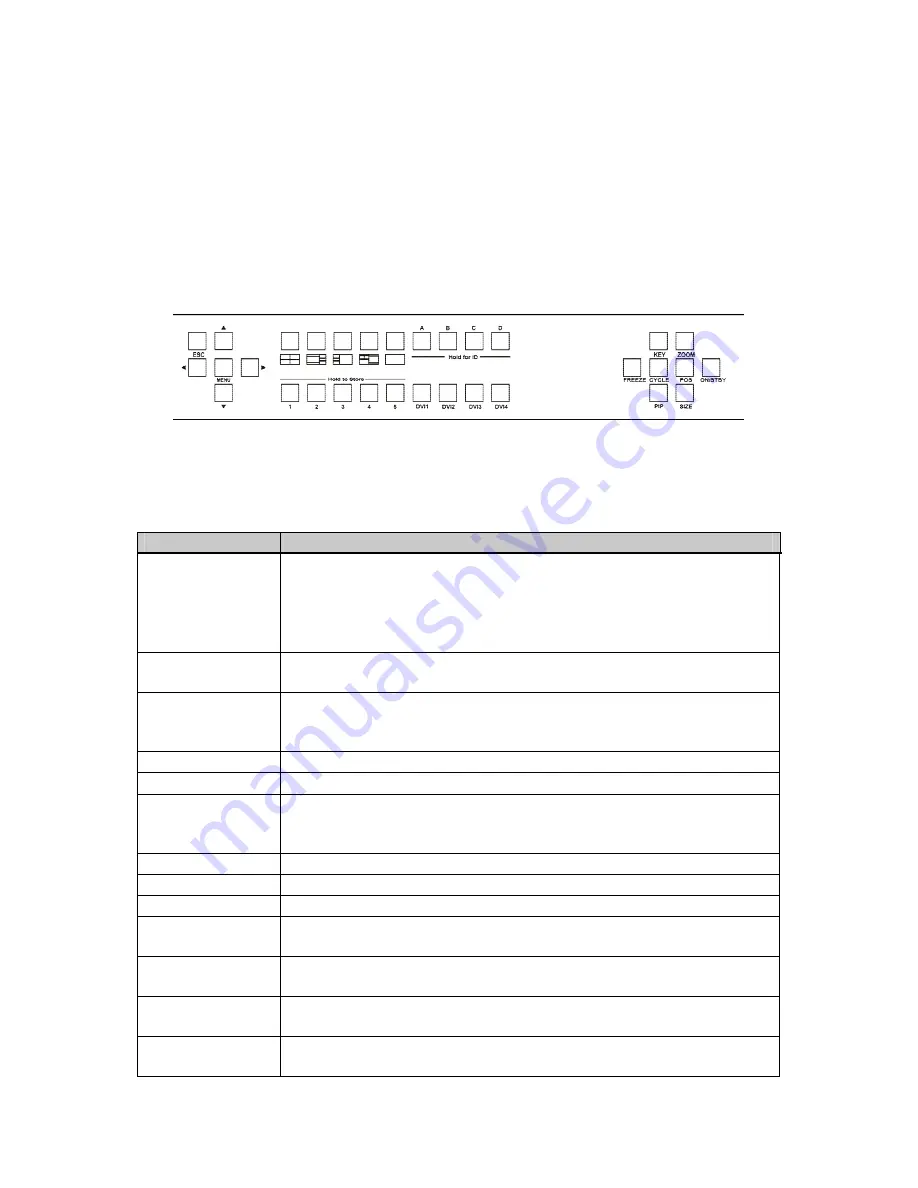
The range of buttons on the front of the unit provides the user with quick access for
selecting a variety of inputs and features.
The cross-hair (up/down/left/right) buttons on the front panel provides the user with
a way of navigating the Liquid Crystal Display menus (LCD) which is detailed in a
later section.
6.1
Button controls
The following buttons are available on the front of the unit:
Button
Button Function
Menu navigation
& adjustment
buttons.
Up / down / left / right / SELECT allow quick and easy access to
various menu settings. Press and hold SELECT to store current
settings into memory. They will then be restored on power-on,
or when a Restore is done. See next section for more
information.
Presets 1 to 5
Recalls a preset. These start off blank, but are available to the
user.
Presets 6 to 10
(shown with
default setups)
Recalls a pre-defined present, but can be overridden by the
user.
A / B / C / D
Selects which of the 4 windows on the screen to adjust.
DVI-U1 to 4
Selects the input for the currently selected window.
KEY
Enables keying for currently selected window – see ‘Adjust
keyers’ menu.
(Key color defaults to black, so black foreground will disappear.)
ZOOM
Jumps to the ‘Zoom’ menu item.
FREEZE
Freezes the currently selected window
CYCLE
Cycles the sources through the 4 windows.
POS
Jumps to the Pan or Pos menu item to allow immediate panning
or positioning of the image.
PIP
Activate picture-in-picture mode for the currently selected
window.
SIZE
Jumps to the ‘Shrink’ menu item to allow the current window to
be re-sized.
STANDBY
Hold in to put the unit into Standby (power-save) mode.
Press once to come out of Standby mode.


