background image

18

19

www.tuttibambini.com

www.tuttibambini.com

Carrycot (Sold Separately)

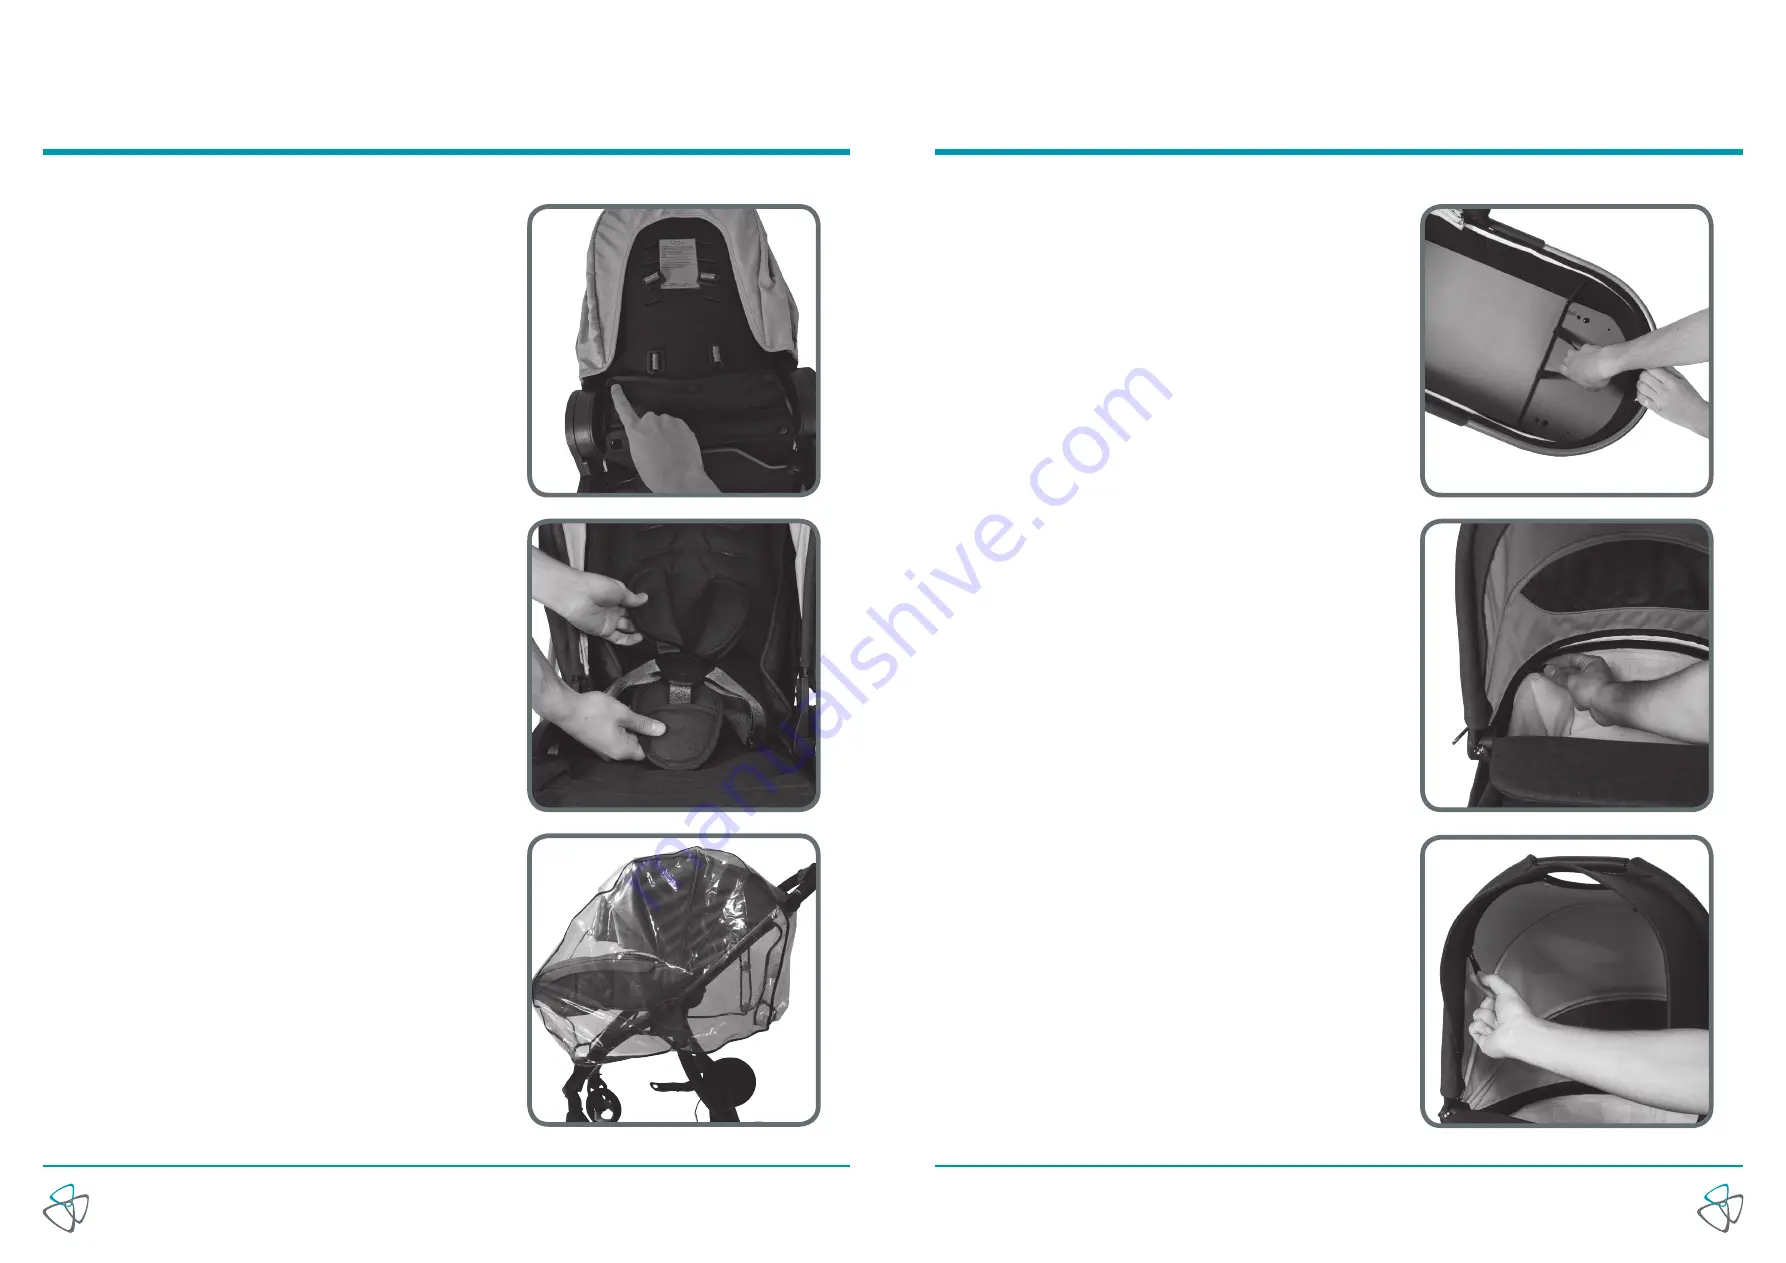
Secure the seat liner to the seat unit by fastening the 
press studs at the top of the seat liner, and to the 
back rest and seat (via the gap between the two).

8. Fitting the shoulder and crotch pads 

(sold separately)

 
Attach the shoulder pads around the shoulder  
straps and secure using the Velcro provided.  
Feed the crotch strap through the hole in the  
crotch pad as shown in the image.

9. Fitting the rain cover

 
Drape the raincover over the seat unit and fasten the 
velcro straps together at the front, back and sides of 
the pushchair to secure into place.

Seat Unit

1. Assembling the carrycot

 
Remove the mattress and lining to gain access to the 
assembly bars at the bottom of the carrycot. Using the 
tabs provided, pull the bars until they click into place 
on the carrycot base. Put the lining and mattress back 
into the carrycot. 

WARNING: Ensure that the  

assembly bars are fully engaged before using  
the carrycot

.

2. Fitting the carrycot hood  

  (sold separately)

 
Zip the lower end of the carrycot hood onto the zip  
on the carrycot and pull all the way around. 

Zip the two padded ends of the carrycot hood around 
the carrycot hood bar towards the handle, ensuring 
that leatherette handle can be accessed through the  
handle hole.

Summary of Contents for KOJI

Page 1: ...Assembly Instructions...

Page 2: ...ies Accessories not approved by the manufacturer should not be used with this product Only replacement parts supplied or recommended by the manufacturer distributor shall be used Hello Congratulations...

Page 3: ...shoulder and crotch pads sold separately 18 Fitting the rain cover 18 Carrycot sold separately Assembling the carrycot 19 Fitting the carrycot hood sold separately 19 Fitting the carrycot apron sold...

Page 4: ...the chassis 2 Fitting removing the rear wheels Press the metal pins of the rear wheels into the designated holes at the back of the chassis until they click into place There is no left and right Check...

Page 5: ...handle will extend as you open the chassis You can also rest your foot on the rear wheel support bar for extra stability when opening 4 Operating the parking brake Press downwards on the parking brak...

Page 6: ...dle locks on either side of the chassis frame by pulling them inwards Unclip the two handle locks on either side of the chassis frame by pulling them inwards In forward facing mode Fold the seat in ha...

Page 7: ...the central bar so that it stands upright by itself Recline the seat all the way backwards Fold the calf support inwards to reduce the folded size In rear facing mode Fold the seat in half by pulling...

Page 8: ...wards or forwards letting go of the handle at the desired position The seat will lock into place There are 3 seat positions 3 Adjusting the calf support Pull the handle on the underside of the calf su...

Page 9: ...s by threading the buckle through the seat back at the higher position 5 Removing the seat unit from the chassis Squeeze the two handles on either side of the seat unit and lift the seat upwards out o...

Page 10: ...raps together at the front back and sides of the pushchair to secure into place Seat Unit 1 Assembling the carrycot Remove the mattress and lining to gain access to the assembly bars at the bottom of...

Page 11: ...t The yellow markers on the adapters should face inwards Then lower the carrycot onto the adapters until they click into place 3 Fitting the carrycot apron sold separately Zip the carrycot apron onto...

Page 12: ...ow markers on the adapters should face inwards Then lower the car seat onto the adapters until they click into place 2 Removing the car seat from the chassis Press the two buttons on the car seat adap...

Page 13: ...chair requires regular maintenance by the user Overloading incorrect folding and the use of non approved accessories may cause damage or break the pushchair It may be unsafe to use replacement parts o...

Page 14: ...Notes 26 www tuttibambini com Notes 27 www tuttibambini com...

Page 15: ...www tuttibambini com Join Us Follow us on Facebook TuttiBambiniUK Follow us on Twitter TuttiBambiniUK Follow us on Instagram TuttiBambiniUK...

Reviews: