2
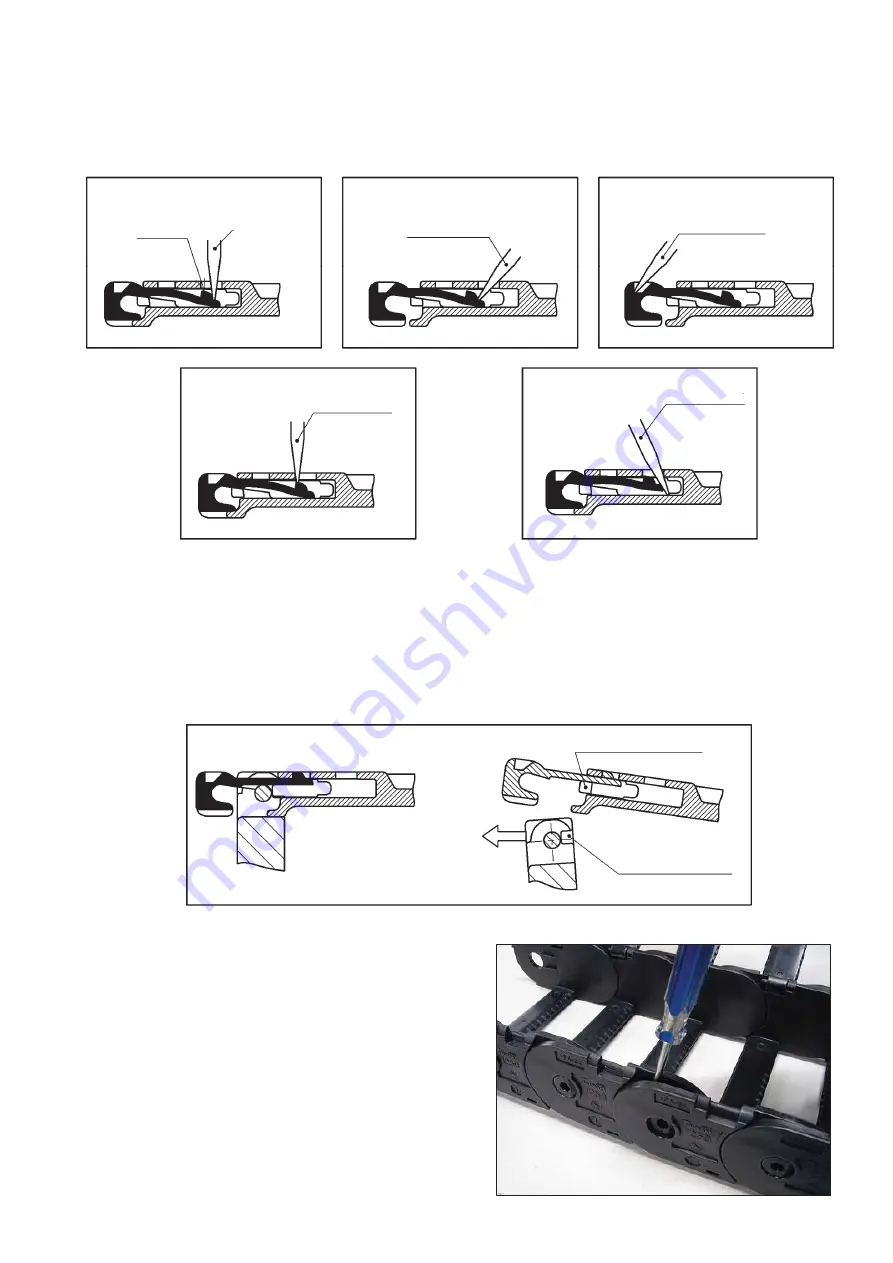
Dia. 1 Proper removal
Lightly push a flat-head screwdriver straight down onto the end of the hook. Confirm that the hook has released and bend
the screwdriver backward while pushing forward to remove. Remove the screwdriver and confirm that the hook is
securely hidden underneath the arm. Insert the screwdriver tip into the groove and push out to securely remove the
locking hook.
Dia. 4: Incorrect removal
Dia. 5: Incorrect removal
Pushing down hard on the top of the
Inserting the screwdriver the wrong way
hook with the screwdriver.
and getting caught in the end area.
2-2. Remove the arm
Even with the locking hook removed, the projections located on the ends of both sides of the arms will still be fixed into
the locking grooves on the inner side of the links. Push the link outward and down to release the projections from the
arms.
2-3. Remove the links
Insert a flat-head screwdriver between the links and
twist 90°. Use the pin on the other side as a fulcrum
and bend the links apart to remove.
Caution: Ensure that the arms on either side of where you
will disconnect are either released or removed
before beginning.
Dia. 1
Hook
Screwdriver
Dia. 2
Screwdriver
Dia. 3
Screwdriver
Dia. 4
Screwdriver
Dia. 5
Screwdriver
Arm projection
Locking groove
on link side


