background image

29/07/2020           4 

Warranties


Processing warranty claims 


Warranty claims according to the manufacturer's general terms of business are valid for 1 year from 
the date of delivery.


The handover date stated on the machine delivery note is decisive for the time of transfer of risk. 
Warranty claims are generally to be reported to the contract retailer making the delivery.  
The recorded parts of the delivered machine must generally be kept without any changes due to the 
proof reasons until final processing of the enforced warranty claim. In the event of a warranty claim, 
the claimed part of the machine (or old part) is to be provided free domicile to the manufacturer or 
the sales retailer. 
 
A technical change to the machine and/or parts thereof leads to the loss of all warranty claims.  
The same applies in the case of incorrect handling or use of lubricants or spare parts and accessories 
not approved or specified by the manufacturer. Transport damages and damages that are caused by 
normal wear and tear after initialisation of the machine are not usually valid for warranty claims. 
 
The delivered machine is to be subjected to the specified obligatory visual checks or inspections 
according to the specified intervals in the maintenance plan provided. In the event of non-
compliance with the obligatory visual checks and inspection plan, all warranty claims are void.  
A further prerequisite for a warranty claim is the submission of full proof of the obligatory visual 
checks and inspections performed. 
 
Any warranty and maintenance work may only be performed by a specialist retailer authorised  
by TS.  
 
It is pointed out that the warranty work exceeding a value of 150.00€ must generally be coordinated 
with TS and approved by TS. The manufacturer reserves the right to perform the repair himself in 
this case. 
 
A prerequisite for enforcement of a warranty claim is the return of the fully completed and signed 
machine delivery note.


Summary of Contents for GM10

Page 1: ...OPERATING MANUAL GM10 150 190 250 350 450 550 327 431 532 WS 10 14 P WS 10 14 SP WS 15 27 P WS 18 D WS 18 DT WS 10 PTO WS 15 PTO WS 18 PTO WS 20 PTO WS 23 PTO ...

Page 2: ...______________________________________________________ which this declaration relates to corresponds with the relevant basic health and safety requirements of EC directive 2006 42 EC and the requirements of the other relevant 2014 30 EU 2014 35 EU _____________________________________________________________________________________________ The technical documents are kept in the main factory For c...

Page 3: ...nspection is recorded with a stamp and signature on the machine delivery note There is no claim to war ranty without returning the fully completed and signed delivery note Furthermore all screw connections must be checked for a tight fit before initial use and the hose lines che cked for areas of abrasion Please directly arrange an appointment with your customer for this Regular inspections accord...

Page 4: ... parts and accessories not approved or specified by the manufacturer Transport damages and damages that are caused by normal wear and tear after initialisation of the machine are not usually valid for warranty claims The delivered machine is to be subjected to the specified obligatory visual checks or inspections according to the specified intervals in the maintenance plan provided In the event of...

Page 5: ...ing device 21 5 7 Motor rocker 22 5 8 Support 22 5 9 Rotating ring lock 22 5 10 Attachment to a vehicle 23 5 11 GM10M Pull Push switching the second wheel 23 5 12 Attachment to a tractor 24 5 13 Drive on Z machines 25 5 14 Pivoting Z machines special equipment 25 5 15 Testing the blade and counter blade 26 5 16 Testing the safety equipment 26 6 OPERATION AND IMPLEMENTATION 27 6 1 Funnel flap with ...

Page 6: ... 6 12 ABS System 33 7 MAINTENANCE AND REPAIR 34 7 1 Maintenance for wood shredders 35 7 2 Checking the screws 37 7 3 Ball bearings 37 7 4 V belts 37 7 5 Hacking blades and counterblades 38 7 6 Grinding instructions 41 8 LUBRICATION PLAN 42 8 1 GM 10 M Pull Push or WS 10 14 SP 42 8 2 GM 10 M 80km h or WS 10 14 P 43 8 3 150 M or WS 15 27 P 44 8 4 170 190 M or WS 18 35 D 45 8 5 250M or WS 18 35 DT 46...

Page 7: ...10 1 General 54 10 2 Technical data 54 10 3 AMP plug 55 10 4 Pilot System 56 11 BIO HYDRAULIC OIL 66 12 PREFERRED HVI HYDRAULIC OIL 13 HYDRAULIC PLANS 67 13 1 WOOD SHREDDER WITH ABS 67 13 2 WOOD SHREDDER WITH ABS EPS 68 13 3 GM10 Pull Push 69 14 ELECTRICAL DIAGRAMS 70 14 1 170M 190M 250M 70 14 2 350M 450M 550M 73 14 3 General EPS electric switching 76 14 4 GM10M 78 15 INSPECTIONS 80 ...

Page 8: ...g professional requirements we ask you to read this operating manual conscientiously and comply with the warning and maintenance instructions We can only provide the full manufacturer s guarantee for the TS Industrie wood shredder with compli ance of all maintenance work at the specified intervals This operating manual covers several models so the introduction explains how you can find your way ar...

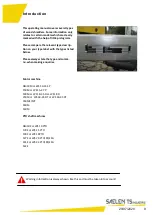
Page 9: ...ur type label with the types listed below Please always state the type and comm no when making enquiries Motor machine GM10M or WS 10 14 SP 150M or WS 15 27 P 190M or WS 18 35 D or WS 18 D 250M or WS 18 35 DT or WS 18 35 DT 350ME MT 450M 550M PTO shaft machines GM10Z or WS 10 PTO 170Z or WS 15 PTO 190Z or WS 18PTO 327Z or WS 20 PTO ZS ZSA 431Z or WS 23 PTO ZS ZSA 532Z Warning information is always...

Page 10: ...ble 5 Foreign matter e g iron parts and stones etc must be removed before operation 6 After maintenance or repair check whether all protective devices have been attached 7 The wood shredder may not be taken into operation in rooms due to the associated risk of poisoning 8 The hacking disc may only be removed once it has come to a standstill This means that the drive motor is switched off and the i...

Page 11: ...t be secured against rolling away 16 Single axle motor devices are attached to traction vehicles and if available the park brake is applied For operation without a traction vehicle the parking locks front and back must be lowered 17 Minimum clearance of 10 m from the machine to the ejection must be maintained due to safety reasons The objection must always be averted by operating personnel 18 You ...

Page 12: ...unter blades are also to be tested for function and a tight fit 24 Operating personnel must be inducted thoroughly before initialisation 25 The hacking disc may only be released once it has come to a full standstill and the motor has been switched off For work on the hacking disc or on cutting tools the hacking disc must al ways be locked with the supplied hacking disc claw 26 Danger due to flying...

Page 13: ...ways make sure that the machine is driven straight onto a trailer otherwise there is the risk of it tipping over The same applies when taking it off the trailer In this case it should be guided down with a safety rope otherwise there is the risk of the machine tip ping over backwards Make sure that no persons are within the danger zone when loading the machine 32 When loading onto and off trailers...

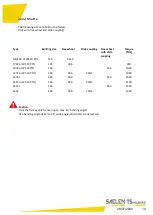
Page 14: ...553 1000 327Z or WS 20 PTO 104 096 255 2 1000 327ZS 104 096 553 1000 431Z or WS 23 PTO 106 096 255 2 1100 431ZS 106 563 1450 532Z 106 096 255 2 1200 Joint Shafts The following sizes are built in the factory Only with free wheel and slide coupling Caution Joint shafts may only be used up to max 10 bending angle At a bending angle of 10 to 35 wide angle joint shafts are necessary ...

Page 15: ...oggles Wear ear protectors Wear protective gloves with special close fitting cuffs Wear safety footwear Only touch machine parts when they have come to a complete standstill Maintain a sufficient distance from rotating ma chine parts ...

Page 16: ...nitialisation Do not remain in the ejection area when the ma chine is running Danger zone Switch the motor off and remove the key before maintenance and repair work Maintain a sufficient displace from hot surfaces exhaust Secure the machine transport trailer before parking against unintentionally rolling away u sing wedges ...

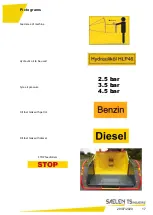
Page 17: ...29 07 2020 17 Feed area of machine Hydraulic oil to be used Tyre air pressure Fill fuel tank with petrol Fill fuel tank with diesel STOP feedrollers Pictograms 2 5 bar 3 5 bar 4 5 bar ...

Page 18: ...r placed on the retrac tion table and drawn in by the retraction rollers then guided against the rotating closed hacking disc The cutting blades attached to the hacking disc now cut off the retracted material The horizon tally attached lower blade and the vertical up right side blade serve as An attachment counter cutter The cut off wood chips are transported through the ejection channel outside b...

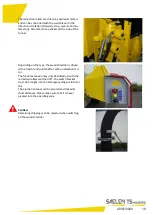
Page 19: ...he wood shredder is driven with a tractor and joint shaft or with an attached mo tor The funnel extension may only be folded up with the retraction rollers switched off the switch bracket must be brought into the emergency stop position for this The ejection channel can be pivoted and locked at short distances Please make sure that it is never pivoted into the operating area Caution Remaining chip...

Page 20: ...always take place away from the operating area Impacts are attached to ensure this Transport position Transport position of the chimney Before transport the ejection chimney must be locked against the direc tion of travel To the back Ejection flap The ejection flap can be pivoted from the horizontal to the vertical position pointing downwards and progressi vely locked ...

Page 21: ... and stop the wood shredder with the clamping device in the uncoupled state with the en gine idle In order to increase the starter s service life it is compulsory that the force transfer is un coupled when starting other the starter has to pull the whole hacking disc along transmitted by the belt This should also have completed before shut down because the hacking discs continue running here This ...

Page 22: ...g transmitted by the belt This should also have completed before shut down because the hacking discs continue running here This can produced cracks on the wood shred der and on the drive belt which can lead to conse quential damages Support The support to the back must always be lowered when the wood shredder is uncoupled from the vehicle This is how you can avoid the wood shred der tipping over R...

Page 23: ... and plug in the plug for the lighting Fully retract the support wheel push the back safety support up lock and check the lighting The support wheel may only be unscrewed up to the marking In the coupled status the display must be within the green range Ball head open ready to attach GM10M Pull Push switching the second wheel The guard master with hydraulic drive can also be operated with two driv...

Page 24: ... driver must make sure that the authorised axle loads of the tractor are met Furthermore the driver must ensure that the machine is sufficiently counterbalanced according to the StVO If this does not take place it may be the case that the tractor cannot follow the bends Before attachment it must be checked that the intake bolts for the lower steering wheel are tightened Caution When driving the tr...

Page 25: ...e ABS cannot react because no reduction in speed occurs and the hacker therefore becomes strained gearbox damages drive shaft break The sliding coupling on the PTO shaft must be set lower in these cases in order to guarantee a reduction in speed Unfortunately the friction disc loss is also increased by this Pivoting Z machines special equipment The wood shredder is mounted on a subframe which can ...

Page 26: ...el due to waste Caution For work on the hacking disc or on the cutting tools e g blade change the hacking disc must always be locked with the supplied hacking disc claw Risk of injury Testing the safety equipment In addition a functional test on the safety equipment on the wood shredder must be carried out each day before work Ball joints on the switch equipment may only have a low clearance By ac...

Page 27: ...k FORWARDS switch bracket pulled towards operator Retraction rollers pull material in Pos 2 Halt STOP switch bracket slid in one step away from the operator Retraction rollers stay still Pos 3 Reverse REVERSE switch bracket pushed in two steps Retraction rollers push material back out Pos 4 Safety stop STOP switch bracket fully pushed in In the fourth switch position the switch bracket is tightene...

Page 28: ...t side of the fun nel flap the yellow pushbutton is activated and the retraction rollers draw in the material 3 Pos REVERSE on the right or left side of the funnel flap the black pushbutton is activated and the trac tion rollers push the material back out 4 Stop press the switch bracket towards the hacker and the retraction rollers stand still Commandes en rotation du rouleau ameneur Stopping rota...

Page 29: ...witching forces listed above must always be complied with This is to be checked at regular intervals The switching forces are set on the nut shown on the photo The new machines you must pay extra attention to the correct setting in the first six weeks because the material on the facility needs to be broken in Funnel flap locking Before any transportation of the machine the funnel flap needs to be ...

Page 30: ...ushed back Now shred the material quantity or saw off branch forks and start loading again If the drive power is currently too low motor speed reduces heavily briefly switch off the retraction bring switch bracket into the halt position until a motor speed has reached the working speed again then set the switch lever back to forwards work the special equipment ABS system regulates this automatical...

Page 31: ...n is folded down The safety shaft must be activated so that the switch rod is released The drive motor is now started and set to a maximum working speed pay attention to the motor operating manual The hacking material can now be entered Noise emissions The wood shredder produces a guaranteed sound level in accordance with directive 2000 14 EC of Due to the high noise emissions of the wood shredder...

Page 32: ...over tight again after addressing the blockage Transport position First of all the switch bracket is brought into the halt end position With the safety lock beneath the funnel flap the switch rod is automatically blocked on the halt position by turning the sa fety shaft by approx 45 Turn the blowout pipe to the back in the transport position Cleaning the machine The machine is to be cleaned after ...

Page 33: ...sc is mea sured on the hacking disc shaft If this falls below a specified value the retraction rollers automati cally switch off The drive motor can now recover If the target speed is achieved again the retrac tion rollers automatically switch again The switch off and switch on speed can be set by your workshop ...

Page 34: ...ted in the below table or please refer to the type label Upon delivery the bearings are ready lubricated and the gearbox filled with oil However it recommended that you check before initialisation For all couplings gears oil motors and V belt drives etc upon mounting attention must be paid that these are level and parallel to each other For all parts to be mounted attention is to be paid to the ge...

Page 35: ... Lubrication Daily Every 50 hours 3 Cardan shaft joint and profile pipe Z machine Lubrication Every 8 hours 4 Gearbox Z machine Check oil level Change oil Daily Annually 5 Hydraulic system Oil change and tank cleaning First filter change First filter change Every 2 years After 50 operating hours Every 500 operating hours 6 Upper retraction Abschmieren Every 8 hours 7 Cooler grate perforated motor ...

Page 36: ...s are to be used for repair work Caution Should your machine be filled with bio diesel shorten all motor maintenance intervals by half Caution 1 For longer standing periods the batteries should be charged at least every 3 months and before de livery of the machine 2 Start intervals for working time length should be complied with so that the battery can be regenerated accordingly 3 In order to make...

Page 37: ... rollers and hack ing disc shaft are to be lubricated according to the maintenance table The ball bearings are to be test ed at least once per year and replaced if necessary V belts All V belts are to be checked for the first time after 4 operating hours for tension and tightened if neces sary Furthermore weekly checks on the belts must be performed When purchasing the belts attention must be paid...

Page 38: ...quality and re traction is difficult meaning that the blades are quick ly blunt When attaching the blades the gap between the blade and counterblade must be readjusted Fibres or uneven chips are produced due to larger gap and more power is required If the gap is smaller than 1 mm the blade can hit the counterblade dur ing operation Caution Never weld the worn hacking blade Caution The torque of th...

Page 39: ...e blade pushes the wood back The subsequent running of the hacking disc must be considered when opening the cover Type Size a mm Size b mm Size c GM10M Z or WS 10 14 P SP PTO 85 95 30 150M or WS 15 27 P 80 95 30 170M Z or WS 15 PTO 80 95 30 190M Z or WS 18 D PTO 80 100 30 250M or WS 18 DT 80 100 30 327Z ZS ZSA or WS 20 PTO 80 100 30 350ME MT 80 100 30 431Z ZS ZSA 110 125 30 450M 110 125 30 532Z 11...

Page 40: ... In order to loosen the counterblade the retainer on the side of the housing must be loosened The counterblade is found behind and can be turned or replaced There is a thread in the counterblade which facilitates removal with a screw The large cover must be removed first on the vertical counterblade Both traction springs are then released and the top carriage is folded up and secured The cover scr...

Page 41: ...becomes very hard which can lead to breakages Therefore attention must be paid to the following 1 A soft open grinding stone to match the grinding machine and the material to be ground 2 A steady grinding machine free of vibrations 3 Grind directly at the grinding point wet grinding with strong cooling 4 Set the correct angle 30 5 You should hand over these grinding instructions to your tool grind...

Page 42: ...29 07 2020 42 Lubrication plan TS GM 10 M Pull Push or WS 10 14 SP ...

Page 43: ...29 07 2020 43 TS GM 10 M 80km h or WS 10 14 P ...

Page 44: ...29 07 2020 44 TS 150 M or WS 15 27 P ...

Page 45: ...29 07 2020 45 TS 170 190 M or WS 18 35 D ...

Page 46: ...29 07 2020 46 TS 250 M or WS 18 35 DT ...

Page 47: ...29 07 2020 47 TS 350 450 M ...

Page 48: ...29 07 2020 48 TS 550 M ...

Page 49: ...29 07 2020 49 Z machines GM10Z or WS 10 PTO 170Z or WS 15 PTO 190Z or WS 18 PTO 327Z or WS 20 PTO 431Z or WS 23 PTO 532Z ...

Page 50: ...ting control light OK Warning light battery charge control Warning light oil pressure Warning light coolant temperature Do not put the contact key on a heavy bunch of keys this might produce disconnection of the ignition during the operation ...

Page 51: ...ameters This is to be understood as the setting of various base values to adapt the HMC 542 two different hacker types Programming the parameters is only necessary upon first initialisation These settings can also be made in the factory on request Normal operation The HMC542 has a display function in the normal mode Depending on whether the blade shaft turns or not either the speed or the total op...

Page 52: ...29 07 2020 52 HMC 542 view Display SET button Electricity supply and contacts Function keys F1 F2 LED error Operating LED ...

Page 53: ...ess Red error LED Flashes when an error has occurred Function key F1 Previous display Reduces value and number Function key F2 Next display Increases value and number Display with 16 digits in two lines SET D r e h z a h l X X X X U p m Software When starting the device the software version number appears on the display for approximately 2 seconds e g Always keep your software version number to ha...

Page 54: ... day and total operating hours counter The differentiation is made between two different operating statuses when operating the HC960 Technical data Dimensions 80 x 80 x 75mm Display LCD 4 digit l3mm Operating voltage 8 30V Power consumption max 100 mA Output load max 6A Temperature range 25 85 C Total operating hours counter 0 9999 h Day operating hours counter 0 99 99 h Speed measurement 1 2700 r...

Page 55: ...29 07 2020 55 AMP plug ...

Page 56: ...d and reverse action to test the correct function of the hydraulic circuit 8 A rapid forward action of the rotor to test intervention of the NoStress facility 9 3 NoStress VarioStress choices relative to the type of material to be prcessed 10 Maintenance management intervals for oil change 11 Belt slippage clutch and hydraulic coupling security system 12 Engine cut out and starter motor deactivati...

Page 57: ...he access code and to navigate the menu It is formally forbidden to modify the default factory settings of the Pilot System Any modification to the security and program parameters made outside of our factories is the entire responsibility of the person having made these changes Liquid Cristal lit screen Led Green static on Green flashing indicates impulsions given by the rotor sensor Red static in...

Page 58: ...gine RPM Button 2 for leafy waste uses an in termediate RPM Can be used for branch waste and small amounts of conifer vegetation Button 3 for conifer and large quantities of vegetation particularly wet and green wood restricted but high regime for maxi mum ventilation Choice of NoStress setting If the programme settings are changed during use the yellow forward button must be pressed to reengage t...

Page 59: ... now be pressed Once the feed rollers are in action if the red stop bar to the rear of the hopper is pushed feeder stop is displayed If the rotor speed is too high the feed roller is automatically stopped to prevent use of the machine and a Danger symbol is dis played along with the message Rotor over speed To restart the rotation of the feed rollers the engine must be slowed It can be re turned t...

Page 60: ... slippage is greater than the allocated percentage the engine is stopped and a message is displayed on the screen Different causes of slippage rotor blocked at start up or during operation belts loose clutch worn N B Slippage can also occur if the machine is accelerated very slowly from standby To bypass the message and continue press the button 1 after having verified and control led the transmis...

Page 61: ...date by pressing 1 1 2 3 4 5 Press the button 1 to validate and bypass the number 0 Press the button to enter number 3 et valider avec la touche 1 Press again on the button 1 to va lidate and bypass the second 0 6 The user can now access the menus Lan guage Daily Hour counter Service Status services and oil change and END naviga tion ...

Page 62: ... and manipulation Resetting the Daily Hour counter Press to scroll to the Daily Hour Counter 1 Press 1 to validate the deleting of existing hours 2 3 A message validates the opera tion 4 Press to scroll to END and press 1 Enter ...

Page 63: ...il change The message is saved in the Pilot System To bypass the message and continue work press the button 1 Press once or twice on the or buttons at any time to visualise the next oil change or service then contact your dealer in advance to make a reservation When the service is due or overdue a warning message and an icon show when the ma chine is turned on ...

Page 64: ...PM from 2175 rpm the feed roller starts to turn Normal RPM after over speed of the engine or rotor PTO the rotor must return to less than 2175 rpm in order that the feed roller can function again RPM overspeed rotor stops REMINDER It is formally forbidden to modify the default factory settings of the Pilot System Any modification to the security and program parameters made outside of our factories...

Page 65: ...stops the engine and pre vents restarting deactivates starter motor To delete this message ensure that the housings are closed and press the button 1 Red LED Rotor rotation impulse sensor A static green LED indicates that the machine and consequently the Pilot System have been turned on The light begins to flash when it receives a signal from the rotor impulse sensor M18 The frequency of the flash...

Page 66: ...ensation escape by releasing the drainage screw each month For temperatures between 10 and 25 allow the machine to warm up for several minutes with the retraction switched on HE 46 BIO oil can be mixed with other BIO oils on a rapeseed oil basis that correspond with DIN 51524 part 2 Filling with HE46 BIO from used machines that previously had hydraulic oil on a mineral oil basis See appendix ...

Page 67: ...29 07 2020 67 Hydraulic plans Wood shredder with ABS ...

Page 68: ...29 07 2020 68 Wood shredder with ABS EPS ...

Page 69: ...29 07 2020 69 GM10 Pull Push ...

Page 70: ...29 07 2020 70 Electrical diagrams 170M 190M 250M ...

Page 71: ...29 07 2020 71 170M 190M 250M ...

Page 72: ...29 07 2020 72 170M 190M 250M ...

Page 73: ...29 07 2020 73 350M 450M 550M ...

Page 74: ...29 07 2020 74 350M 450M 550M ...

Page 75: ...29 07 2020 75 350M 450M 550M ...

Page 76: ...29 07 2020 76 General EPS electric switching ...

Page 77: ...29 07 2020 77 General EPS electrical switching ...

Page 78: ...29 07 2020 78 GM10M ...

Page 79: ...29 07 2020 79 GM10M ...

Page 80: ...29 07 2020 80 ...

Reviews: