Trust SpaceC@m 300
21
NL
Function Description
N
There are various functions in this submenu of the 'Edit' screen that you can use to
edit the image.
O
‘Print’ button: Prints the edited image on your printer.
P
‘Share’ button: Saves the edited image to your hard disk, sends the edited image
by e-mail or fax, or saves it as a HTML document (Internet).
Q
‘Express’ button: Gives more functions that you can use to edit the image.
R
A 'Thumbnail' (small image) of the image is shown here. Click on the red arrow
next to the thumbnail to see all your images. Click on the thumbnail of the image
that you want to edit.
Table 6: Processing a snapshot
5.3
Using Acer EasyXpress VideoMail 2.2
Follow the instructions below for the use of Acer EasyXpress VideoMail. For more information you can also
consult the help function of this program.
Note:
You must have a working e-mail account installed on your system before you start EasyXpress
VideoMail. Ask your Internet Service Provider if you have any questions about your e-mail
account.
1. Start EasyXpress VideoMail 2.2.
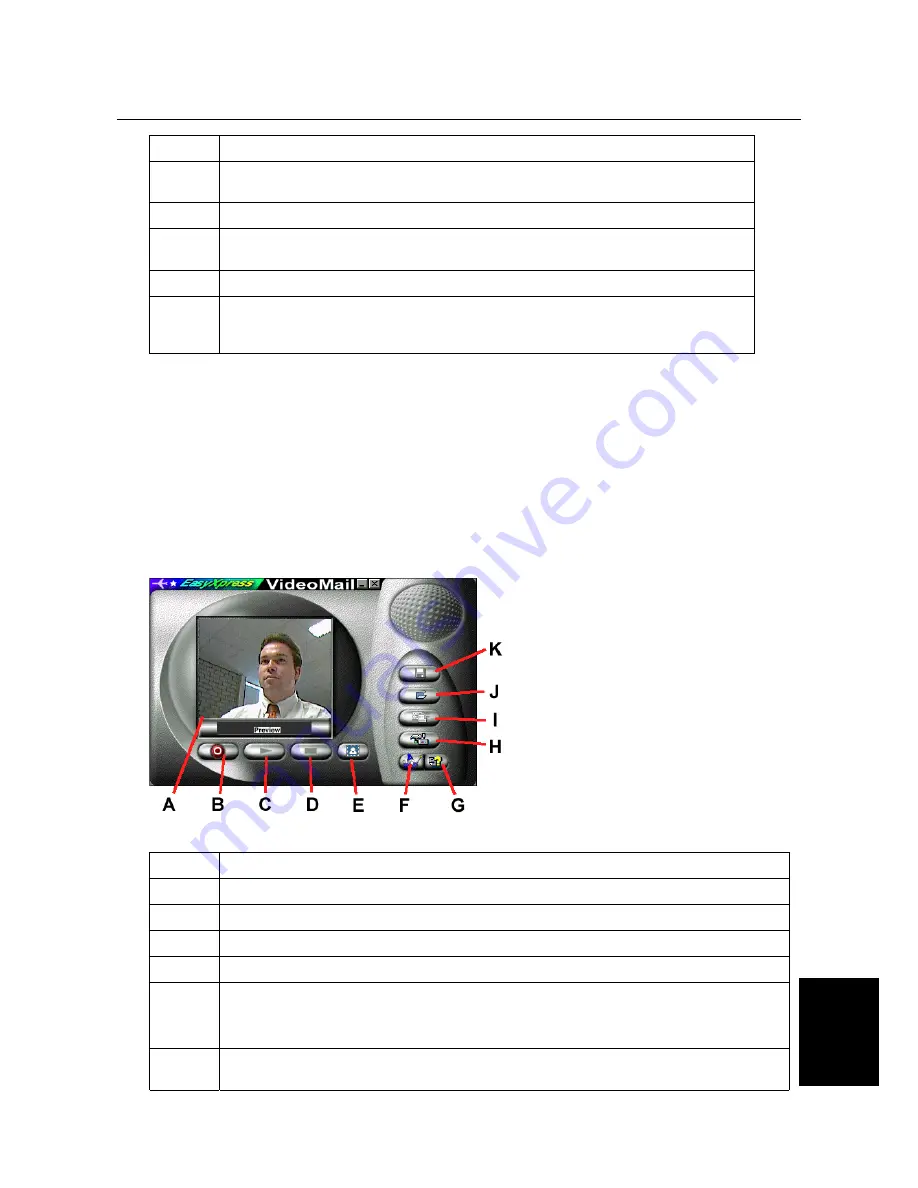
2. A screen similar to figure 29 will appear. See the table below for this screen's diverse functions.
Figure 29: Using Acer EasyXpress
Function Description
A
The camera image is shown in this screen.
B
‘Record’ button: Starts the video/sound recording.
C
‘Play’ button: Plays the recorded video mail message.
D
‘Stop’ button: Stops recording or playback of the video mail message.
E
‘Snapshot’ button: Takes a 'snapshot' of the present video image. The snapshot is opened
in the EasyPaint program where the image can be edited and saved.
Note:
The Snapshot button on the camera does not work with this program.
F
‘‘Wizard’ button: Starts the VideoMail Wizard. You can create and send a video mail
message using this wizard. Follow the instructions below for the use of this wizard.


