TRUST 632AV LCD POWER VIDEO
17
U K
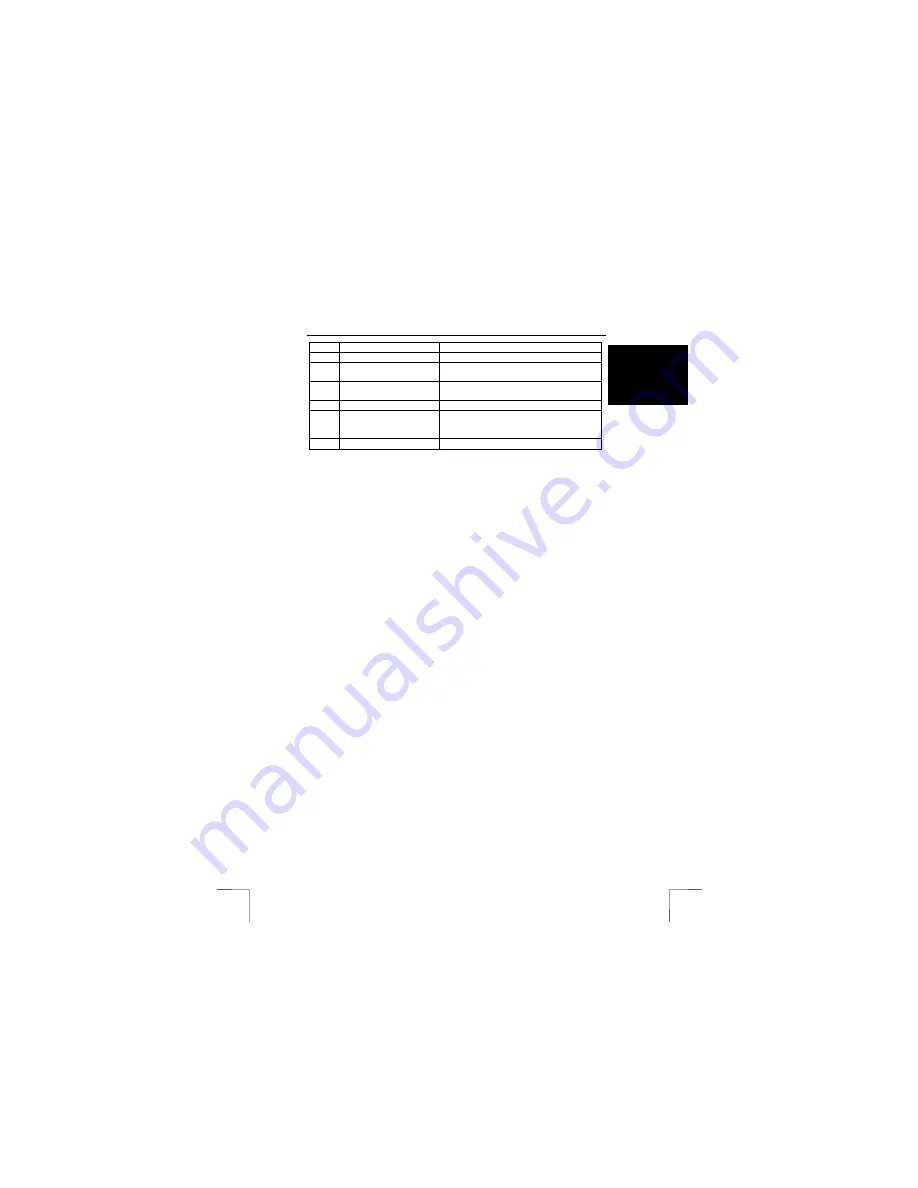
Item
Description
Function
flicker.
9
Indicator for the save
mode
This indicator is lit when the camera is in
the save mode.
10
Indicator for the live
mode.
This indicator is lit when the camera is in
the live mode.
11
Video screen
Shows the image viewed by the camera.
12
Hide screen
Hides the screen, but does not close the
program. It is recommended to first stop the
image using button 7.
13
Close
Closes the program.
Table 12: Trust DV Power Video Manager used in the live mode. Use this table
together with figure 10.
7.1.5
Opening saved photographs or video clips
1.
If you wish to connect the camera (this is not necessary), select the ‘DV disk’
mode (see figure 7).
2.
Click on ‘Start -> Programs -> TRUST 632AV LCD Power Video -> Power
Video Manager’.
3.
In the left-hand side of the screen (12), scroll to the location where you have
saved the photographs and video recordings.
4.
The recordings will be visible as icons.
5.
Double-click on one of the recordings. The recording will now be opened in
your default editing program or media player program.
Tip:
See the Help function provided with this program for more detailed
information.
7.1.6
Alternative method for transferring recordings from the
camera
The TRUST 632AV LCD POWER VIDEO is visible in Windows as an extra
removable disk when it is in the ‘Storage medium’ mode (see figure 7). Its use is as
easy as moving a file. In contrast to other cameras, this camera, therefore,
does not
require a separate (TWAIN) driver. Download photographs using ‘File – Open’ or
copy them to your hard disk.
1.
Take some photographs.
2.
Connect the camera to your computer’s USB port using the USB cable
provided.
3.
Wait a couple of seconds. The computer will detect the camera and the LCD
screen will be turned on.
4.
Check whether the ‘Storage medium’ mode has been selected (see figure 7).
This should already have been selected.
5.
Open ‘My Computer’.
6.
Search for ‘Removable Disk’ and open it. A folder entitled ‘DCIM’ will be
visible. If not, find a second ‘Removable Disk’ and open it.
7.
Double-click on the ‘DCIM’ folder. A folder entitled ‘100media’ will be visible.
If you have taken a large number of recordings, these will be saved in
different folders, such as 100media, 101media, 102media, etc.
8.
Double-click on the ‘100media’ folder. The files will now be visible.
9.
Copy all the files to a suitable location on your hard disk (for example C:\My
Recordings).
10.
You can now edit these recordings as required.


