EN
7
electric heater TEH 200 / TEH 300 / TEH 400
Assembly and installation
Scope of delivery
•
1 x Device
•
1 x Manual
Start-up
Warning
Operating several devices stacked onto one another is
prohibited for safety reasons.
Do not take the devices into operation when stacked.
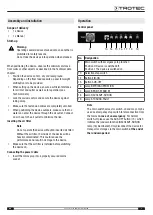
When positioning the device, observe the minimum distance
from walls or other objects as described in the Technical data
chapter.
•
Position the device on firm, dry and level ground.
Depending on the floor load capacity a panel for weight
distribution is to be provided.
•
When setting up the device, ensure a sufficient distance
for air inlet and outlet as well as for operation (see
Technical data).
•
Lock the swivel castors and secure the device against
rolling away.
•
Make sure that extension cables are completely unrolled.
•
When positioning the device outdoors, make sure that no
water can enter the device through the air outlet. Connect
an air hose to the air outlet to minimize the risk.
Inserting the air filter
Note
Do not operate the device without an inserted air filter!
Without the air filter, the inside of the device will be
heavily contaminated. This could reduce the
performance and result in damage to the device.
•
Make sure that the air filter is installed before switching
the device on.
Connecting the power cable
•
Insert the mains plug into a properly secured mains
socket.
Operation
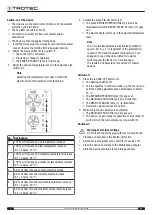
Control panel
9
13 14 15 16 17 18
19
No.
Designation
9
Main switch with emergency stop function
Position 0: Device is switched off.
Position I: The device is switched on.
13
Selection step switch
14
Button EIN-ON
15
Button AUS-OFF
16
Lamp BETRIEB-OPERATION
17
Lamp BEREIT-STAND BY
18
Lamp NACHLAUF-RUN ON
19
Lamp STÖRUNG-FAULT
Note
The main switch serves for switch-on and may only be
used as emergency stop switch for disconnection from
the mains
in case of an emergency
. For normal
switch-off please use the AUS-OFF button (15), which
initiates the rundown function (NACHLAUF-RUN ON
lamp (18) illuminated). Only disconnect the device for
transport or storage via the main switch
at the end of
the rundown period
.
Summary of Contents for TEH 200
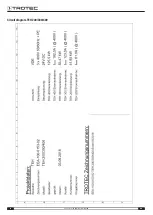
Page 16: ...16 EN electric heater TEH 200 TEH 300 TEH 400 Circuit diagram TEH 200 300 400 ...
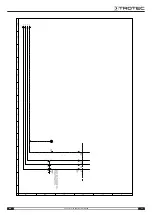
Page 17: ...EN 17 electric heater TEH 200 TEH 300 TEH 400 ...
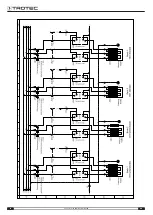
Page 18: ...18 EN electric heater TEH 200 TEH 300 TEH 400 ...
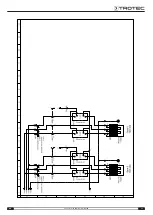
Page 19: ...EN 19 electric heater TEH 200 TEH 300 TEH 400 ...
Page 20: ...20 EN electric heater TEH 200 TEH 300 TEH 400 ...
Page 21: ...EN 21 electric heater TEH 200 TEH 300 TEH 400 ...
Page 22: ...22 EN electric heater TEH 200 TEH 300 TEH 400 ...
Page 23: ...EN 23 electric heater TEH 200 TEH 300 TEH 400 ...
Page 24: ...24 EN electric heater TEH 200 TEH 300 TEH 400 ...
Page 25: ...EN 25 electric heater TEH 200 TEH 300 TEH 400 ...
Page 26: ...26 EN electric heater TEH 200 TEH 300 TEH 400 ...


