


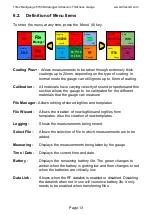


Tritex Multigauge 5700 Datalogger Ultrasonic Thickness Gauge www.tritexndt.com
Page 16
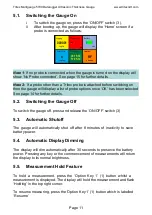
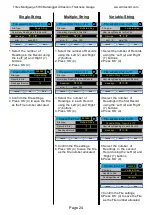
No Probe
- If no probe is connected when the gauge is turned on, or if a probe
is disconnected, the screen will display the following:
Either connect a suitable probe or simply press the ‘OK’ (4) button to enter
the ‘Home’ screen. This will allow navigation of the menus without a probe
fitted. Once ‘OK’ has been selected, the display will show ‘No Probe!’ on
the ‘Home’ screen and at the bottom right of the screen in measurement
mode.
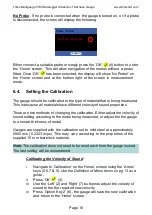
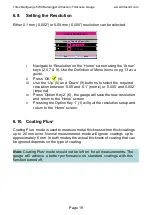
6.4.
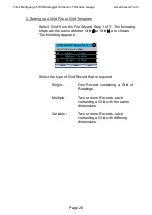
Setting the Calibration
The gauge should be calibrated to the type of material that is being measured.
This is because all materials have different velocity of sound properties.
There are two methods of changing the calibration. Either adjust the velocity of
sound setting according to the metal being measured, or adjust the the gauge
to a known thickness of metal.
Gauges are supplied with the calibration set to mild steel at approximately
5900 m/s (0.2323 in/µs). This may vary according to the properties of the
supplied 15 mm test block material.
Note:
The calibration does not need to be reset each time the gauge is used.
The last setting will be remembered.
Calibrating the Velocity of Sound
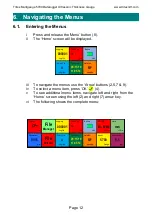
i
Navigate to ‘Calibration’ on the ‘Home’ screen using the ‘Arrow’
keys (2,5,7 & 9).
Use the Definition of Menu Items on pg 13 as a
guide.
ii
Press ‘OK’ (4).
iii
Use the ‘Left’ (2) and ‘Right’ (7) buttons to adjust the velocity of
sound to the the required new velocity.
iv
Press ‘Option Key 2’ (6), the gauge will save the new calibration
and return to the ‘Home’ screen.
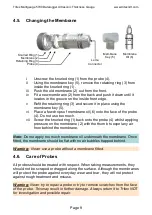
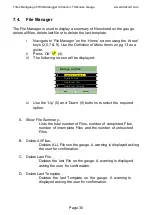
Probe change:
No Probe connected:
OK
!


