


MB 741
3
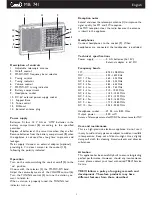
Reception notes
Extend and steer the telescopic antenna (1) to improve the
signal quality for FM and SW reception.
For MW reception steer the radio because the antenna
is inbuilt in the appliance.
Headphones
Connect headphones to the socket (9). When
headphones are connected, the loudspeaker is excluded.
Technical specifications
Power supply: .................... 4 AA batteries (4x1.5V)
External adapter in 6V DC
Frequency bands:
FM ........................................... 87.50 -108.0 MHz
MW ......................................... 520 - 1620 KHz
SW 1 - 75m .......................... 3.65 - 4.25 MHz
SW 2 - 60m .......................... 4.55 - 5.25 MHz
SW 3 - 49m .......................... 5.85 - 6.55 MHz
SW 4 - 41m .......................... 6.95 - 7.65 MHz
SW 5 - 31m .......................... 9.10 - 10.55 MHz
SW 6 - 25m .......................... 11.40 - 12.45 MHz
SW 7 - 21m .......................... 12.75 - 13.90 MHz
SW 8 - 19m .......................... 14.60 - 16.00 MHz
SW 9 - 16m .......................... 17.10 - 18.80 MHz
SW 10 - 13m ........................ 20.55 - 22.50 MHz
Headphone socket: .......... Ø 3.5 mm 8-32 Ohm
Output power: ................. 300 mW
Antenna: Telescopic antenna for FM/SW Ferrite antenna for MW
Care and maintenance
This is a high-precision electronic appliance; do not use it
in very humid or dusty places or subject to sudden rises/falls
in temperature. Keep out of direct sunlight. Use a slightly
damp soft cloth for cleaning. Avoid solvents and abrasive
substances.
Attention
This appliance has been carefully built to ensure long-lasting
perfect performance. However, should any inconvenience
occur, please contact your local authorised TREVI Service
Centre.
TREVI follows a policy of ongoing research and
development. Therefore products may have
different features from those described.
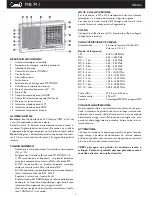
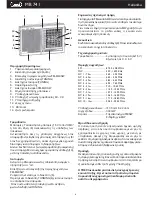
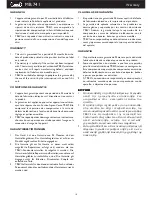
Description of controls
1.
Adjustable telescopic antenna
2.
On/off control
3.
FM-SW-MW frequency band selector
4.
Tuning control
5.
Tuning indicator
6.
Volume control
7.
FM-MW-SW tuning indicator
8.
Battery compartment
9.
Headphone socket
10. DC 6V external power supply socket
11. Support Base
12. Tone control
13. DX/Local
14. External antenna plug
Power supply
Batteries: Fit four 1.5 V AA or “UM3” batteries in the
battery compartment (8) according to the specified
polarities.
Replace all batteries at the same time when they are flat.
Remove batteries from the battery compartment (8) when
the appliance is not used for a long time to prevent acid
leakages.
Mains supply: Connect an external adapter (optional)
providing 6 V in direct current to the socket (10),
following the polarity indicated.
Operation
Turn on the radio switching the control on/off (2) to the
“on” position.
Choose with the selector (3) the FM-MW-SW band.
Adjust the volume by means of the VOLUME control (6).
Turn the TUNING control (4) to tune the station you
want to listen to.
When a station is properly tuned, the TUNING led
indicator turns on.
English
1
1 1
7
4
5
6
3
9
2
1 0
8
1 2
1 3
1 4
Summary of Contents for MB 741
Page 11: ...MB 741 11 Note ...


