background image


© Copyright 2017 TRENDnet. All Rights Reserved. 


TRENDnet User’s Guide


TPE-TG44ES 

17


Upgrade your switch firmware 

Management 

TRENDnet may periodically release firmware upgrades that may add features or fix 
problems associated with your TRENDnet switch model and version. To check if there is 
a firmware upgrade available for your device, please check your TRENDnet model and 
version using the link. 

http://www.trendnet.com/support/


In addition, it is also important to verify if the latest firmware version is newer than the 
one your switch is currently running. To identify the firmware that is currently loaded on 
your switch, log in to the switch, click on the System Info section or click on Tools and 
click on Firmware Upgrade. The firmware used by the switch is listed as Runtime Image 
or Image Version. If there is a newer version available, also review the release notes to 
check if there were any new features you may want or if any problems were fixed that 
you may have been experiencing. 


1. If a firmware upgrade is available, download the firmware to your computer. 


2. Unzip the file to a folder on your computer. 

Please note the following: 


Do not interrupt the firmware upgrade process. Do not turn off the device or 
press the Reset button during the upgrade. 


If you are upgrade the firmware using a laptop computer, ensure that the laptop 
is connected to a power source or ensure that the battery is fully charged. 


Disable sleep mode on your computer as this may interrupt the firmware upgrade 
process. 


Do not upgrade the firmware using a wireless connection, only using a wired 
network connection. 


Any interruptions during the firmware upgrade process may permanently 
damage your switch. 


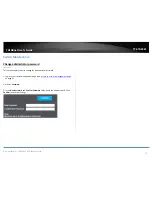
1. Log into your switch management page (see “

Access your switch management page

” 

on page 6). 


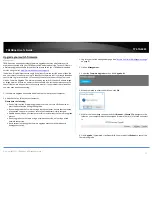
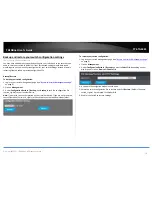
2. Click on Management. 


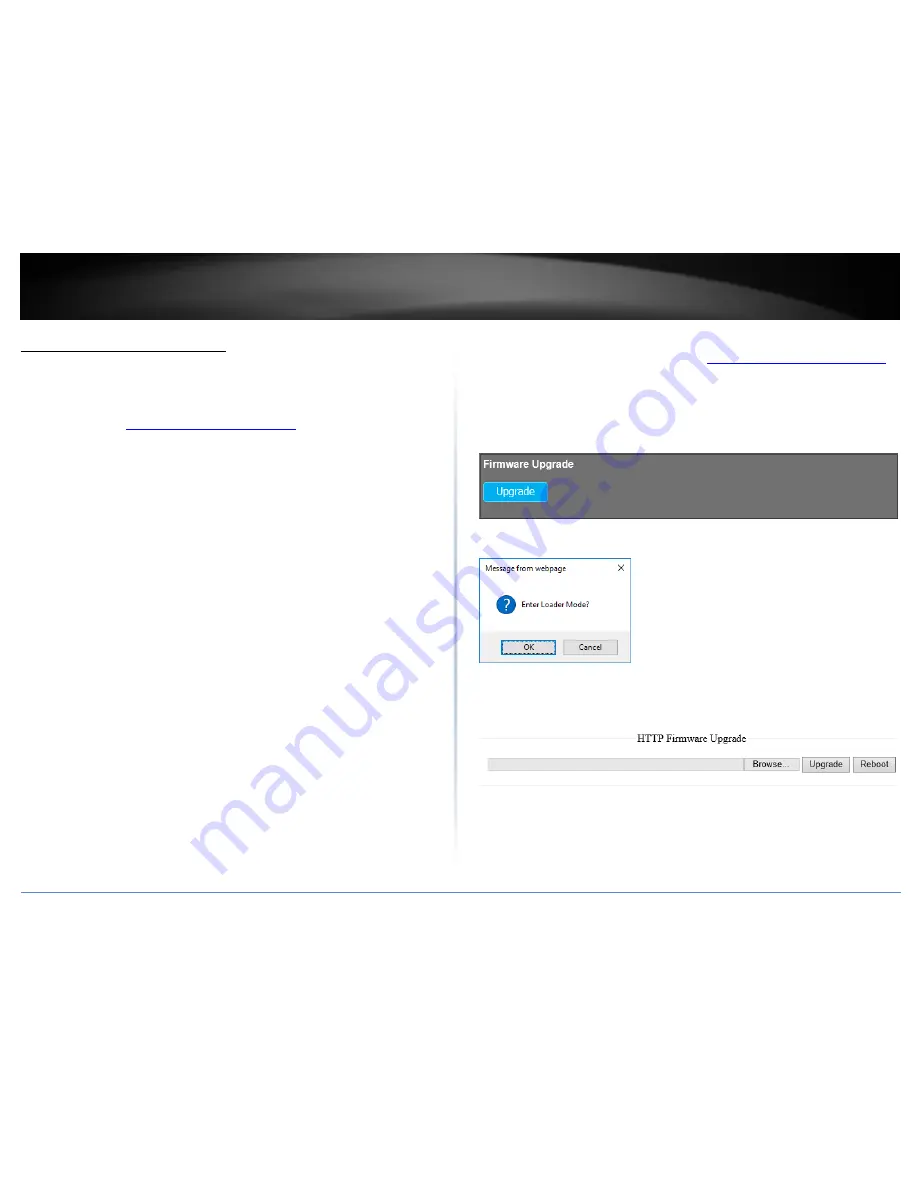
3. Under the Firmware Upgrade section, click Upgrade. W 


4. When prompted to enter Loader Mode, click OK


5. Wait for the loader page to appear and click Browse or Choose File. Navigate to the 

folder on your computer where the unzipped firmware file (.bin) is located and select 
it. 


6. Click Upgrade. If prompted, click Yes or OK. You may also click Reboot to cancel the 
firmware upgrade. 


Summary of Contents for TPE-TG44ES

Page 1: ...TRENDnet User s Guide Cover Page ...

Page 2: ...AN 8 Add modify and remove VLANs 8 Trunk Link Aggregation 10 Configure port trunk settings 10 Mirroring 10 Configure port mirror settings 10 QoS Quality of Service 11 Port Based QoS 11 IEEE 802 1p QoS 11 Storm Control 12 Configure Storm Control 12 Rate Limiting 13 Set Per Port Rate Limiting 13 Loopback Detection Prevention 13 Enable loopback prevention 13 IGMP Snooping 14 Configure IGMP Snooping S...

Page 3: ...oubleshooting access controls and monitoring TRENDnet s TPE TG44ES provides four gigabit PoE and four gigabit non PoE ports The PoE standard supplies up to 30W of power per port for devices such as high power wireless access points PTZ Pan Tilt Zoom Internet cameras and VoIP telephony systems Ports Four gigabit PoE ports and four gigabit ports provides a 16Gbps switching capacity PoE Power Supplie...

Page 4: ...he switch to factory defaults PoE ports 1 4 Ports 1 4 can supply power and Gigabit connectivity to both PoE 802 3af or PoE 802 3at PoE devices PoE ports 5 8 Ports 5 8 can provide Gigabit connectivity to network non PoE devices When using LACP only ports 7 8 can be used for link aggregation On Off Power Switch Turns the switch on or off o Power Connector Connect the included DC power adapter to the...

Page 5: ... or power is not connected Gigabit Ports 1 8 Link ACT LED On Green When the Green LED lights are on the link is established at Gigabit connectivity On Amber When the Amber LED lights are on the link is established at 10 100Mbps connectivity Blinking When the LED is blinking the port is transmitting or receiving data Off The link is disconnected or not established PoE On Green When the Green LED li...

Page 6: ... the IP address of the switch in the address bar and then press Enter The default IP address is 192 168 10 200 6 Enter the User Name and Password and then click Login By default User Name admin Password admin Note User name and password are case sensitive 7 Click Management 8 Configure the switch IP address settings to be within your network subnet then click Apply Note You may need to modify the ...

Page 7: ...es to connect them to one of the available Gigabit Ports 1 8 Check the status of the LED indicators on the front panel of your switch to ensure the physical cable connection from your computer or device Note If you encounter issues connecting to your network there may be a problem with your computer or device network settings Please ensure that your computer or device network settings also called ...

Page 8: ...o check the general system information of your switch such as firmware version build date and IP address information You can also enable or disable jumbo frames or power saving EEE features 1 Log into your switch management page see Access your switch management page on page 6 2 Click on System Mode Name The model name of the switch Device Name The current device name assigned to the switch This c...

Page 9: ...ange your switch IP address settings Typically the IP address settings should be changed to match your existing network subnet in order to access the switch management page on your network Default Switch IP Address 192 168 10 200 Default Switch IP Subnet Mask 255 255 255 0 1 Log into your switch management page see Access your switch management page on page 6 2 Click on Management 3 Review the set...

Page 10: ...s received on the specified port VLAN Add modify and remove VLANs VLAN A VLAN is a group of ports that can be anywhere in the network but communicate as though they were in the same area VLANs can be easily organized to reflect department groups such as R D Marketing usage groups such as e mail or multicast groups multimedia applications such as video conferencing and therefore help to simplify ne...

Page 11: ...ultiple times to cycle through the port membership type based on the color code After you have assigned all the ports with the desired port membership to the new VLAN click Apply Note when untagged or VLAN unaware ports are assigned to a VLAN the port VLAN ID should be assigned the same ID as the VLAN to be properly configured ex If adding ports 7 8 as untagged port members of VLAN ID 100 the PVID...

Page 12: ...n the device on the other end of the trunk should also be configured to use the MAC SA DA algorithm o MAC SA DA MAC source and destination address o MAC SA MAC source address only o MAC DA MAC destination address only Link Group Activity Select Active mode for 802 3ad link aggregation Link Group Member Only ports 7 8 may be used for link aggregation The ports will not be checked if a link aggregat...

Page 13: ...ick OK 3 Review the settings Click Apply to save the settings By default queue configuration can be found at the bottom of the page queue 0 being the lowest priority and queue 3 being the highest 1 8 Indicates the port number By default all ports are assigned to the lowest priority queue 0 This would require manually configuration to apply per port priority Weight The weight value indicates the qu...

Page 14: ...the port transmits all frames out of higher priority queues before transmitting any from the lower priority queues WFQ Weighted Fair Queuing Using this scheduling method the port transmits a set number of bits from random queues in a round robin fashion so that each has a chance to transmit traffic Storm Control Configure Storm Control Broadcast Storm Control The switch can set rate limits on broa...

Page 15: ...te or bandwidth limit for transmitted from a specific port Loopback Detection Prevention Enable loopback prevention Loopback Prevention The loopback detection and prevention feature allows the switch to detect and prevent disruption from loops that occur on other switches directly connected to your switch Ex A loop occurs on another switch that is connected to your switch on port 5 If loopback det...

Page 16: ...AN ID PoE Configuration The main advantage of PoE is that it can make installing a network easier The selection of a location for a network device is often limited by whether there is a power source nearby This constraint limits equipment placement or requires the added time and cost of having additional electrical sources installed However with PoE you can install PoE compatible devices wherever ...

Page 17: ... will turn on to indicate 80 of total PoE power used PSE IC MAX Temperature Displays the maximum temperature allowable limit of the PoE IC chip PSE Voltage Displays the PoE voltage supplied to each PoE port Port Displays the port number You can manually enable or disable PoE on the specified port by clicking the number and selecting Turn on or Turn off By default PoE is enabled on all PoE ports Po...

Page 18: ...dministrator password Password This section explains how to change the administrator password 1 Log into your switch management page see Access your switch management page on page 6 2 Click on Password 3 In the New Password and Confirm Password fields enter the new password Click Confirm to save the settings ...

Page 19: ...ncing 1 If a firmware upgrade is available download the firmware to your computer 2 Unzip the file to a folder on your computer Please note the following Do not interrupt the firmware upgrade process Do not turn off the device or press the Reset button during the upgrade If you are upgrade the firmware using a laptop computer ensure that the laptop is connected to a power source or ensure that the...

Page 20: ...n page 6 2 Click on Management 3 Under Configuration Restore Backup click Backup to save the configuration file switch_cfg bin to your local hard drive Note If prompted choose the location on your local hard drive If you are not prompted the configuration file switch_cfg bin will be saved to your default downloads folder To restore your switch configuration 1 Log into your switch management page s...

Page 21: ...ry defaults if you are encountering difficulties with your switch and have attempted all other troubleshooting Before you reset your switch to defaults if possible you should backup your switch configuration first see Backup and restore your switch configuration settings on page 77 There are two methods that can be used to reset your switch to factory defaults Hardware Method Using a paper clip on...

Page 22: ...ch fabric 16 Gbps RAM buffer 192 KB MAC Address Table 4K entries Jumbo Frames 9 KB Forwarding rate 11 9 Mpps 64 byte packet size Management HTTP Web based GUI Backup Restore Configuration Upload Firmware Link Aggregation 802 3ad Dynamic LACP Quality of Service QoS Port based QoS 802 1p Class of Service CoS Bandwidth Control Rate Limiting per port Min Limit 512Kbps Queue Scheduling Strict Priority ...

Page 23: ...tput 55V DC 1 3A external power adapter Consumption 65 28W max PoE PoE budget 60 W max 802 3at Up to 30 W per port ports 1 4 Mode A Pins 1 2 for power and pins 3 6 for power PD auto classification Over current short circuit protection Fan Acoustics Fanless design MTBF 1 089 244 hours Operating Temperature 0 50 C 32 122 F Operating Humidity Max 90 non condensing Dimensions 240 x 105 x 27 mm 9 45 x ...

Page 24: ...tion icon and click Properties c Click Internet Protocol Version TCP IPv4 and then click Properties d Then click Use the following IP address and make sure to assign your network adapter an IP address in the subnet of 192 168 10 x Click OK Windows XP 2000 a Go into the Control Panel double click the Network Connections icon b Right click the Local Area Connection icon and the click Properties c Cl...

Page 25: ...and your IP address settings displayed Note If you are experiencing difficulties please contact your computer or operating system manufacturer for assistance How to configure your network settings to use a static IP address Note Please note that although the following procedures provided to follow for your operating system on configuring your network settings can be used as general guidelines howe...

Page 26: ...atic IP address Then click the Apply button f Restart your computer Note If you are experiencing difficulties please contact your computer or operating system manufacturer for assistance How to find your MAC address In Windows 2000 XP Vista 7 8 1 10 Your computer MAC addresses are also displayed in this window however you can type getmac v to display the MAC addresses only In MAC OS 10 4 1 Apple M...

Page 27: ... is connected Consult the dealer or an experienced radio TV technician for help FCC Caution Any changes or modifications not expressly approved by the party responsible for compliance could void the user s authority to operate this equipment This device complies with Part 15 of the FCC Rules Operation is subject to the following two conditions 1 This device may not cause harmful interference and 2...

Page 28: ...lace the defective product or there is no comparable model available we will refund the depreciated value of the product If a product does not operate as warranted during the applicable warranty period TRENDnet shall reserve the right at its expense to repair or replace the defective product or part and deliver an equivalent product or part to the customer The repair replacement unit s warranty co...

Page 29: ...SE NEGLECT IMPROPER INSTALLATION OR TESTING UNAUTHORIZED ATTEMPTS TO REPAIR OR MODIFY OR ANY OTHER CAUSE BEYOND THE RANGE OF THE INTENDED USE OR BY ACCIDENT FIRE LIGHTNING OR OTHER HAZARD LIMITATION OF LIABILITY TO THE FULL EXTENT ALLOWED BY LAW TRENDNET ALSO EXCLUDES FOR ITSELF AND ITS SUPPLIERS ANY LIABILITY WHETHER BASED IN CONTRACT OR TORT INCLUDING NEGLIGENCE FOR INCIDENTAL CONSEQUENTIAL INDI...

Page 30: ......
Reviews: