


Page 26
Removal Instructions (
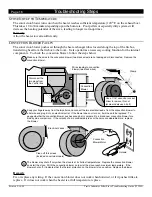
Unplug the Heater First!
)
Printed 3/18/98
Travis Industries Pellet Stove Troubleshooting Guide (
1994)
A
CCESSING
I
NTERNAL
C
OMPONENTS ON
I
NSERTS
Servicing pellet inserts requires the removal of the insert from the fireplace. The directions below detail one
method of removal.
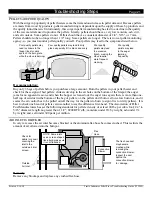
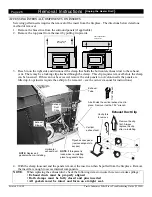
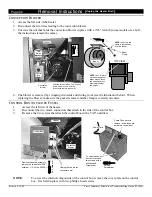
1. Remove the brass trim from the surround panels (if applicable).
2. Remove the top panel from the insert by pulling it upwards.
Remove the trim
by sliding it up.
The top panel slides
off the insert.
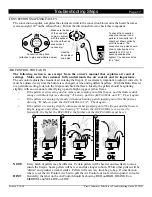
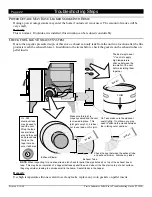
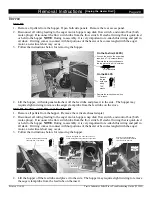
3. Reach in on the right side and disconnect the clamp that holds the horizontal exhaust duct to the exhaust
vent. There may be a locking clip attached through the clamp. This clip requires removal before the clamp
can be loosened. If this can not be accessed, remove the side panels (on Avalon inserts the panels are
lifted up, Lopi inserts require the ashlip to be removed Ð see the owner's manual for instructions).
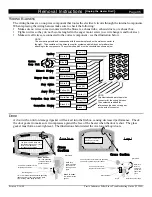
Unclip this
to remove
Exhaust
Blower
Horizontal
exhaust duct
Remove the clip
first. Always
replace the clip
after re-installing.
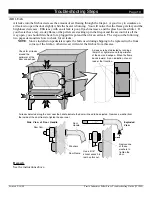
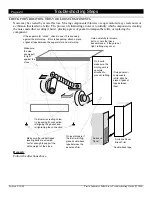
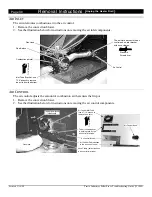
7/16
" Wrench
Vertical
exhaust duct
Exhaust
Tube
Exhaust Duct Clip
Exhaust
Duct
Clips
Flyash access panel
(remove wingnuts to
access)
A bolt holds the vertical exhaust duct in
place. Remove it with a 7/16Ó wrench.
NOTE
: If this gasket is
loose when re-installing,
place two gaskets here.
NOTE
: Replace all
gaskets when re-installing.
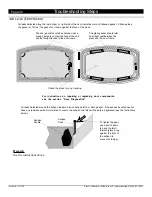
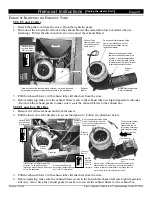
4. With the clamp loosened and the panels removed, the insert can then be pulled from the fireplace. Remove
the insert far enough to access internal components.
NOTE
:
When replacing the exhaust duct, check the following items to insure there is no smoke spillage:
¥ Exhaust ducts must be properly aligned
¥ Both clamps must be fully closed and pins inserted
¥ All gaskets must be intact and form an air-tight seal.
Summary of Contents for 400 PI
Page 46: ......