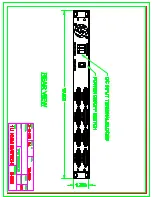
The rear view of the TR-9200/TR-9300
1. Turn off your computer. You should always turn off your computer before connecting or
disconnecting a device.
2. Connect the KVM cable to the “System 1” connector on the monitor/keyboard drawer.
3. Connect the video (VGA) connector of the KVM cable to the video card connector on
the rear panel of your computer.
4. Identify and connect the PS/2 mouse and PS/2 keyboard connector to the correct
PS/2 ports on the rear panel of your computer.
5. Connect the AC power cord to the power inlet on the drawer and then to a power
outlet.
6. If the TR-9200 is used, step 2 & 3 should be skipped. Users need only connect the
TR-9200 VGA in port to computer system’s VGA out port.
NOTE:
Please refer to chapter 4 for more information about the TR-9300.
3.3 Turning On the Drawer
Make sure all cables and the power cord are connected properly. Be sure to tighten all
connector screws. Using two hands, grasp the rear of the drawer, lift the tab and pull the
panel up and forward. This will disengage the momentary on/off switch and the unit
should power on. The LED on the left of the monitor panel should turn from orange to
green, verifying that the unit is operational.
3.4 Testing the Drawer
To test that the drawer is working properly, perform the following steps:
1. Power up the monitor/keyboard drawer, and then turn on your computer.
2. Make sure the video image is centered within the screen area. Use the OSD controls
to adjust the image (see note below) or press the Auto button on the right hand side
of the monitor.
Note:
If the unit does not power up when the panel is pulled up, try pushing the soft
power on/off button on the left side of the monitor panel to power up the unit.
You can adjust the horizontal and vertical position, contrast, and brightness to
TR-9200/9300 User Manual
17

