background image

TL-WR543G

54M Wireless AP Client Router User Guide


- 63 - 

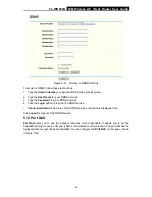
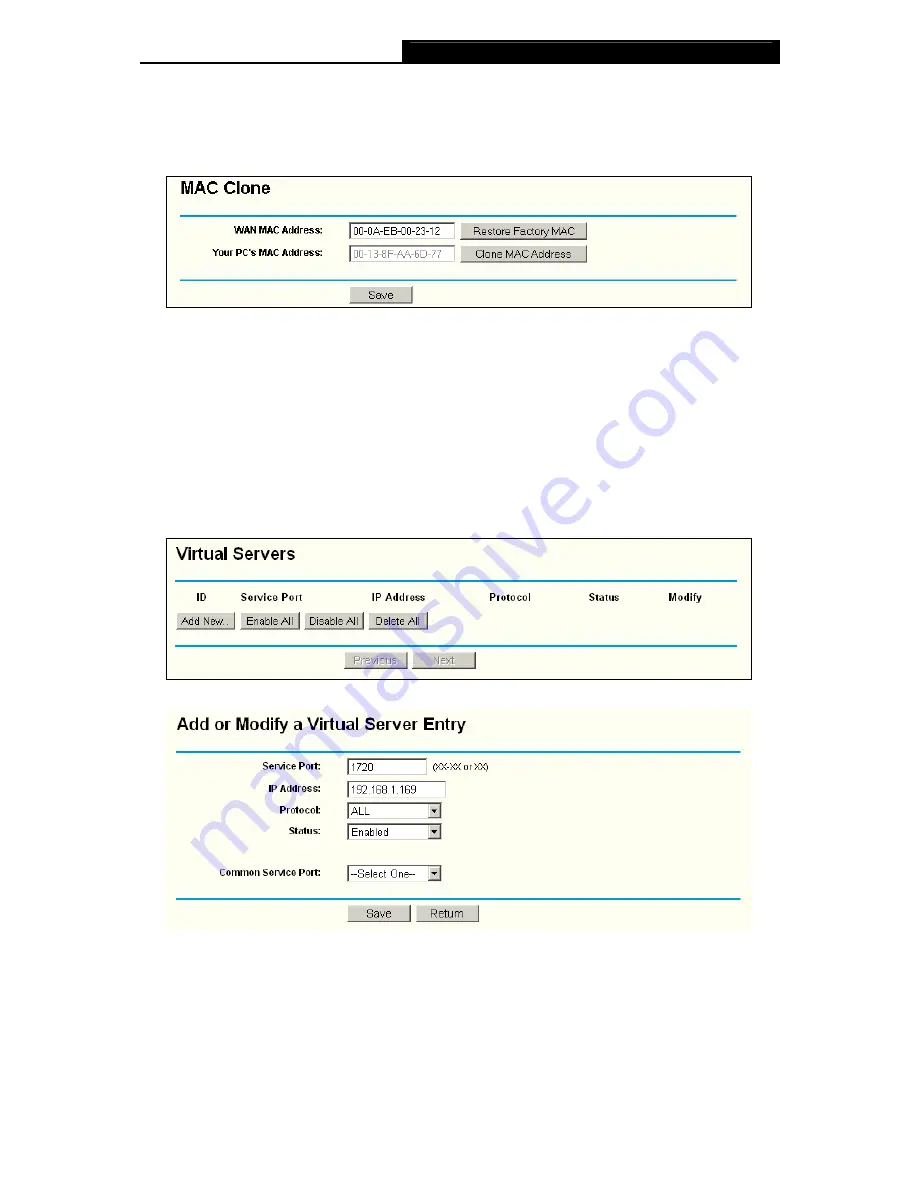
address is proper MAC address, click the "Clone MAC Address" button and your PC’s 
MAC address will fill in the "WAN MAC Address" field. Or else, type the MAC Address 
into the "WAN MAC Address" field. The format for the MAC Address is 
XX-XX-XX-XX-XX-XX. Then click the "Save" button. It will take effect after rebooting. 


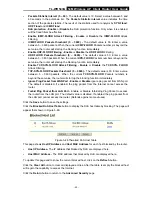
Figure A-3  MAC Clone 

3.  I want to use Netmeeting, what do I need to do? 

1)  If you start Netmeeting as a sponsor, you don’t need to do anything with the router. 

2)  If you start as a response, you need to configure Virtual Server or DMZ Host. 

3)  How to configure Virtual Server: Login to the router, click the “Forwarding” menu on the 

left of your browser, and click "Virtual Servers" submenu. On the "Virtual Server" page, 
click 

Add New,

 then on the “Add or Modify a Virtual Server” page,    enter “1720” into the 

blank behind the “Service Port”, and your IP address behind the IP Address, assuming 
192.168.1.169 for an example, remember to “Enable” and “Save”.   


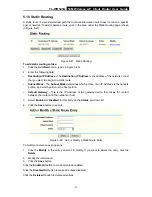
Figure A-4  Virtual Servers 


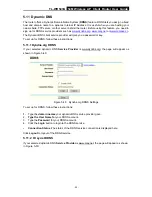
A-5    Add or Modify a Virtual server Entry 

)


Note: 

Your opposite side should call your WAN IP, which is displayed on the “Status” page. 

4)  How to enable DMZ Host: Login to the router, click the “Forwarding” menu on the left of 

your browser, and click "DMZ" submenu. On the "DMZ" page, click “Enable” radio and 
type your IP address into the “DMZ Host IP Address” field, using 192.168.1.169 as an 
example, remember to click the "Save” button.   

Summary of Contents for TL-WR543G

Page 1: ...TL WR543G 54M Wireless AP Client Router Rev 1 0 1 ...

Page 2: ...oduct names are trademarks or registered trademarks of their respective holders No part of the specifications may be reproduced in any form or by any means or used to make any derivative such as translation transformation or adaptation without permission from TP LINK TECHNOLOGIES CO LTD Copyright 2007 TP LINK TECHNOLOGIES CO LTD All rights reserved ...

Page 3: ...r an experienced radio TV technician for help This device complies with part 15 of the FCC Rules Operation is subject to the following two conditions 1 This device may not cause harmful interference 2 This device must accept any interference received including interference that may cause undesired operation Any changes or modifications not expressly approved by the party responsible for compliance...

Page 4: ... the 2 4 GHz band has been ongoing in recent years to allow current relaxed regulation Full implementation planned 2012 Italy If used outside of own premises general authorization is required Luxembourg None General authorization required for network and service supply not for spectrum Norway Implemented This subsection does not apply for the geographical area within a radius of 20 km from the cen...

Page 5: ......

Page 6: ......

Page 7: ... Adapter for TL WR543G 54M Wireless AP Client Router One Quick Installation Guide One Resource CD for TL WR543G 54M Wireless AP Client Router including This Guide Other Helpful Information Note If any of the listed contents are damaged or missing please contact the retailer from whom you purchased the product for assistance ...

Page 8: ...er 6 Chapter 4 Quick Installation Guide 8 4 1 TCP IP configuration 8 4 2 Quick Installation Guide 9 Chapter 5 Configuring the Router 13 5 1 Login 13 5 2 Status 13 5 3 Quick Setup 14 5 4 Operation Mode 14 5 5 Network 15 5 5 1 LAN 15 5 5 2 WAN 16 5 5 3 MAC Clone 25 5 6 Wireless 26 5 6 1 Wireless Settings 26 5 6 2 Advanced Settings 32 5 6 3 Site Survey 32 5 6 4 MAC Filtering 33 5 6 5 Wireless Statist...

Page 9: ... 5 11 DDNS 52 5 11 1 Dyndns org DDNS 52 5 11 2 Oray net DDNS 52 5 11 3 Comexe cn DDNS 53 5 12 Port QoS 54 5 13 System Tools 56 5 13 1 Time 56 5 13 2 Firmware 57 5 13 3 Factory Defaults 58 5 13 4 Backup and Restore 59 5 13 5 Reboot 59 5 13 6 Password 59 5 13 7 Log 60 5 13 8 Statistics 60 Appendix A FAQ 62 Appendix B Configuring the PC 66 Appendix C Specifications 70 Appendix D Glossary 71 ...

Page 10: ...1g and IEEE 802 11b solutions up to 855 36m tested in China The transmission range is extended to 4 9 times It is an easy Web based setup for installation and management Even though you may not be familiar with the router this guide will make configuring the router easy Before installing the router please look through this guide to know all the router s functions 1 1 Purposes This Guide tells you ...

Page 11: ...chnology so that the transmission distance is 2 3 times of traditional IEEE 802 11g and IEEE 802 11b solutions up to a distance of 855 36m tested in China The transmission range is extended to 4 9 times It is compatible with all IEEE 802 11g and IEEE 802 11b products The TL WR543G 54M Wireless AP Client Router provides flexible access control in AP router mode so that parents or network administra...

Page 12: ...r Special Application and DMZ host Built in firewall supporting IP address filtering Domain Name filtering and MAC address filtering Provides WLAN ACL Access Control List AP Router mode only Supports configuration backup restore and firmware upgrade Supports Web management Detachable Antenna reverse SMA connector 2 3 Panel Layout 2 3 1 The Front Panel The front panel of the TL WR543G consists of s...

Page 13: ...e the power adapter which is supplied with the TL WR543G 54M Wireless AP Client Router only the use of a different adapter may result in product damage Four 10 100Mbps RJ45 LAN ports for connecting the router to the local PC s RJ45 WAN port for connecting the router to a cable DSL Modem or Ethernet Factory Default Reset button There are two ways to reset the router s factory defaults 1 Use the Fac...

Page 14: ...TL WR543G 54M Wireless AP Client Router User Guide 5 Figure 2 2 Rear Panel sketch ...

Page 15: ...nsing 3 3 Connecting the Router Before you install the router you should connect your PC to the Internet through your broadband service successfully If there is any problem please contact your ISP After that please install the router according to the following steps Don t forget to pull out the power plug and keep your hands dry 1 Power off your PC Cable DSL Modem and the router 2 Locate an optimu...

Page 16: ...TL WR543G 54M Wireless AP Client Router User Guide 7 Figure 3 1 Hardware Installation of the TL WR543G 54M Wireless AP Client Router ...

Page 17: ...tions as to how to do this please refer to Appendix B Configuring the PC 2 Configure the network parameters The IP address is 192 168 1 xxx xxx is from 2 to 254 Subnet Mask is 255 255 255 0 and Gateway is 192 168 1 1 The router s default IP address Obtain an IP address automatically 1 Set up the TCP IP Protocol in Obtain an IP address automatically mode on your PC If you need instructions as to ho...

Page 18: ... of 192 168 1 2 192 168 1 254 the gateway must be 192 168 1 1 4 2 Quick Installation Guide With a Web based Internet Explorer or Netscape Navigator utility it is easy to configure and manage the TL WR543G 54M Wireless AP Client Router The Web based utility can be used on any Windows Macintosh or UNIX OS with a Web browser Connect to the router by typing http 192 168 1 1 in the address field of Web...

Page 19: ...Next and then Choose Operation mode page will appear shown in Figure 4 6 Figure 4 6 Choose Operation mode The router supports two mode2 operation modes for multi user to access the Internet AP client router and AP router In AP client router mode it can access the Internet wirelessly by your WISP s support In AP router mode it can access the Internet via ADSL Cable Modem Click Next and then Choose ...

Page 20: ...ure 4 9 Figure 4 9 Quick Setup Static IP Note The IP parameters should have been provided by your ISP IP Address This is the WAN IP address as seen by external users on the Internet including your ISP Enter the IP address into the field Subnet Mask The Subnet Mask is used for the WAN IP address it is usually 255 255 255 0 Default Gateway Enter the gateway IP address into the box if required Primar...

Page 21: ... region where the wireless function of the router can be used It may be illegal to use the wireless function of the router in a region other than one of those specified in this field Channel The current channel in use This field determines which operating frequency will be used Mode Indicates the current mode 54Mbps 802 11g 11Mbps 802 11b If you select 54Mbps 802 11g it is compatible with 11Mbps 8...

Page 22: ...us The Status page displays the router s current status and configuration All information is read only 1 LAN This field displays the current settings or information for the LAN including the MAC address IP address and Subnet Mask 2 Wireless This field displays basic information or status for wireless function including Wireless Radio SSID Channel Mode Wireless MAC address and IP address 3 WAN Thes...

Page 23: ... Status 5 3 Quick Setup Please refer to Section 4 2 Quick Installation Guide 5 4 Operation Mode The router supports two operation modes AP Client Router and AP Router Please select one your want Click Save to save your choice The default mode is AP Client Router Figure 5 2 ...

Page 24: ...ess port acts same as a LAN port while in AP mode The WAN Connection Type can be setup in WAN page by using Dynamic IP Static IP PPPoE 802 1X Dynamic IP 802 1X Static IP Big Pond Cable L2TP PPTP 5 5 Network Figure 5 3 the Network menu There are three submenus under the Network menu shown in Figure 5 3 LAN WAN and MAC Clone Click any of them and you will be able to configure the corresponding funct...

Page 25: ...ven any login parameters fixed IP Address logging ID etc please select Dynsamic IP If you are given a fixed IP static IP please select Static IP If you are given a user name and a password please select the type of your ISP provided PPPoE BigPond L2TP PPTP If you are not sure which connection type you use currently please contact your ISP to obtain the correct information 1 If you choose Dynamic I...

Page 26: ...ge will appear shown in Figure 5 6 Figure 5 6 WAN Static IP You should type the following parameters into the spaces provided IP Address Enter the IP address in dotted decimal notation provided by your ISP Subnet Mask Enter the subnet Mask in dotted decimal notation provided by your ISP usually is 255 255 255 0 Default Gateway Optional Enter the gateway IP address in dotted decimal notation provid...

Page 27: ...tically after the router is disconnected To use this option click the radio button Time based Connecting You can configure the router to make it connect or disconnect based on time Enter the start time in HH MM format for connecting and end time in HH MM format for disconnecting in the Period of Time fields Note Only when you have configured the system time on System Tools Time page will the Time ...

Page 28: ...know that your ISP does not automatically transmit your IP address to the router during login click Use the IP Address specified by ISP check box and enter the IP Address in dotted decimal notation which your ISP provided Detect Online Interval The default value is 0 you can input the value between 0 and 120 The router will detect Access Concentrator online at every interval between seconds If the...

Page 29: ...cation provided by your ISP Password Enter the password for 802 1X authentication provided by your ISP Click Login to start 802 1X authentication Click Logout to end 802 1X authentication Host Name This field is required to be filled by some service provider 5 If you choose 802 1X Static IP you should enter the follow parameters Figure 5 10 ...

Page 30: ...P Click Login to start 802 1X authentication Click Logout to end 802 1X authentication IP Address Enter the IP address in dotted decimal notation provided by your ISP Subnet Mask Enter the subnet Mask in dotted decimal notation provided by your ISP Default Gateway Optional Enter the default gateway IP address in dotted decimal notation provided by your ISP 6 If you choose Big Pond Cable you should...

Page 31: ...ection to remain active at all times enter 0 in the Max Idle Time field Otherwise enter the number of minutes you want to have elapsed before your Internet connection terminates Caution Sometimes the connection cannot be disconnected although you specify a time to Max Idle Time since some applications are visiting the Internet continually in the background Connect Automatically Connect automatical...

Page 32: ...P Choose either as you are given by your ISP Click the Connect button to connect immediately Click the Disconnect button to disconnect immediately Connect on Demand You can configure the router to disconnect from your Internet connection after a specified period of inactivity Max Idle Time If your Internet connection has been terminated due to inactivity Connect on Demand enables the router to aut...

Page 33: ...ion automatically as soon as you attempt to access the Internet again To use this option click the radio button If you want your Internet connection to remain active at all times enter 0 in the Max Idle Time field Otherwise enter the number in minutes that you wish to have the Internet connecting last unless a new link is requested Note Sometimes the connection cannot be disconnected although you ...

Page 34: ...se this option click the radio button Connect Manually You can configure the router to make it connect or disconnect manually After a specified period of inactivity Max Idle Time the router will disconnect from your Internet connection and you will not be able to re establish your connection automatically as soon as you attempt to access the Internet again To use this option click the radio button...

Page 35: ...utton the router will prompt you to reboot 5 6 Wireless Figure 5 15 Wireless menu There are four submenus under the Wireless menu shown in Figure 5 15 Wireless Settings Advanced Settings Site Survey MAC Filtering and Wireless Statistics Click any of them and you will be able to configure the corresponding function The detailed explanations for each submenu are provided below Note The MAC Filtering...

Page 36: ... or disabled If disabled the wireless stations will be able to connect the router without encryption It is strongly recommended that you choose this option to encrypt your wireless network The encryption settings are described below Security Type You can select one of the following authentication types WEP Select WEP authentication type based on 802 11 authentications WPA PSK WPA2 PSK Select WPA W...

Page 37: ...he selected key radio button These values must be identical on all wireless stations in your network Key Type You can select the WEP key length 64 bit or 128 bit or 152 bit for encryption Disabled means the WEP key entry is invalid For 64 bit encryption You can enter 10 hexadecimal digits any combination of 0 9 a f A F zero key is not permitted or 5 ASCII characters For 128 bit encryption You can ...

Page 38: ...adius Server IP Enter the IP address of the Radius Server Radius Port Enter the port number that the radius service used Radius Password Enter the password for the Radius Server If you select AP Router the basic settings for the wireless network are set on this page Figure 5 17 ...

Page 39: ...nction of the router can be used It may be illegal to use the wireless function of the router in a region other than one of those specified in this field If your country or region is not listed please contact your local government agency for assistance The default region is United States When you select your local region from the pull down list Click the Save button then the Note Dialog appears Cl...

Page 40: ...ccess If enabled wireless stations will be able to access the router Otherwise wireless stations will not be able to access Enable SSID Broadcast If you select the Enable SSID Broadcast checkbox the Wireless Router SSID will broadcast its name SSID on the air Enable Bridges If you select the Enable Bridges checkbox you can input MAC address of other APs to communicate with them wirelessly in Bridg...

Page 41: ...gure 5 18 XR The short of eXtended Range If enabled the wireless transmission distance will be longer in the same condition of circumstance Power The transmit power of the access point There are five options for you to select in the pull down list Max 1 2 1 4 1 8 and Min Note The router will reboot automatically after you click the Save button 5 6 3 Site Survey This Page shows the site list of sca...

Page 42: ... router which depend on the station s MAC addresses MAC Address The wireless station s MAC address that you want to access Status The status of this entry either Enabled or Disabled Privilege Select the privileges for this entry You may select one of the following Allow Deny 64 bit 128 bit 152 bit Description A simple description of the wireless station WEP Key Specify a unique WEP key in Hexadeci...

Page 43: ...ple 2F34D20BE2 5 Status Select Enabled or Disabled for this entry on the Status pull down list 6 Click the Save button to save this entry To add additional entries repeat steps 1 6 Note When 64 bit or 128 bit or 152 bit is selected WEP Key will be enabled To modify or delete an existing entry 1 Click the Modify in the entry you want to modify If you want to delete the entry click the Delete 2 Modi...

Page 44: ...d the Return button 6 Click the Add New button and enter the MAC address 00 0A EB 00 07 8A in the MAC Address field enter wireless station C in the Description field select 128 bit in the Privilege pull down list enter 2F34D20BE2E54B326C5476586A in the WEP Key field and select Enabled in the Status pull down list Click the Save and the Return button The filtering rules that configured should be si...

Page 45: ...under the DHCP menu shown in Figure 5 24 DHCP Settings DHCP Clients List and Address Reservation Click any of them and you will be able to configure the corresponding function The detailed explanations for each submenu are provided below 5 7 1 DHCP Settings The router is set up by default as a DHCP Dynamic Host Configuration Protocol server which provides the TCP IP configuration for all the PC s ...

Page 46: ...an IP Address automatically mode This function will take effect until the router reboots 5 7 2 DHCP Clients List This page shows Client Name MAC Address Assigned IP and Lease Time for each DHCP Client attached to the router Figure 5 26 Figure 5 26 DHCP Clients List Index The index of the DHCP Client Client Name The name of the DHCP client MAC Address The MAC address of the DHCP client Assigned IP ...

Page 47: ...cimal notation of the computer you wish to add 3 Click the Save button when finished Figure 5 28 Add or Modify an Address Reservation Entry To modify or delete an existing entry 1 Click the Modify in the entry you want to modify If you want to delete the entry click the Delete 2 Modify the information 3 Click the Save button Click the Enable All button to make all entries enabled Click the Disable...

Page 48: ...rtual servers on this page shown in Figure 5 30 Figure 5 30 Virtual Servers Service Port The numbers of External Ports You can type a service port or a range of service ports the format is XXX YYY XXX is the start port YYY is the end port IP Address The IP Address of the PC providing the service application Protocol The protocol used for this application either TCP UDP or All all protocols support...

Page 49: ... all entries disabled Click the Delete All button to delete all entries Click the Next button to go to the next page and Click the Previous button to return the previous page Note If you set the virtual server of service port as 80 you must set the Web management port on Security Remote Management page to be any value except 80 such as 8080 Or else there will be a conflict to disable the virtual s...

Page 50: ... response using one of these ports will be forwarded to the PC that triggered this rule You can input at most 5 groups of ports or port section Every group of ports must be set apart with For example 2000 2038 2050 2051 2085 3010 3030 Incoming Protocol The protocol used for Incoming Ports Range either TCP or UDP or ALL all protocols supported by the router Status The status of this entry either En...

Page 51: ...g Port Range cannot overlap each other 5 8 3 DMZ The DMZ host feature allows one local host to be exposed to the Internet for a special purpose service such as Internet gaming or videoconferencing DMZ host forwards all the ports at the same time Any PC whose port is being forwarded must have its DHCP client function disabled and should have a new static IP Address assigned to it because its IP Add...

Page 52: ...urrently accessing the router Status Either Enabled or Disabled Enabled means that port is still active Otherwise the port is inactive Click Refresh to update the Current UPnP Settings List 5 9 Security Figure 5 36 The Security menu There are six submenus under the Security menu shown in Figure 5 36 Firewall IP Address Filtering Domain Filtering MAC Filtering Remote Management and Advanced Securit...

Page 53: ...led or disabled You can select the default filtering rules of MAC Address Filtering either Allow or Deny accessing the router 5 9 2 IP Address Filtering The IP address Filtering feature allows you to control the Internet Access by specific users on your LAN based on their IP addresses The IP address filtering is set on this page Figure 5 38 Figure 5 38 IP address Filtering To disable the IP Addres...

Page 54: ...tion format For example 61 145 238 6 61 145 238 47 Keep the field open which means all WAN IP Addresses have been put into the field 5 WAN Port Enter a WAN Port or a range of WAN Ports in the field For example 25 110 Keep the field open which means all WAN Ports have been put into the field 6 Protocol Select which protocol is to be used either TCP UDP or All all protocols supported by the router 7...

Page 55: ... to control access to certain websites on the Internet by specifying their domains or key words Figure 5 40 Domain Filtering Before adding a Domain Filtering entry you must ensure that Enable Firewall and Enable Domain Filtering have been selected on the Firewall page To Add a Domain filtering entry click the Add New button The page Add or Modify a Domain Filtering entry will appear shown in Figur...

Page 56: ...xt page and the Previous button to return to the previous page For example if you want to block the PC s on your LAN to access websites www xxyy com cn www aabbcc com and websites with net in the end on the Internet while no limit for other websites you should specify the following Domain filtering list 5 9 4 MAC Filtering Like the IP Address Filtering page the MAC Address Filtering page shown in ...

Page 57: ...modify If you want to delete the entry click the Delete 2 Modify the information 3 Click the Save button Click the Enable All button to make all entries enabled Click the Disabled All button to make all entries disabled Click the Delete All button to delete all entries Click the Next button to go to the next page and click the Previous button to return to the previous page Fox example If you want ...

Page 58: ...s disabled To enable this function change the default IP Address to another IP Address as desired To access the router you will type your router s WAN IP Address into your browser s Address in IE or Location in Navigator box followed by a colon and the custom port number For example if your Router s WAN address is 202 96 12 8 and you use port number 8080 enter in your browser http 202 96 12 8 8080...

Page 59: ...Packets threshold 5 3600 The default value is 50 Enter a value between 5 3600 packets When the current TCP SYN FLOOD Packets numbers is beyond the set value the router will start up the blocking function immediately Ignore Ping Packet from WAN Port Enable or Disable ignore ping packet from WAN port The default is disabled If enabled the ping packet from the Internet cannot access the router Forbid...

Page 60: ...The Subnet Mask determines which portion of an IP Address is the network portion and which portion is the host portion Default Gateway This is the IP Address of the gateway device that allows for contact between the router and the network or host 3 Select Enabled or Disabled for this entry on the Status pull down list 4 Click the Save button to save it Figure 5 48 Add or Modify a Static Route Entr...

Page 61: ...To set up for DDNS follow these instructions 5 11 1 Dyndns org DDNS If your selected dynamic DNS Service Provider is www dyndns org the page will appear as shown in Figure 5 49 Figure 5 49 Dyndns org DDNS Settings To set up for DDNS follow these instructions 1 Type the domain names your dynamic DNS service provider gave 2 Type the User Name for your DDNS account 3 Type the Password for your DDNS a...

Page 62: ...e the Password for your DDNS account 3 Click the Login button to login the DDNS service Connection Status The status of the DDNS service connection is displayed here Domain Name The domain names are displayed here Click Logout to logout the DDNS service 5 11 3 Comexe cn DDNS If your selected dynamic DNS Service Provider is www comexe cn the page will appear as shown in Figure 5 51 ...

Page 63: ...t 4 Click the Login button to login to the DDNS service Connection Status The status of the DDNS service connection is displayed here Click Logout to logout of the DDNS service 5 12 Port QoS Port QoS helps you to use the network resources more reasonable It allows you to set the bandwidth priority for every LAN port LAN1 4 and wireless communication The port that has the highest priority can get t...

Page 64: ... can t be larger than Upload Bandwidth Download Quantum The minimum download guaranteed bandwidth specified for the corresponding port The unitage is 32kbps The sum of all ports download quantum must not be larger than Download Bandwidth Priority Administer the distribution of surplus bandwidth There are five priorities listed in descending order Highest 1 2 3 and Lowest If there is still surplus ...

Page 65: ...32kbps 4 Because the wireless communication will engross good sized of CPU we strongly recommended that you should choose the lowest priority for wireless to avoid the excessive use of CPU 5 For G 729A VoIP both the recommendatory upload and download guaranteed bandwidth are 8kbps and the workable quantum is 1 For H 264 video both the recommendatory upload and download guaranteed bandwidth are 64k...

Page 66: ...ernet If you re using Daylight saving time please follow the steps below 1 Select using daylight saving time 2 Enter daylight saving beginning time and end time in the right blanks Note 1 This setting will be used for some time based functions such as firewall You must specify your time zone once you login to the router successfully if not the time limited on these functions will not take effect 2...

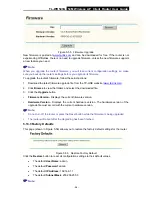
Page 67: ...Browse to view the folders and select the downloaded file 3 Click the Upgrade button Firmware Version Displays the current firmware version Hardware Version Displays the current hardware version The hardware version of the upgrade file must accord with the current hardware version Note 1 Do not turn off the router or press the Reset button while the firmware is being upgraded 2 The router will reb...

Page 68: ... configuration file The restoration process lasts for 20 seconds and the router will restart automatically Keep the router on during the restoring process to prevent any damage 5 13 5 Reboot This page shown in Figure 5 58 allows you to reboot the router Figure 5 58 Reboot the router Click the Reboot button to reboot the router Some settings of the router will take effect only after rebooting which...

Page 69: ...ces Enter the new Password twice to confirm it Click the Save button when finished Click the Clear All button to clear all 5 13 7 Log This page shown in Figure 5 60 allows you to query the logs of the router Figure 5 60 System Log The router can keep logs of all traffic You can query the logs to find what happened to the router Click the Refresh button to refresh the logs Click the Clear Log butto...

Page 70: ...ransmitted by the router Total Bytes The total amount of bytes received and transmitted by the router Packets The total amount of packets received and transmitted in the last Packets Statistic interval seconds Bytes The total amount of bytes received and transmitted in the last Packets Statistic interval seconds ICMP Tx The total amount of the ICMP packets transmitted to WAN in the last Packets St...

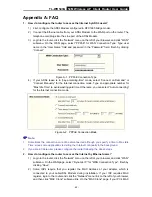
Page 71: ... for Max Idle Time to avoid wasting paid time Otherwise you can select Auto connecting for the Internet connection mode Figure A 2 PPPoE Connection Mode Note 1 Sometimes the connection cannot be disconnected although you specify a time to Max Idle Time since some applications is visiting the Internet continually in the background 2 If you are a Cable user please configure the router following the ...

Page 72: ...e Virtual Server Login to the router click the Forwarding menu on the left of your browser and click Virtual Servers submenu On the Virtual Server page click Add New then on the Add or Modify a Virtual Server page enter 1720 into the blank behind the Service Port and your IP address behind the IP Address assuming 192 168 1 169 for an example remember to Enable and Save Figure A 4 Virtual Servers A...

Page 73: ...except 80 such as 88 into the Web Management Port field Click Save and reboot the router Figure A 7 Remote Management Note If the above configuration takes effect to configure to the router by typing http 192 168 1 1 88 the router s LAN IP address Web Management Port in the address field of the Web browser 3 Login to the router click the Forwarding menu on the left of your browser and click the Vi...

Page 74: ...router 1 Make sure the Wireless Router Radio is enabled 2 Make sure that the wireless stations SSID accord with the router s SSID 3 Make sure the wireless stations have the right KEY for encryption when the router is encrypted 4 If the wireless connection is ready but you can t access the router check the IP Address of your wireless stations ...

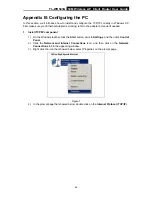
Page 75: ...e adapter s manual if needed 1 Install TCP IP component 1 On the Windows taskbar click the Start button point to Settings and then click Control Panel 2 Click the Network and Internet Connections icon and then click on the Network Connections tab in the appearing window 3 Right click the icon that showed below select Properties on the prompt page Figure 1 4 In the prompt page that showed below dou...

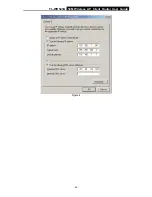
Page 76: ...operties window will display and the IP Address tab is open on this window by default Now you have two ways to configure the TCP IP protocol below Setting IP address automatically Select Obtain an IP address automatically Choose Obtain DNS server automatically as shown in the Figure below ...

Page 77: ...router s LAN IP address is 192 168 1 1 type IP address is 192 168 1 x x is from 2 to 254 and Subnet mask is 255 255 255 0 3 Type the router s LAN IP address the default IP is 192 168 1 1 into the Default gateway field 4 Select Use the following DNS server addresses radio button In the Preferred DNS Server field you can type the DNS server IP address which has been provided by your ISP ...

Page 78: ...TL WR543G 54M Wireless AP Client Router User Guide 69 Figure 4 ...

Page 79: ...uto Negotiation LAN RJ45 ports supporting Auto MDI MDIX Cabling Type 10BASE T UTP category 3 4 5 cable maximum 100m EIA TIA 568 100Ω STP maximum 100m 100BASE TX UTP category 5 5e cable maximum 100m EIA TIA 568 100Ω STP maximum 100m Radio Data Rate 54 48 36 24 18 12 9 6Mbps or 11 5 5 3 2 1Mbps LEDs Power SYS WLAN WAN 1 4 Safety Emissions FCC CE Environmental and Physical Operating Temp 0 40 32 104 ...

Page 80: ...l host to be exposed to the Internet for a special purpose service such as Internet gaming or videoconferencing DNS Domain Name System An Internet Service that translates the names of websites into IP addresses Domain Name A descriptive name for an address or group of addresses on the Internet DoS Denial of Service A hacker attack designed to prevent your computer or network from operating or comm...

Page 81: ...TL WR543G 54M Wireless AP Client Router User Guide 72 communicate with each other wirelessly which network serving users are limited in a local area http www tp link com ...

Reviews: