


– 100 –
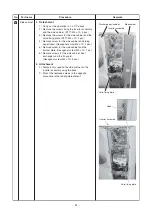
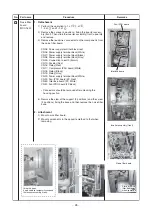
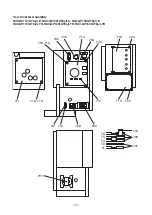
Concave part
PMV main
u
nit
Po
s
itioning projection
PMV coil
Bell mo
u
th
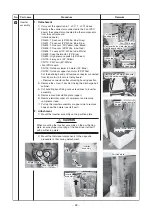
Di
s
charge
port ca
b
inet
Fan g
u
ard
PT2P M3
14 and wa
s
her
Hooking claw
Straight line of
b
ell mo
u
th
No.
11
12
Part name
PMV coil
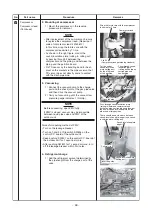
Fan g
u
ard
Procedure
1. Detachment
1) Carry o
u
t work of item 1 of
.
2) T
u
rn the coil while p
u
lling
u
pward and then
remove the coil from the PMV main
u
nit.
2. Attachment
1) S
u
rely match the po
s
itioning projection of
the coil with the concave part of PMV main
u
nit and then fix it.
1. Detachment
1) Carry o
u
t work
s
of item 1 of
and 1 of
.
REQUIREMENT
To prevent
s
cratch on the prod
u
ct, carry o
u
t
the work on card
b
oard, cloth, etc.
2) Remove the di
s
charge port ca
b
inet and then
p
u
t on it
s
o that the fan g
u
ard
s
ide direct
s
downward.
3) Remove the
s
crew for the
b
ell mo
u
th and
fan g
u
ard.
(PT2P M3 × 14 and wa
s
her, 4 pc
s
.)
4) Remove the hooking claw
s
(8 po
s
ition
s
) of
the fan g
u
ard.
2. Attachment
1) P
us
h the hooking claw
s
(8 po
s
ition
s
) with
hand
s
from the front
s
ide to fix the claw
s
.
2) Attach the
b
ell mo
u
th fixed with
s
crew
s
and
wa
s
her
s
.
(PT2P M3 × 14 and wa
s
her, 4 pc
s
.)
REQUIREMENT
Check that all the hooking claw
s
are fixed at
the
s
pecified po
s
ition
s
.
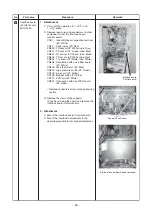
Remarks


