59
Clear
Selection
– This option clears the current Motion Region Box from the Keyframe Image.
Start
Search
– This option Begins the search.
Motion
Region
Box
– The Motion Region Box is the user defined area of the Keyframe image. You create the
Motion Region Box by clicking inside the image and dragging the mouse. The Motion Region Box can be
resized by pulling on the little square boxes located on the outer perimeter of the Box.
Start
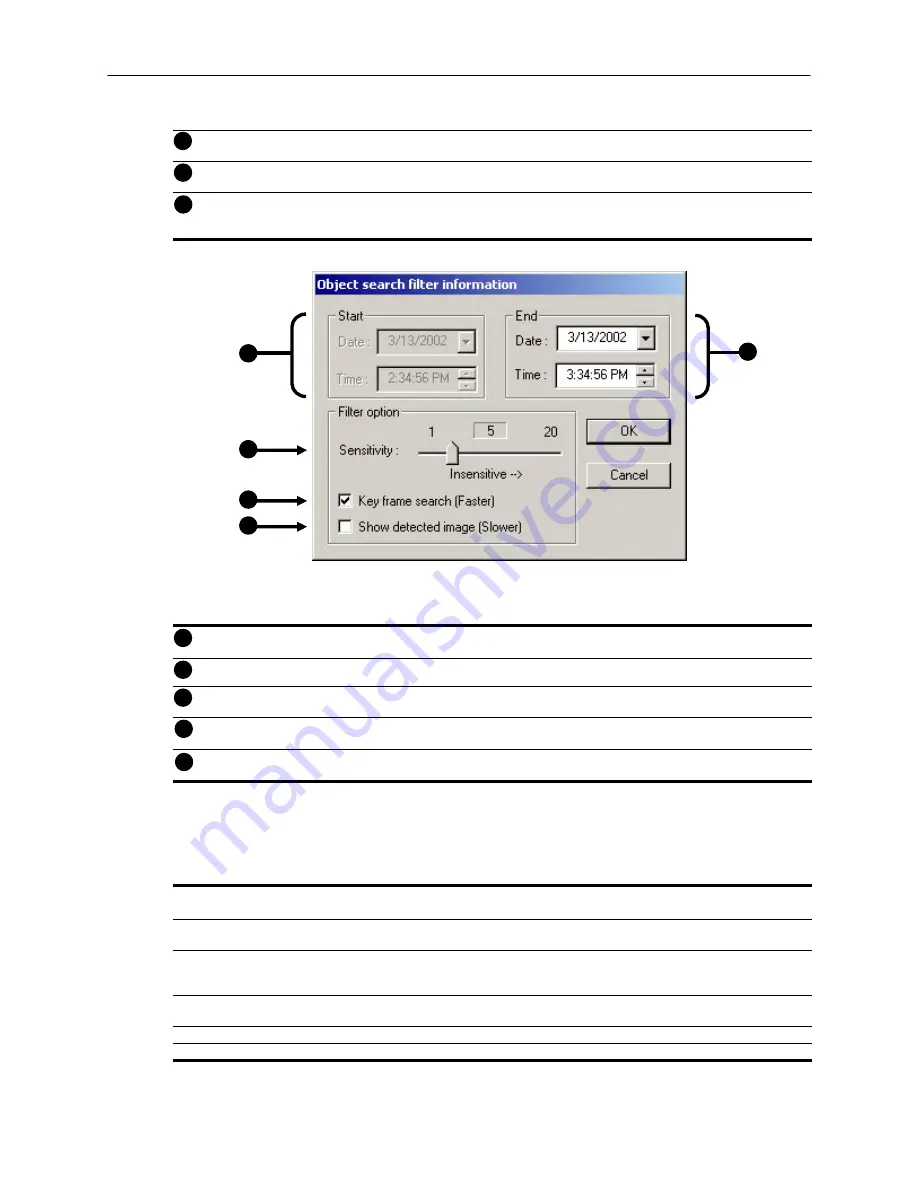
– This displays the time and date of the initial Key Frame.
Sensitivity
– The Sensitivity option allows you to control sensitivity of the motion that will be detected. Often
times poor lighting conditions can be interpreted as motion. The sensitivity can compensate for this.
Key Frame Search
– Selecting the Cancel button exits the Object Search.
Show
Detected
Image
– This option, when selected, displays the results as it finds them. Using this option
slows the search process slightly and therefore may not be ideal when searching large periods of time.
End
– This option allows you designate an end time. The default is one hour.
Performing an Object Search
1) Begin by selecting a single camera. You can do this either by turning off all cameras but one, or by double clicking
a displayed image (it will then be the only image displayed on the screen)
2) Select the Object Search Button.
The Object Search window will open.
3) Create a Motion Region Box on the image. Do this by clicking inside the image and, while holding the left mouse
button down, drag the pointer. When the desired shape is created, simply let go of the mouse-button. Only One
Motion Region Box can be created. To delete the Motion Region Box press the Clear Selection button.
4) Press the Start Search button.
The Object Filter Search Information window should open.
5) Select an end time. One hour is the default setting.
6) Adjust the Sensitivity if necessary.
8
9
1
2
3
4
Figure 5.10b
1
2
3
4
Figure 5.10b
5
5
10


