11
© February 2007 TOSHIBA TEC CORPORATION All rights reserved
e-STUDIO166/206
DRUM RELATED SECTION
11 - 15
[J]
Drum separation finger
[K] Recovery blade
(1)
Take off the drum.
"
P.11-14 "[H] Drum"
(2)
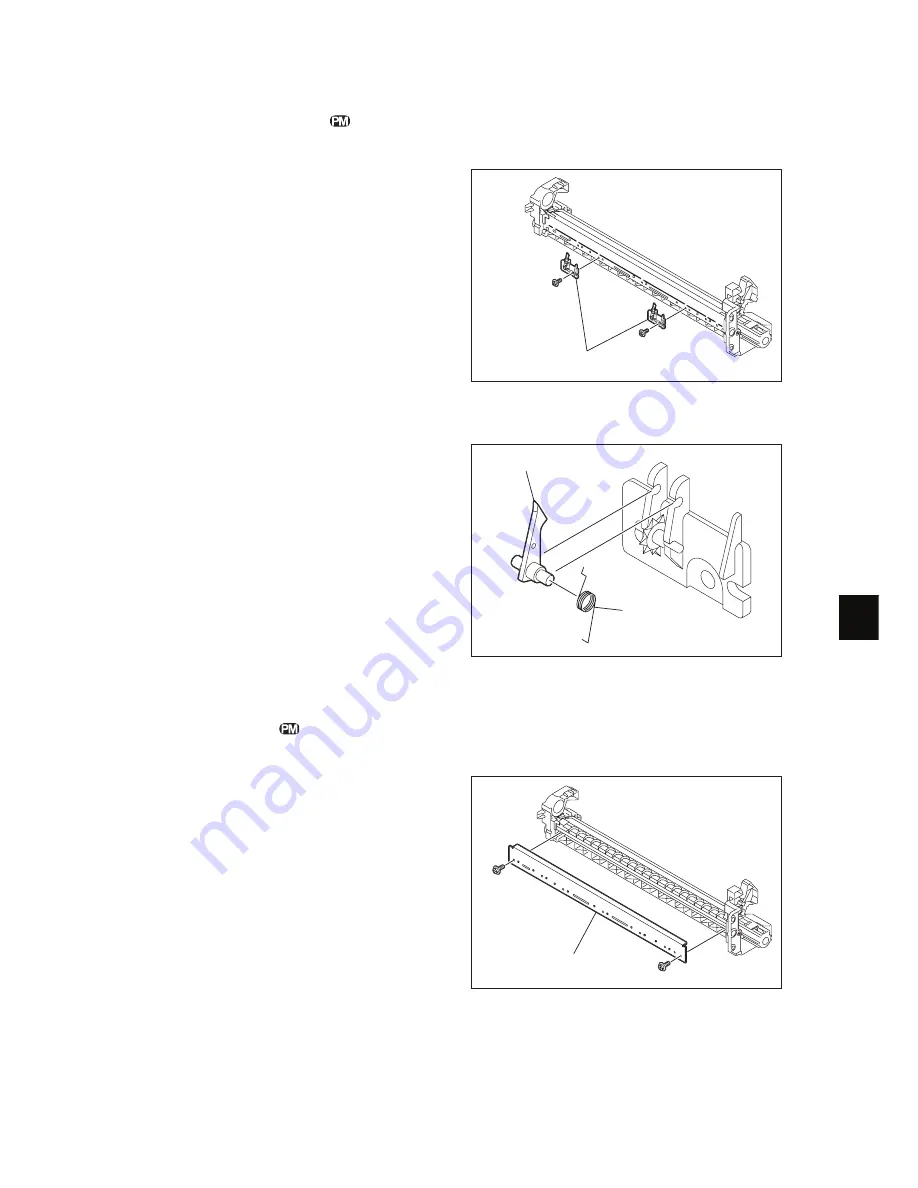
Take off 2 drum separation finger units by
removing 1 screw each.
Note:
When replacing the drum separation fingers,
make sure that the drum has been taken off
first since the fingers may scratch the drum
surface.
Fig. 11-22
(3)
Take off the drum separation finger with the
spring.
Note:
When the drum separation fingers have been
replaced, check if the pressure movement is
normal by moving them with your hands.
Fig. 11-23
(1)
Take off 2 drum separation finger units.
"
P.11-15 "[J] Drum separation finger"
(2)
Remove 2 screws, and take off the whole
recovery blade with the bracket.
Fig. 11-24
Drum separation finger unit
Drum separation finger
Spring
Recovery blade
Summary of Contents for e-STUDIO 206
Page 6: ......
Page 10: ...e STUDIO166 206 February 2007 TOSHIBA TEC CORPORATION All rights reserved CONTENTS 4 ...
Page 68: ...e STUDIO166 206 February 2007 TOSHIBA TEC CORPORATION All rights reserved COPY PROCESS 3 14 ...
Page 88: ...e STUDIO166 206 February 2007 TOSHIBA TEC CORPORATION All rights reserved CONTROL PANEL 5 8 ...
Page 132: ...e STUDIO166 206 February 2007 TOSHIBA TEC CORPORATION All rights reserved DRIVE UNIT 9 10 ...
Page 236: ...e STUDIO166 206 February 2007 TOSHIBA TEC CORPORATION All rights reserved PC BOARDS 15 4 ...
Page 237: ......
Page 238: ......


