16
Live TV
PVR
The PVR function allows you to easily record digital television content
for later viewing. The function is only available for digital channels. To
use PVR, you must connect a storage device for recording. The format
of the storage disk should be NTFS, FAT32. The PVR will not function if a
data storage device has not been connected.
Schedule Recording
In Live TV, press
> PVR.
Alternatively, press
/
to load the info bar, and select a
programme and choose PVR.
If your remote has
button, press it and use D-pad to select
to
set up PVR.
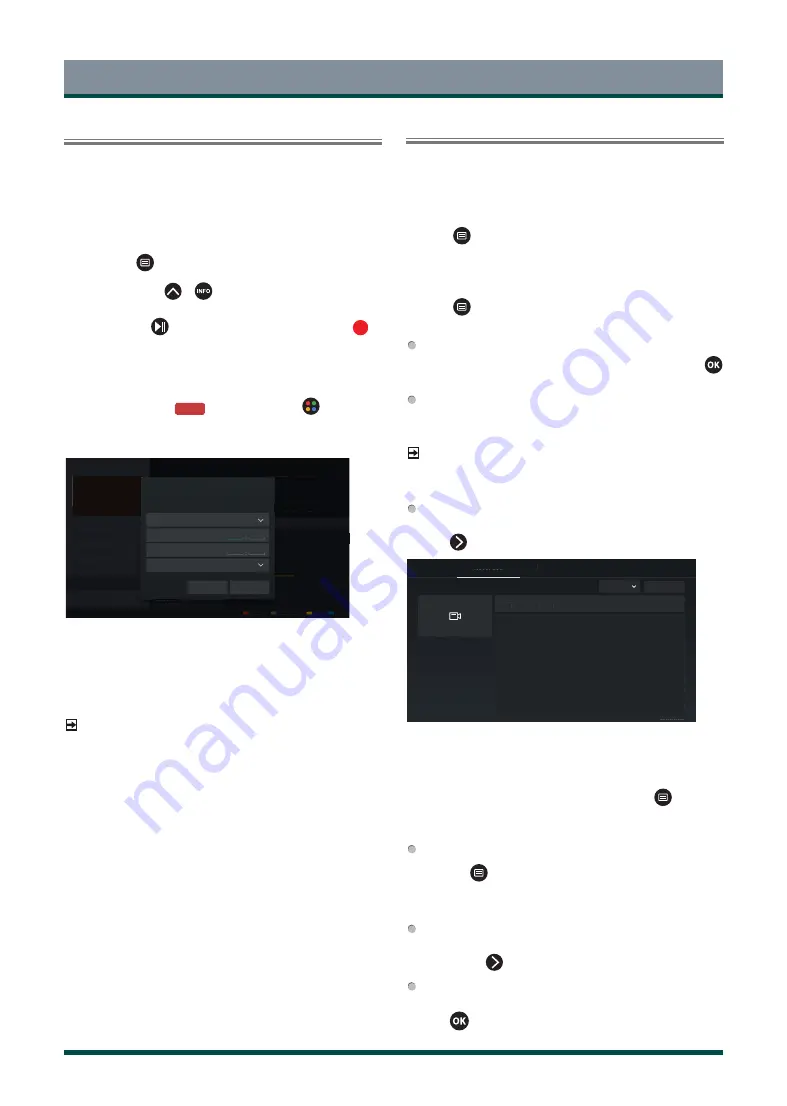
You can select recording mode from time, manual stop and program.
When you select time, you can set the appointment time and period.
In Guide (EPG), press the
[RED] button or press
button to call
out the colour menu and select RED, to view the scheduled recording.
In schedule recording list, you can readjust the reservation information
that has been set.
BASKETBALL
53 CH5
Guide
Cable
101 Channel 4
26 Mar. 23:10-00:30
Schedule recording
Recording mode
Start time
End time
Repeat
Once
Time
23
10
00
30
Cancel
Save
Schedule
Programme colour
24h-
24h+
Standby Recording
If you press the power button during recording and select Standby
Recording, your TV will go into standby mode but the recording process
is still going on. If you press power button again to wake up the TV, the
recording process will not be affected. After recording, the recorded file
will be automatically saved to the disk.
NOTE
·
The storage space of your device should be no less than 2G (for 15
minutes high definition video). It is strongly recommended to use USB
mobile hard disk drive instead of USB flash drive as the storage device.
·
If the transfer rate of your hard disk is too slow, a pop-up notice will
appear. In this case, you can use another disk with higher speed.
·
The PVR function doesn’t support analogue channels.
·
Some broadcasters may restrict to record the programme.
·
During the recording progress, channels locked with Channel Lock
(password needed) are disabled to watch.
·
Some channel-related configuration may conflict with background
recording. In this case, a reminding window will pop up.
·
The PVR function may not be applicable in certain models/
countries/regions.
Recording List
Accessing the recording list
View the list of recorded programmes and scheduled list.
To enter the recording list:
In Live TV,
> Recording List
Managing the recording list
In Live TV,
> Recording List > Recorded
You can watch, sort or delete recorded programmes.
Watch recorded programme
Select a recorded programme in the recording list, and press
button to watch it.
Sort recorded programme
Select All, and you can choose from the list to sort the recorded
programme.
NOTE
·
This function may not be applicable in some models/countries/
regions.
Delete recorded programme
Select Edit, select a recorded programme in the recording list, and
press
button to delete it.
All
26.6GB/500GB
(Disk for Recording)
(All Disk)
BASKETBALL
53 CH5
Recorded
Scheduled
Recorded
Edit
11:10 2016/10/12
120 min
1.24GB
If you connect more than one storage devices to the TV, Recorded
(Disk for Recording) and Recorded (All Disk) are available on-
screen to select.
In Recorded (Disk for Recording), you can watch recorded
programme of the storage device that is selected at
> Settings
> System > Advanced Settings > PVR & Time Shift > PVR Setup/
Time Shift Setup.
Managing the schedule list
In Live TV,
> Recording List > Scheduled
You can change scheduled recording information and reminder
information, or cancel scheduled recordings or reminders.
Delete scheduled recording or reminder
Select Edit, select a scheduled recording or reminder in the schedule
list, and press
button to delete it.
Edit scheduled recording or reminder
Select scheduled recording or reminder in the schedule list, and
press
button to adjust it.
Summary of Contents for 43C350KE
Page 1: ...Bar code ...


