
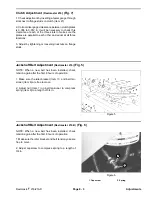

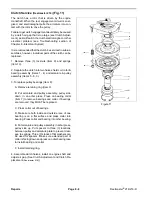


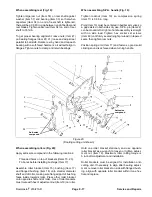


Set Up and Adjustments
Adjustment Summary and Check List
DETAILED ADJUSTMENT INSTRUCTIONS FOLLOW
THIS SUMMARY AND CHECK LIST
. Study this informa
tion and refer to it often to get maximum life and per
formance from the cutting units.
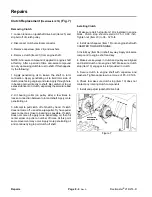
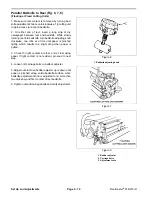
Daily Performance Checks
NOTE: It is not necessary to remove the cutting units
from the traction unit to perform these daily checks. It is
recommended that mowers be washed after each use.
Always remove key from ignition switch when working
on the machine.
1. Purge all water and debris from all of the bearings by
greasing them. Use No. 2 multi-purpose lithium base
grease.
2. Visually check for sharp reel and bedknife.
•
Remove burrs, nicks, and rounded edges.
3. Lower cutting units to ground (setting on rollers) and
remove belt tension. Rotate the reel by hand. TURN
ADJUSTING KNOB ONE (1) CLICK AT A TIME UNTIL
FIRST CONTACT BETWEEN REEL AND BEDKNIFE IS
FELT AND HEARD THEN TIGHTEN ONE (1) MORE
CLICK TO GET LIGHT CONTACT
*.
•
No contact will dull the cutting edges.
•
Excessive contact accelerates wear; quality of cut
may be adversely affected.
* It is best to make the reel to bedknife adjustment
in the morning, immediately before each day of
mowing.
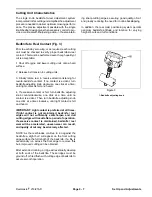
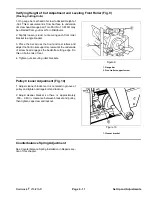
Weekly Checks
1. Check reel bearing condition — rotate reel by hand
with no bedknife to reel contact.
2. Make sure bedknife adjustment knob/pivot assembly
is held FIRMLY in place between bedbar yoke.
3. Using a gauge bar, verify correct height of cut setting.
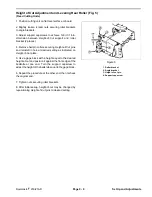
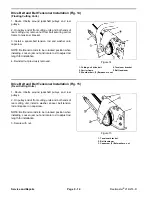
Monthly Adjustments
NOTE: Remove cutting unit from traction unit.
1. Visually check for sharp reel and bedknife. Backlap
or grind reel and bedknife if necessary.
2. Set height of cut adjustment and level rear roller.
3. Adjust bedknife parallel to reel.
5. Floating cutting units only – use gauge bar to verify
height of cut adjustment and adjust front roller.
6. Adjust roller scraper (if equipped) to 1/32 in. from
roller.
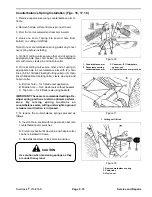
* Check to make sure both front and rear rollers con
tact the ground for their entire length and that the
bedknife cutting edge is parallel with the ground. Do
adjustments again if necessary.
7. Set comb (if equipped) for desired action on turf.
8. After installing cutting units on machine, lower cutting
units to ground and adjust reel to bedknife contact (see
Step 3 under Daily Performance Checks).
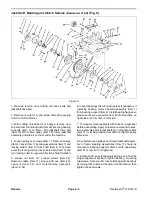
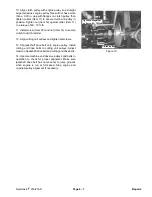
Special Notes
1. Replace the bedbar bushings and nylon flange bush
ings every two years.
2. A “rifled” reel and/or bedknife must be corrected by
grinding.
3. After extended running, a ridge will eventually de
velop at both ends of the bedknife. These ridges must
be ground off or filed flush with cutting edge of bedknife
to assure smooth operation.
4. Adjust large jam nut on reel shaft to get 0.060 in.
clearance from reel blades to end of bedbar when
capscrew on end of reel shaft is tightened. Tighten
capscrew on end of reel shaft to 35 ft-lb.
5. To get proper bearing alignment, leave nuts on bear
ing flanges loose and adjust reel parallel to bedknife.
Rotate reel by hand and tap end of reel shaft with a soft
face hammer so self-aligning reel bearings can find the
proper alignment position. Tighten nuts to clamp and
retain bearings.
Set Up and Adjustments
Page 9 - 6
Reelmaster
®
216/216-D
Summary of Contents for reelmaster 216
Page 2: ...This page is blank ...
Page 4: ...This page is blank ...
Page 8: ...Safety Instructions Page 1 4 Reelmaster 216 216 D ...
Page 12: ...Torque Specifications Page 2 4 Rev B Reelmaster 216 216 D ...
Page 26: ...Adjustments Page 4 4 Reelmaster 216 216 D ...
Page 40: ...Troubleshooting Page 5 14 Reelmaster 216 216 D ...
Page 42: ...Troubleshooting Page 5 16 Reelmaster 216 216 D ...
Page 72: ...Repairs Page 5 46 Reelmaster 216 216 D ...
Page 75: ...Reelmaster 216 S N 10001 19999 Reelmaster 216 216 D Page 6 3 Wiring Schematics ...
Page 76: ...Reelmaster 216 S N 20001 Up Wiring Schematics Page 6 4 Reelmaster 216 216 D ...
Page 77: ...Reelmaster 216 D Reelmaster 216 216 D Page 6 5 Wiring Schematics ...
Page 114: ...Repairs Page 7 8 Reelmaster 216 216 D ...
Page 124: ...Repairs Page 8 10 Reelmaster 216 216 D ...
Page 143: ...This page is blank ...


